
Some of these tips will cross over to setting up a hydraulic caliper as well. (I even will show one today) So, if you have flat mount or post mount calipers that are hydraulic, or semi-hydraulic, this could be for you as well.
One other thing that bears mentioning before we dig in. The cable housing and levers you use will influence how your mechanical disc brake will feel and perform to a great degree. Pay attention to those things and you will reap the benefits. I am not going to cover any of that in this post. Finally, poorly maintained cables and housings will adversely affect mechanical disc brake performance, so that is also something to be aware of going forward.
The Goal: The main goal here is to align the caliper to the rotor so that the pads are parallel to the rotor and hit the rotor without deflecting it. Perfect alignment may not be possible depending upon mounting points for the caliper not being properly aligned, poorly designed calipers that won't hold the pads correctly, or lack of facing the mounting points on a heavily painted frame, or when those points are slightly off. See a professional mechanic if any of these issues are preventing you from getting really close to a perfect caliper alignment.

Tip #1:
The basic alignment technique is to use the adjustment for the pads or to tie down the lever to activate the brake with a toe strap or a rubber band after you loosen up the calipers. This will align the pads with the rotors.
If you use adjusters to move the pads against the rotor, (the main way to align an Avid BB-7, for instance), make sure that you use the adjusters evenly and that the caliper is as centered over the rotor as possible.
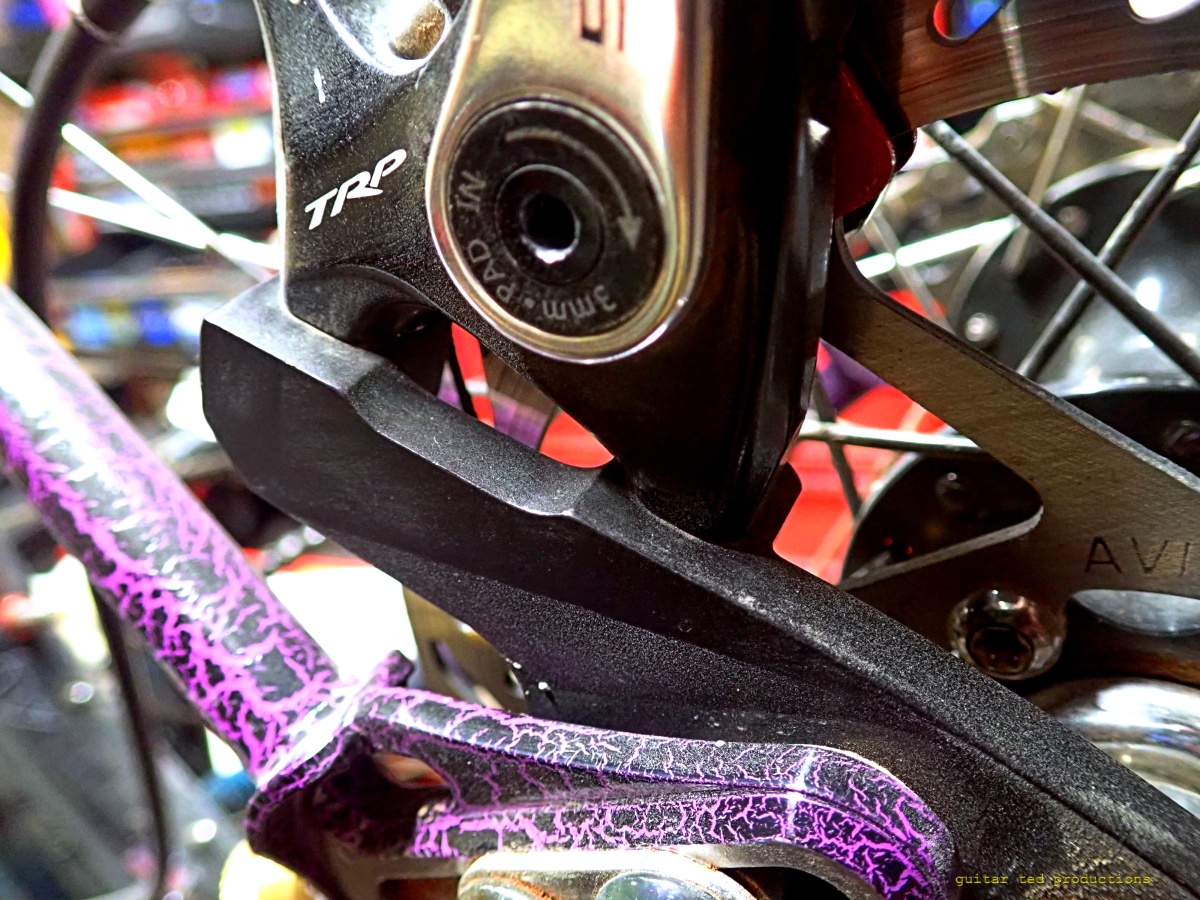
Post mount calipers are easier to loosen because of how the fastener bolts face upward toward you, Flat mount calipers can be a real chore since many rear mounts pierce the chain stay and the bolt heads face downward. Some fork flat mount bolts are hard to access while others , as with my image above, pierce the fork. Get to know what you are dealing with, what wrench you require, and dial up your patience before attempting this!

Tip #2:
The image tells you all, but to reiterate, reefing one bolt down before the other on the caliper mount is a sure-fire way to twist the caliper out of alignment with the rotor. Once you release pressure that you applied either by using the levers or pad adjusters, the caliper will be out of alignment or rubbing the rotor on one side.
The winning technique here is to gently apply torque alternately to each bolt. Maybe only turning the bolt head a few degrees at a time. First one - then the other, rinse and repeat until the caliper is firmly fixed to the frame or fork.
In some rare cases I have had to apply a drop of chain lube under a bolt head for a caliper to prevent it from torquing my caliper off-axis. But generally speaking, using a gentle and alternating application of torque will yield the best results.

Tip #3 For Avid Brakes or any Caliper That Uses Concave/Convex Washers:
A few things to know here about Avid calipers that use those pesky concave/convex washers. They are generally made from aluminum, and since they are of a softer metal, the effect of tightening them down against one another will make them take a set. What that means is that - even if you loosen the bolts, those washers may stick together, or go back to their original positions when re-tightened.
To prevent this from happening, you should always make sure those washers are loosened from each other and rotated so that they won't just go right back where they were, preventing you from getting a good adjustment.
This is important since Avid calipers, and some others that adopted this design, not only adjust side-to-side, but also adjust for vertical plane, This makes Avid calipers a bit more fussy, but if you follow this tip regarding the washers, you should have better chances for success,
Finally, those washers can corrode and will eventually fail. Always inspect these washers for signs of corrosion or breakdown and replace them if you have any questions about them. You can get replacement washers from SRAM or in a pinch, you can use the concave/convex washers from a set of linear pull brakes.
Okay, I hope those tips and tricks are useful. Let me know in the comments if you have any tricks or tips of your own. If you have any questions that you'd like me to answer in a post like this, just let me know there in the comments as well.
Thanks for this post. I didn’t realize those cone washers could take a set (deform together and lock, for those unfamiliar with that terminology). I still have a few post mount frames so I’ll keep that in mind.
ReplyDeleteAny particular tips for bleeding hydraulic brakes? I’m sure a similar post on that would be appreciated, though maybe it’s too dependent on brake model.
Thank you very Guitar Ted! I am happy because I already follow most of you advices, and because I have learn some new points to be care of. Excelente!
ReplyDeleteJust ride & enjoy!
Thank you again.
@Pedro - You are most welcome! Thank you for the great suggestion for the post.
ReplyDeleteWhen dealing with disc calipers with a stationary pad (always the inboard pad in my experience... bb5/7 and most inexpensive cable disc units), optimal set-up is to have the rotor offset outboard in the caliper with the static pad adjusted to allow the rotor to just pass without rubbing. This position permits the moving pad to minimally push the rotor against the non-moving pad. Since the rotor position is biased inboard, the non-moving pad can wear for longer without the rotor hitting the caliper and the moving pad can be adjusted via cable and or external adjuster.
ReplyDelete-notoriusjwb