Tuesday, March 14, 2023

Singular Cycles Mk3 Build: Update 4

I had to await the arrival of this part to complete the build.
Waiting. It isn't very fun, but when you get to be my age, you'd better have it figured out as far as how to do that. A day and then I'd have my part. Swap out the DT Swiss XD driver for the HG cassette driver and boom! Done! 

DT Swiss star ratchet hubs are actually pretty easy to work on. So I figured this deal was a slam dunk. But you know, this entire build has been fraught with hurdles I had to clear, and the free hub swap turned out to be no different in that area. 

I started working on the wheel, first removing the SRAM 10-42T cassette, and then I popped the end cap off the axle, which went a lot smoother than I was expecting it to be. Okay, pull that freehub body off now and..... Ah.... Where is the other star ratchet? There is supposed to be two, right? 

Well, one was stuck on the freehub body. Oh! There you are! As I discovered this, the spring, which resides behind the star ratchet, overcame the stickiness of the grease and .....Whee! Off it went with the star ratchet falling to the floor and the spring? Who knew? 

Great! 

Well, I took a break to calm down and when I was settled down enough to think I went back and decided that the spring couldn't have gone far. I started looking high, and moved down. It only took a few minutes and I saw it under a tool box all covered in dust and spider webs. 

Whew! 

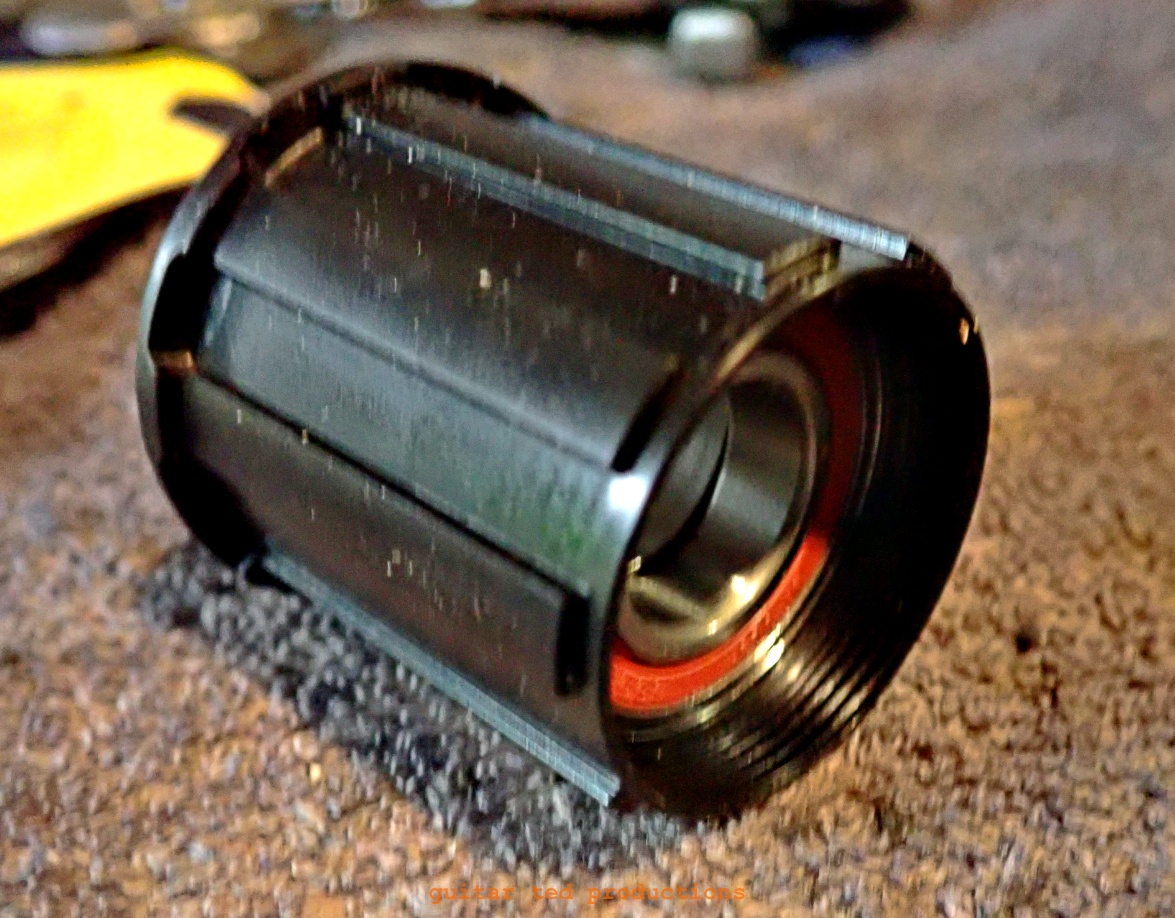
One of the two "star" ratchet rings from the DT Swiss 350 hub.
Once the HG freehub body was swapped I could mount this slightly used 9spd cassette and the new chain.

Since I had the hub all apart and it was looking pretty black in there, I decided to clean it and re grease it. That went smoothly and once I had it all popped back together I mounted the 9 speed cassette and then I put on an e-bike rated 9 speed chain. I used that because it was the longest choice of the ones down at Waterloo Bicycle Works. The Gryphon is a longer bike and I wasn't sure 116 links, which standard chains come in for length, was going to be enough. 
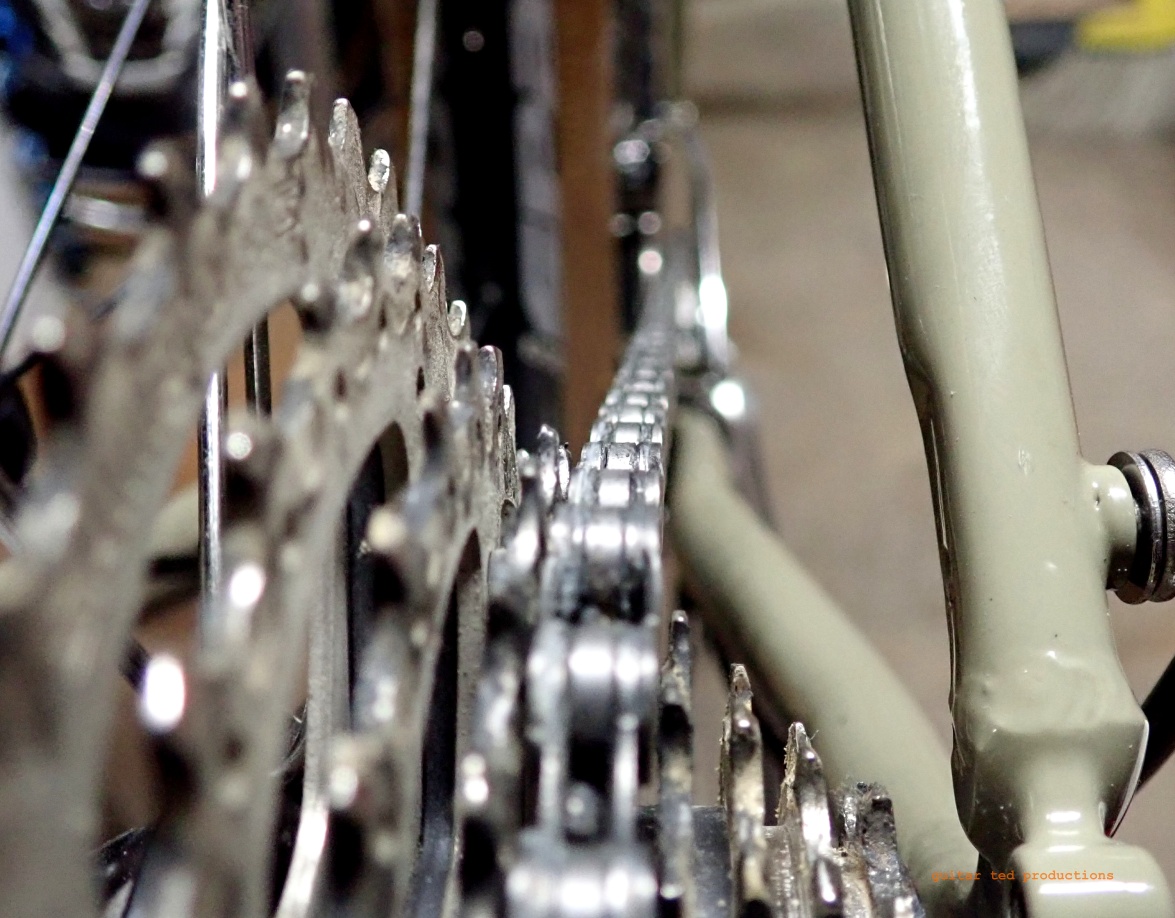
Checking the chain line. Perfect!

The chain was stripped and lubed with the SILCA Super-Secret lube I've been using for a while now. Then after carefully cleaning it all up, I checked the shifting and amazingly I maybe turned two screws a total of a half turn. That was crazy! 
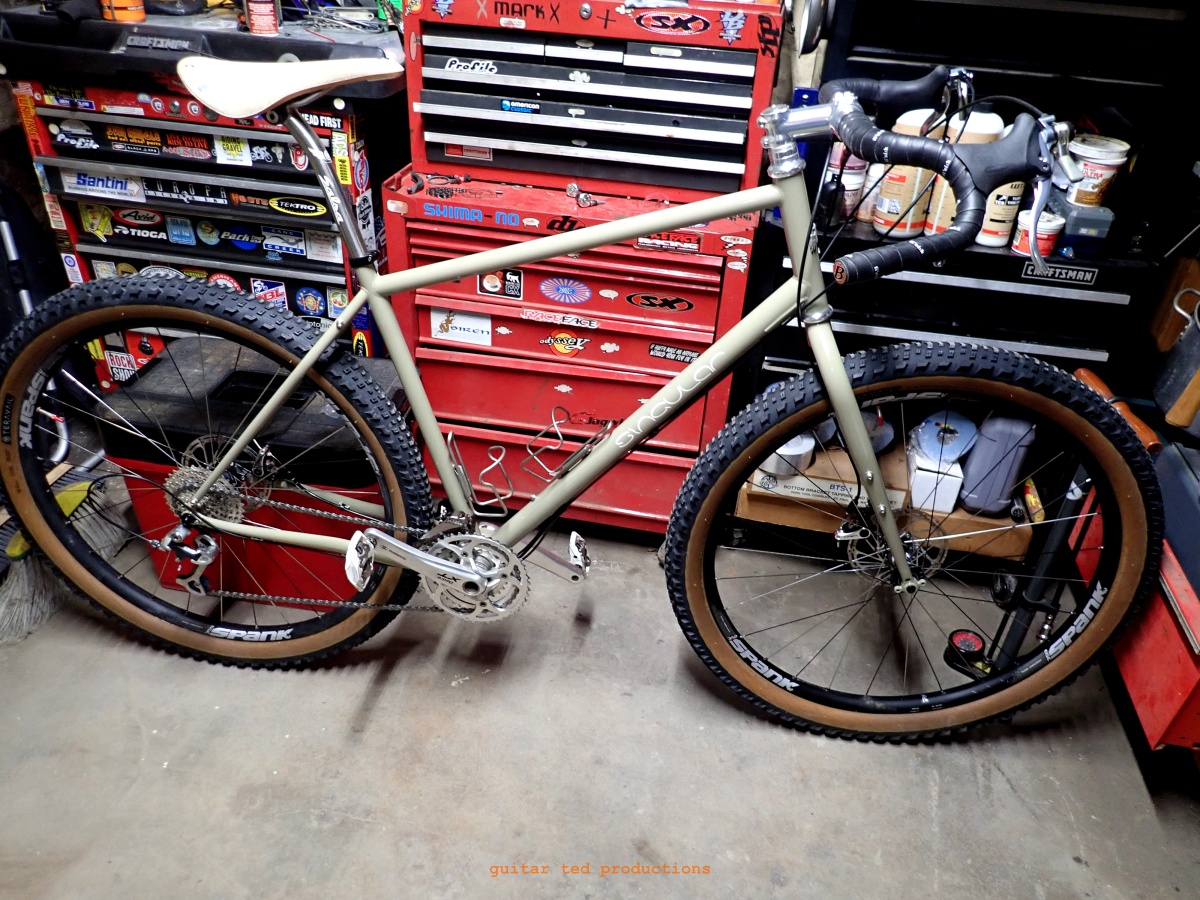
Taking a moment to admire the new rig.

After some admiring in the basement when I finished up all I had to do was get in a test ride. That would not happen until the next day due to it being night and the fact that we had just gotten a bunch of snow the day I finished the build. 

The first test ride went as well as I could have expected it to.

Ride Impressions: 

This is a BIG bike! Big in that it seems longer and a bit taller than anything else I have. I do have the saddle forward in the seat post clamp quite a ways and I might have to look for a bit shorter stem. Maybe a 10mm shorter one. Otherwise the fit is fine. I did note that I have less seat post extended above the top tube than I do on my Fargo, for instance. 

While this bike did not come in at what anyone would say is "light", I think it has to be pointed out that each tire weighs about a thousand grams and these wheels are not in the lightweight category either. It's a 'monster truck' compared to my other gravel rigs, but that's okay. It isn't doing anything that those bikes do, it does something completely different. But I'll get into all that in another post someday.

Back to the ride- It is a springy frame. I noted that while traversing some potholes in a back alley near my home. So, it will absorb some bigger hits well, I think. With all of this snow and ice, I wasn't able to push very hard. So, cornering, braking, and anything aggressive in terms of handling was not tested. 

All I do know now is that it shifts well, nothing fell apart, and those big tires are grippy! One of my purposes for this bike was to be able to handle mildly difficult snow conditions, which is exactly what we had the morning of my test ride. This bike traversed three to for inches of snow with no issues and showed some grip on some sketchy icy compacted snow, so I think it is a winner there. By the way, I was using right at 20psi set indoors, so something likely just below 20psi outside. 

Of course, I'll have to do a little "new bike" fine tuning. The front derailleur cable needs adjustment already, but that's no surprise. But really, this all came together far more easily and far better than I could have hoped. That all despite the hurdles along the way. 

More on the bike as I get longer rides on it, but as for this build, it is over. It is a success. 

Thanks: I wanted to give a shout out to some people who contributed to this build by sending me some of the parts I used on the bike. Some gave these parts a long time ago, some more recently. In no particular order: Brant Richards, Craig Severson, Jason Boucher, and Steve Fuller. Thanks also to Sam Alison of Singular Cycles for his bringing back the Gryphon in a new and improved state, and for his stellar customer service. Thanks to Mike Curiak/Lacemine29.com for selling me these Teravail Coronado tires. 

Thanks to you, dear readers, for reading this series on my Singular Cycles Gryphon Mk3 build.

Singular Cycles Mk3 Build: Update 4

I had to await the arrival of this part to complete the build.
Waiting. It isn't very fun, but when you get to be my age, you'd better have it figured out as far as how to do that. A day and then I'd have my part. Swap out the DT Swiss XD driver for the HG cassette driver and boom! Done! 

DT Swiss star ratchet hubs are actually pretty easy to work on. So I figured this deal was a slam dunk. But you know, this entire build has been fraught with hurdles I had to clear, and the free hub swap turned out to be no different in that area. 

I started working on the wheel, first removing the SRAM 10-42T cassette, and then I popped the end cap off the axle, which went a lot smoother than I was expecting it to be. Okay, pull that freehub body off now and..... Ah.... Where is the other star ratchet? There is supposed to be two, right? 

Well, one was stuck on the freehub body. Oh! There you are! As I discovered this, the spring, which resides behind the star ratchet, overcame the stickiness of the grease and .....Whee! Off it went with the star ratchet falling to the floor and the spring? Who knew? 

Great! 

Well, I took a break to calm down and when I was settled down enough to think I went back and decided that the spring couldn't have gone far. I started looking high, and moved down. It only took a few minutes and I saw it under a tool box all covered in dust and spider webs. 

Whew! 

One of the two "star" ratchet rings from the DT Swiss 350 hub.
Once the HG freehub body was swapped I could mount this slightly used 9spd cassette and the new chain.

Since I had the hub all apart and it was looking pretty black in there, I decided to clean it and re grease it. That went smoothly and once I had it all popped back together I mounted the 9 speed cassette and then I put on an e-bike rated 9 speed chain. I used that because it was the longest choice of the ones down at Waterloo Bicycle Works. The Gryphon is a longer bike and I wasn't sure 116 links, which standard chains come in for length, was going to be enough. 

Checking the chain line. Perfect!

The chain was stripped and lubed with the SILCA Super-Secret lube I've been using for a while now. Then after carefully cleaning it all up, I checked the shifting and amazingly I maybe turned two screws a total of a half turn. That was crazy! 

Taking a moment to admire the new rig.

After some admiring in the basement when I finished up all I had to do was get in a test ride. That would not happen until the next day due to it being night and the fact that we had just gotten a bunch of snow the day I finished the build. 

The first test ride went as well as I could have expected it to.

Ride Impressions: 

This is a BIG bike! Big in that it seems longer and a bit taller than anything else I have. I do have the saddle forward in the seat post clamp quite a ways and I might have to look for a bit shorter stem. Maybe a 10mm shorter one. Otherwise the fit is fine. I did note that I have less seat post extended above the top tube than I do on my Fargo, for instance. 

While this bike did not come in at what anyone would say is "light", I think it has to be pointed out that each tire weighs about a thousand grams and these wheels are not in the lightweight category either. It's a 'monster truck' compared to my other gravel rigs, but that's okay. It isn't doing anything that those bikes do, it does something completely different. But I'll get into all that in another post someday.

Back to the ride- It is a springy frame. I noted that while traversing some potholes in a back alley near my home. So, it will absorb some bigger hits well, I think. With all of this snow and ice, I wasn't able to push very hard. So, cornering, braking, and anything aggressive in terms of handling was not tested. 

All I do know now is that it shifts well, nothing fell apart, and those big tires are grippy! One of my purposes for this bike was to be able to handle mildly difficult snow conditions, which is exactly what we had the morning of my test ride. This bike traversed three to for inches of snow with no issues and showed some grip on some sketchy icy compacted snow, so I think it is a winner there. By the way, I was using right at 20psi set indoors, so something likely just below 20psi outside. 

Of course, I'll have to do a little "new bike" fine tuning. The front derailleur cable needs adjustment already, but that's no surprise. But really, this all came together far more easily and far better than I could have hoped. That all despite the hurdles along the way. 

More on the bike as I get longer rides on it, but as for this build, it is over. It is a success. 

Thanks: I wanted to give a shout out to some people who contributed to this build by sending me some of the parts I used on the bike. Some gave these parts a long time ago, some more recently. In no particular order: Brant Richards, Craig Severson, Jason Boucher, and Steve Fuller. Thanks also to Sam Alison of Singular Cycles for his bringing back the Gryphon in a new and improved state, and for his stellar customer service. Thanks to Mike Curiak/Lacemine29.com for selling me these Teravail Coronado tires. 

Thanks to you, dear readers, for reading this series on my Singular Cycles Gryphon Mk3 build.

Monday, March 13, 2023

Singular Cycles Mk3 Build: Update 3

The Project Wide Gravel Wheels v2 in 2021
Now with a few hurdles cleared there would be another question concerning clearance; That concern being the tires I chose for this build. The Teravail Coronado 29" X 2.8" tires on the Project Wide Gravel Wheels v2 might prove to be an issue. Not because the frame and fork were not designed for a tire that big. It was. In fact, it is supposed to fit 29" X 3.0" tires. I didn't think I'd need anything approaching that big of a tire. 

But my concern was that I was setting the bike up with a front derailleur. Singular lists this frame as having a maximum chain ring clearance of 42t. They don't specifically say that you cannot run a triple or a double crank set, but the implication is that this is a 1X bike. 

That matters where front derailleurs are concerned because of the inner cage plate to tire interference issue could be a problem with trying to run a triple ring crank set. I had no idea whether or not this would work because Singular hadn't given the thought to the possibility of doing this, I assume. I mean, who runs a triple crank set anymore and where would you get a new one? Great thinking there, no doubt, but they perhaps had not considered an odd-duck like myself trying weirdo set ups like this! 

The 29" X 2.8" Coronados on the Project Wide Gravel Wheels v2

 The tires set up on the Spank rims of the PWGWv2 really easily. Maybe one of the easiest tubeless set ups I've done. I aired up the tires, setting the beads at 20psi, with a floor pump with the valve cores installed. I mean, this was as easy as a tubed set up, maybe even better because I didn't have to worry about a bead getting stuck on a tube and not sliding up into its seat on the rim fully. I had to mention this because many have avoided tubeless set ups because of a feared difficulty in setting the tires up. Well, with MTB tires, I think those days are (mostly) gone now. 

Now about that clearance!

All clear here! This is the derailleur setting at its most inward position.
There is tons of clearance around the 2.8" Coronados at both the seat stays and chain stays.

Whew! Another hurdle crossed and another sign pointing toward this whole set up working out! I was set for a disappointment, to be honest, so getting away with things to this point seemed like a victory. But I still had to fit a chain to this, and I had to get the HG freehub body for the DT Swiss 350 hubs. 

The order for the freehub body hadn't arrived yet, so I went ahead with a few things that I could get done. I put rotors on the hubs and tried setting up the brakes. I ran into an issue on the rear caliper but then I realized I didn't need any adapter at all for the 160mm rotor size. Once I realized that it was done and dusted.

However, when I went to install the front wheel to do the front brake, I ran into an issue. The wheel wouldn't attach because I could not get the through axle to pass through the wheel for some reason. What the heck!

Things were not quite what I was lead to believe they would be here.

Upon further inspection and cursing (!!) I found out that the through axle was actually a 15mm diameter one! What?!! I could have sworn the specs on the Singular site for the Mk3 Gryphon said 12mm through axle. Bah! Well, the good news was that I actually had a 15mm end cap set for these hubs in a drawer. But I was a bit flustered that I had to bother with it at all at this point. 

But, eventually I got the wheel mounted and the brake set up. I then checked to see if I was mad or if Singular had the wrong specification on their Gryphon Mk3 page. Turns out the site says "12mm through axle" for the fork. So, I am sane after all! Whew!

This wheat colored Brooks saddle is going to be the perch for the new Singular.

I used the "Boucher route" to keep the cabling off the head tube.

So, I detailed out a few things and fitted a star nut into the slightly trimmed off steer tube. I configured my stem in the "downward" mode, torqued all the stem bolts and checked my saddle height which needed to be adjusted. Capped off the cable ends and wrapped the handle bars with a fresh roll of 'fizik' bar tape. 

All that's left is to get this freehub body swap done, mount the 9 speed cassette, thread the chain on and cut it to length, tune everything up, and double check the build. In my next post I hope to have a first impression ride report for y'all. 

Thanks for joining me on this build so far.

Sunday, March 12, 2023

The GTDRI Stories: The Lead-Up To The Seventh One

Craig Irving (L) and Robert Fry joined me on a 3GR in June of '12.
"The GTDRI Stories" is a series telling the history, untold tales, and showing the sights from the run of Guitar Ted Death Ride Invitationals. This series will run on Sundays. Thanks for reading!

As 2012 got on I started to formulate a clearer idea for what would become the seventh Guitar Ted Death Ride Invitational. One of my desires at this point was to experience the ride as I had seen others do in the six previews versions of this ride. That being as a newcomer to the territory. That wasn't possible if I reconned all the roads. So, I made a course that was, for the most part, an unknown to me. 

It was a course that had some previous Trans Iowa bits to it, but since we'd only run three T.I.'s out of Grinnell by this point, there were still a lot of unseen roads for me in the area. Not all the gold had been mined, so this route was going to take in things I'd seen on the map, but had never ridden. Originally I was going to leave Grinnell via the T.I.v8 route, but I nixed that idea and did a completely unknown to me route to Brooklyn, Iowa for the first leg.

 I was riding decent distances weekly all throughout 2012 leading up to the GTDRI.

Instead of recon, I rode gravel. Mostly every week, although there were breaks for Trans Iowa and trips out of town at times. The majority of my gravel rides were "3GR" rides on Friday evenings or Saturday mornings. These were done in an effort to get my gravel fix, but I also wanted to grow a community of gravel riders. 

Sometimes my only companion on the 3GR wasn't a cyclist.

Getting a community of gravel riders was not easy in my area. For whatever reason, most cyclist around here at the time ignored my efforts to get a gravel group ride up and running. But despite that, I rode anyway, even if no one showed up to join me, and that happened more than a few times. 

But more importantly for me, I was getting some really good base miles in under my wheels and this would be a boon to me in this year's GTDRI. It was hot, humid, and usually pretty Sunny all through May, June, and into July as the GTDRI date approached. A date, which due to lots of rider pressure, was moved off the RAGBRAI weekend. I was getting told that more people would show up to my ride if I made it earlier or later than RAGBRAI. So, the seventh GTDRI was set for mid-July instead of during the last day of RAGBRAI. 

The Fargo Gen I- Re-imagined after four years and readied for the GTDRI in 2012.

After I had pulled a bunch of parts off the Gen I Fargo and let it sit for quite awhile, I decided that it was high time to get that thing back together and use it as a gravel bike. Once I had it up and running, I used it exclusively as my gravel bike to get ready for the GTDRI. 

I trained on hills like these to get ready for the ride.

The route I had concocted was going to be a doozy. There would be lots of BIG hills and big mileage, of course, which would conspire to make this ride on par with the 2010 version of the GTDRI. That was a route which gave no quarter in terms of climbing once the first 25 miles were behind you. 

This one wasn't quite that bad, but as you will see next week, it was no picnic! I was ready for it though, so I wasn't worried about that. My only concern was how many people would actually show up at this one. 

Since the ride start was in Grinnell, and there was no camping close by, I rented a room at the Super 8. It wasn't my first choice, but since NASCAR had a Craftsman Truck Series event in nearby Newton Iowa the same weekend, all the good rooms had been spoken for. Oh well! At least I had a place to stay.

Next week: The Seventh GTDRI

Saturday, March 11, 2023

Singular Cycles Gryphon Mk3 Build: Update 2

Derailleur cleaning time
 Moving on with the build of this Singular Cycles Gryphon Mk3, my next task after figuring out the brakes and that the triple crank would work was to fit a front and a rear derailleur. 

The rear derailleur was a slam dunk, of course, and I had a good candidate for the job in an old (ancient?) Deore XT model. While I was at it I cleaned up a few other derailleurs and my new choice for a front derailleur. 

You might recall that I had pulled a Deore XT front derailleur for the job but later on I realized it was a "top pull" model and I needed a "bottom pull" design. This "Top" and "Bottom" refers to where the cable "pulls from"- topside or from underneath, thus the nomenclature.  

So, I had to dig through my stash of front derailleurs and lo and behold! Here I found an XTR front derailleur, bottom pull, with the hinged plates in the perfect clamp size! It had been a bit abused in a previous life, but it was serviceable and perfect for this application. I cleaned it up and then I had to do some "thinkering". 

As previously mentioned, there is no cable stop for a housing to terminate on and for a bare run of cable to run up to a front derailleur on the Gryphon Mk3. The down tube cable guides support a front derailleur cable housing though. All I needed to do was to figure out a solution. Easier said than done! 

The 1990's were a fun time in mountain biking for the inventive, chi-chi bits you could buy.

I pondered how I would approach the problem and I started to formulate some ideas. First, I would need to make a stop for the housing, (cable stop) and I was planning on anchoring this to the fender mount on the chain stay bridge, just behind the bottom bracket. I figured my cable could run up between the space made by the chain stay bridge and the bottom bracket shell. 

The bracket I would have to fabricate would necessarily be one that would have to clear the width of the chain stay bridge, but be rigid enough that when a shift was initiated, it would not just bend like a flimsy piece of paper against the shifting pressure. This was a tough nut to crack. But I came up with a beefy bit of aluminum rack stay material that I thought I could make work. 

My bracket would be "L" shaped with the slotted part allowing for adjustment to aim what I would have to come up with for a cable stop. That bit was arrived at by modifying what originally was a bit of Shimano metal brake cable guide for an STI lever into what I needed. 

It may not be pretty, but it'll do what's asked of it.
A view from the rear of the bike looking at the back of the seat tube.

As you can see, I canted the bracket to point directly at the front derailleur, thereby reducing any friction and allowing the cable to have no bends as it travels up to the cam of the front derailleur. I will have to put some blue Loctite on those threads, and I should be good to go. Not shown: I fabbed a Presta valve cap into a 'hood' to cover the exit port of my new cable stop to help prevent the ingress of water and dirt.

Next up I had to do the brakes, and that required some thought as well, since I wanted to add in some in-line adjusters, have smooth cable runs, and then I had a couple used cables from the old bike I was going to re-use. I probably should have just gotten new ones right away, but I ended up spending way too much time trying to make the rear one work, and in the end, I just went and bought a new tandem length one at Waterloo Bicycle Works instead. 

3 X 9 utilizing some Dura Ace bar end shifters and Gevenalle levers.

 So, all of that was promising after I got up to this point. The 3 X 9 thing was looking good. Now.....if the rear tire clears the front derailleur! I had to mount the Teravail Coronado 29" X 2.8" tires on the PWGWv2,(wheels described in the previous build post), stick that into the frame, and that would pretty much be the final word on whether or not this thing was going to be viable in this format. 

Next: Checking the wheels for fit and finishing up.

Friday, March 10, 2023

Friday News And Views

New Guitar Ted Podcast Out:

If you haven't heard it yet, check out the longest Guitar Ted Podcast yet which was published last Tuesday. In it N.Y. Roll and I interview Kevin Lee, "ride host" of The Spinistry.

The Spinistry is an organization that has been around in North Texas since 2009. They have put on several classic gravel events like The Red River Riot, The Texas Chainring Massacre, and The Hell of North Texas, to name a few. 

In this new episode, Kevin takes us from the early days of his backroad explorations and how those eventually informed his take on gravel events. The Spinistry's vision for the present and future is laid out and  we learned an awful lot.

In my estimation, The Spinistry has been one of gravel grinding's best kept secrets. Maybe that will change now, but I bet a lot of people have never heard about The Spinistry or their events. Check out the podcast where you get you podcast feeds or at Anchor.fm HERE. 

The new Ritchey Skyline. (Image courtesy of Ritchey)
Ritchey Announces New Skyline Drop Bar:

Ritchey announced their newest drop bar called the Skyline early in the week. It is an ergonomic bar with a classic road drop style. (No flare - No sweep to the extensions)

Now normally I wouldn't bother with a roadie drop bar in the news, but..... It seems that flare and sweep for drop bars is falling out of favor with the Pro/Elite classes of gravel racers. I have noted a slight swing backward to "classic road drop designs" of late, and a LOT of weirdness surrounding aero bits for cycling. 

Before I get too far in the weeds here, there is a link to the Ritchey bar HERE.  

Okay, so what do I think about aero for gravel? Well, it is at odds with the "mountain bike-ification" of gravel, that's for sure. But there is a point to be made about being aero-concious. I mean, you probably wouldn't consider wearing a flappy jacket on a windy day because it catches the wind like a sail and you know that is sapping your strength. So, if you care about that, you actually do care about being aero. It's just a matter of degrees at that point. 

But sacrificing comfort and control for being aero on gravel? I think that's not a good trade-off. So, there are more times I'd want a flared drop bar - for comfort and control - than I would want a traditional road drop for being aero. Your mileage may vary.

Gravel Cycling Hall of Fame To Announce The 2nd Class of Inductees:

I voted as a previous inductee and I am excited to see who will be announced next week to be inducted into the Gravel Cycling Hall of Fame on May 31st in Emporia, Kansas.

So, as I understand it, there will be some sort of ride with the GCHoF members on the 31st as well. (Details TBA) I'm trying to arrange my schedule to attend and Mrs. Guitar Ted may even be coming with me. All kind of up in the air right now, but we will soon know what I can or cannot do.

I have a feeling some of this year's inductees will be a bit 'polarizing' for some and maybe a bit of a 'slam dunk' for others when the list gets revealed. I don't know who is getting in and who is not, but I did see the list we could select from and well, the possibilities for some interesting choices exist, I'll just say that.

At any rate, you'll know as soon as I do, and we can all dissect and comment on the choices made afterward. I think that things will pan out for the best, so I am hopeful that how the GCHoF started out last year will be the direction it goes in this year as well.

Mid-South Kicks Off Gravel Season:

I know, there has been a Belgian Waffle and a few other gravelly events already in 2023, but to my mind, the Mid-South is the "official" start of the gravel season. 

This weekend it happens again, and while I know that Bobby Wintle probably would rather not have this be the case for anyone, but this event will always be a "time marker" for when the pandemic hit in 2020. 

There was a lot of speculation as to whether Mid-South should, or even could, safely hold an event in light of what we thought then, but they did it and got away with it, I suppose. Not that they did anything wrong, but in the context of 2020, it was a huge risk then. 

I know, this may seem unfair to many of you out there, but those two things are what I think of when Mid-South happens in March. It's gravel event time again and I remember what my feelings were in mid-March of 2020 once again. 

All the best to those who are attending the event this year!


 That's a wrap for this week! I hope that you all get out for a ride! Thanks for reading Guitar Ted Productions!