Wednesday, August 31, 2022

Country Views: Riding Into Fall

Escape Route: Bike Path: University Avenue
 Tuesday I had some time to myself in the afternoon. It was a beautiful day, with hardly any clouds, low humidity, and a stiff Northwesterly breeze. I decided on a three hour ride to the North of Waterloo via some alleys, bike paths, urban Level B, and single track. Not necessarily all in that order. 

I was needing to test some tires, so that was part of the reason for the route I chose, but also, it is a good route when the winds are out of the Northwest. I go West mostly under the cover of woods and urban buildings, so there isn't much open headwind that way. Plus, it takes in part of my old commute to Andy's Bike Shop, which I miss riding.Then a lot of the North bit is sheltered as well, which is nice. 

Along the Cedar River. The sunflowers are numerous and about 7-8 feet high this year!

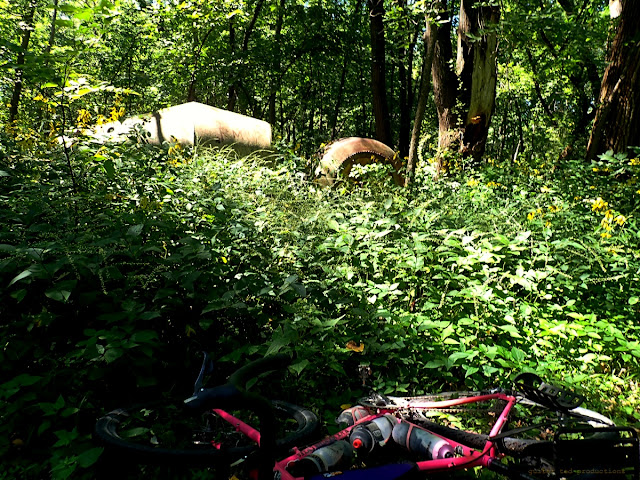
These abandoned mixer bodies remind us that at one time Lower Hartman Reserve was a sand and gravel quarry.

I veered off to take in Shirey Way and a bit of twisty, turny single track through Lower Hartman reserve which I helped put in years ago. Hardly anyone knows that around here but me, but it is true. It used to be called "John's Trail" when it was new. I have no idea what the folks who came in afterward decided to name it. 

North looking up Leversee Road.

 Looking East down Bennington Road 

After some urban street scrambling and bike path action North of Cedar Falls, I emerged on a blacktop road which took me to another, major County blacktop and I turned East out of the wind. Major relief! Then a mile north on what used to be gravel, but they ruined that and put down chip seal. Bah! 

Eventually I got up North on Leversee Road to Bennington Road's Eastern side. I don't care who you are, East Bennington Road is one of the most beautiful sights looking East that I know of in Black Hawk County. 
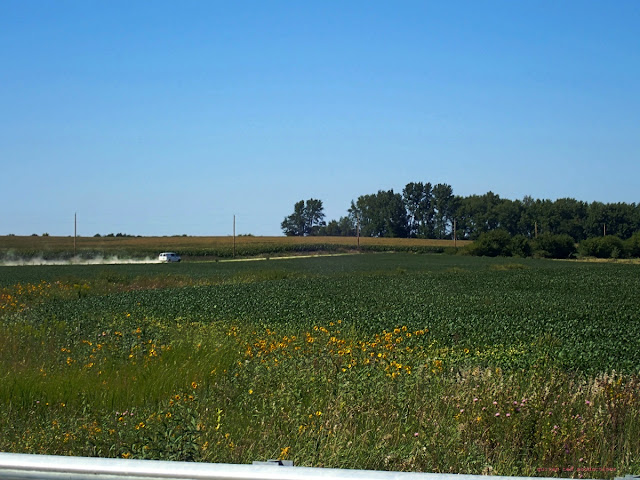
A SUV stirs up dust going North On Streeter Road

The prairie sunflowers dominate the landscape this time of year.

Going East was nice. However; the county maintainers have visited Bennington Road and the gravel was deep and thick. This made for some laborious riding, but I managed. At least the recent rains have settled the dust to a great extent and even though it was windy, I saw no evidence of the usual 'dust drifting' which you can often see on gravel when it is windy out there in the country. 

A "Wooly-Bear" seen on Moline Road. This one says, "Bad Winter!" But.....

....this one seen less than five feet from the other seems to say "Huh? What Winter?"

Wooly bears are out now. I learned from Dave Pryor when we rode together recently that the bigger the orange stripe, the better Winter is supposed to be. Well, I saw four Wooly Bears on this ride and two were completely black and two were completely orange. 

Not sure what that means! 


Fall is definitely working in now, whatever the Wooly-Bears might be trying to tell us. The Sun sets early now, and the corn is beginning to dry down. I was a bit saddened over the last week. There were so many things I wanted to accomplish over Summer that I never even got started on. Rides planned and not done. Time out in the country not taken. But maybe that's the "american" coming out in me. I am not what I have accomplished. That doesn't fulfill me. 

I should be happy I got out at all. That I can ride is something I am privileged to be able to do both physically and from an economic standpoint. Some folks cannot do what I do at all for various reasons. That I didn't get to go nuts and ride until I passed out and then be upset about that is crazy. I need to learn to be satisfied with what I am, where I am, with what I have been given. That should be sufficient. It's more than I really need, to be honest. 

I need to relax about my ambitions sometimes. Other times I waste time and that gets on my nerves too. But Life is a balancing act. We aren't always going to get that balance right. And that's okay. 

I got a three hour ride in. I was satisfied and blessed.

Tuesday, August 30, 2022

Tire Tools: Odds And Ends

 Last week I wrote a post on tire levers (HERE) and in that post I mentioned I would be back with some ideas for other good tools that you might want to consider for your home shop. I have two things which are related and one sort-of tire lever addition that also does another task you may be needing a good tool to do. 

These tools are a must-have for tubeless tire installation.

"Tire-Jack" Tools - These are a must-have for tight fitting tires like tubeless tires if you are not familiar with tire installation, have delicate or weaker hands, or if you just want to make life easier. These have been a little known secret of shop mechanics until recently when tubeless tires gained popularity and other manufacturers/brands got into the game. 

The one on the left is probably best known as a "Kool Stop Tire Jack", although mine is branded something else. The Kool Stop one is nearly identical to this. The premise is that you have one bead of the tire up and over the rim in the inner rim well. Now you are down to that last 4-5 inches of tire that you need to get set into the rim, but things are getting pretty tight and hard to do at this point. That's when you take this tool and place the non-hinged, straight end against the rim edge on the other side of the tire- where it is seated into the rim already- and the "hook" end, which is hinged, has a lip on the end which you place under the edge (bead) of the tire you are trying to "jack over" the rim edge. 

The operation is intuitive once you get the tool placed correctly. Anyway, this was pretty much the only choice for decades until others like the Challenge tool on the right showed up. That tool is ergonomically better, has a better leverage over the tire, and the "hook" end grabs better without slipping off easily. It is also spring loaded which helps with the operation of the tool in one hand. 

The basic "Kool Stop" version is about 13-14 bucks. The Challenge "Smart Bead" version is about 16 bucks. I highly recommend spending the extra for the Challenge tool, or a similarly designed one.  

The Topeak Power Lever X

The next tool is really a few things in one. It is the Topeak Power Lever X tool. I'm focusing on the tire lever bit here, but this might be a great tool for the touring cyclist, bikepacker, (aren't those the same person?) , and any adventurer. 

This lever set also will install or remove a chain quick-link and it can remove a Presta valve core. The tool comes with a clip to harness the chain and provide some slack to ease the installation of a quick-link and has a storage spot for a spare quick-link. So, it goes beyond just being a cool tire lever set. 

I like the extra length for leverage, the stiff steel core, and the wide, angled bead lip here. Cons are that these are a little heavy, and you still would need a chain tool in certain instances to repair a chain in the field.Of course, if you don't need a lever set with the other functions it is a non-starter for you. But I'd be fine packing this lever set for long gravel rides on a bike with tubeless tires. You know- just in case a tire failed to seal. But then again- how often does that happen to you? Risk versus reward. That answer will be different for everybody. I like the idea because it has other functions than being a tire lever set. In fact, wouldn't this thing make a great mud-scraper tool in wet weather?

The price isn't bad for what this can do at 15 bucks or so. Also, I have reviewed this tool before on Riding Gravel and am doing a more in-depth look at it again there. So, the Standard Disclaimer applies here, and for that Challenge Smart Bead tool as that was provided to me by Challenge Tires.

Monday, August 29, 2022

Thoughts On The Gravel Family

Dave Pryor, GT (L) and a reflection of N.Y. Roll Image by Dave Pryor.
I posted that "Riding Gravel Radio Ranch" episode with Dave Pryor the other day, (here) and as I was re-listening to it, I was reminded of how Dave interpreted the term "gravel family". Now, I know a lot of you out there may roll your eyes at the sight or sound of that term, but if you listen closely to what Dave Pryor is saying there, I think you'd come away with a deeper understanding of that term, and an appreciation for what it stands for.

It can be shrugged off as merely marketing, or a goofy construct of gravel riders, say like the term "Spirit of Gravel", which has been bastardized to the point that it is now a term of mockery for the gravel riding enthusiasts. However; in the podcast episode linked there, if you listen to it, I think this whole idea of "the gravel family" and what that looks like up against what has been traditional bicycle racing, will become apparent. Much of what is happening now in the upper echelons of gravel racing will make more sense. 

I really appreciated Dave's viewpoint where he says that there are "different religions" and when you marry into a family with a different "religion" than your traditional family's that the sense is that you start to have a different viewpoint. This becomes apparent with regard to the gravel scene when we start looking at inclusion, representation, and equity. These are also terms which many roll their eyes when they see or hear them, but if you take a closer look at the gravel scene, it actually means something. 

I think this term, "gravel family" also helps us identify ourselves a bit differently. We are not 'just cyclists', or "racers", or part of a "tribe". If we consider ourselves part of this dusty, dirty fellowship of humans, then we see more similarities and we celebrate our differences, not drawing lines and separating ourselves into factions. We know that parts of our family are challenging, perhaps even distasteful, but hey! We love them crazy outliers as much as we do our close friends because we all stand together. Apart we will fail. 

Dave mentioned that we have a participatory activity in the gravel cycling scene. We all can come together and do this thing. We need to be together and enjoying each other's company and the gravel scene, I think, has done more of that than anything I know of. 

And the World could use a little more of that.

Sunday, August 28, 2022

The GTDRI Stories: Getting The Word Out

Start area of the inaugural DK200. Image by Paul Jacobson.
 "The GTDRI Stories" is a series telling the history, untold tales, and showing the sights from the run of Guitar Ted Death Ride Invitationals. This series will run on Sundays. Thanks for reading!

When I went down to Emporia, Kansas for the first DK200 in 2006, it was the first time I had lined up for a bicycle event since early 1997. The XC MTB thing didn't make any sense to me at the time because I was paying nearly $50.00 bucks to ride an hour and spend six hours in a car to get to and from the venue. The DK200? That was merely $40.00, (if I recall correctly) and I got to spend the entire day riding, and longer, if I wanted to. Plus, it was on a course that hardly anyone riding knew anything about. What would we see? What surprises lay in store for those who would take the start? 

I loved the feeling of adventure and discovery. It was akin to something I felt at a venue near Morrison, Illinois when we did those XC MTB events. The RD of the Morrison series would develop these insane courses that were borderline adventure race territory. Having to ford creeks, walk up and down steep ravines, and cross irrigation channels on "I" beams of steel laid flat on their sides. It was nuts, and when you finished, you didn't care what place you got. It was just something to actually make it through the course. What would that madman have in store next time we went down? It was exciting, and the earliest gravel events were just like that. 

P Avenue in Tama County South of Traer, Iowa. Image 2006 from GTDRI recon.

I came back from that first DK200 with a greater appetite for adventure on gravel. The "death ride" idea was brought up and Jeff Kerkove, who at that time was still working alongside me as a bicycle mechanic, kept egging me on to put out the idea as an event. I hesitated but to no avail, and I had such an enthusiasm for such pursuits that Jeff ended up just creating a blog under my account for the ride. 

After that it was pretty much just a given that I would announce this. Of course, times were different then. Many of us that were early into the gravel scene were either regular readers of cycling blogs, or they were a gravel cyclist who maintained a blog. I'd wager a bet and say that 2006-2007 was the height of this blogging activity, at least on the cycling side, and there were so many cycling blogs it was ridiculous. 

This was important because most folks had about a half a dozen blogs they followed via an "RSS feed" or that they just checked on. This meant that anything you wanted to proclaim made the rounds in that community in a hurry. I recall that I had several blogs I checked in on and I let slip in a comment on Paul Jacobson's cycling blog that I was doing a 'death ride' gravel grinder thing. Well, that was all it took to spark the fire. 

The first header on the 2006 GTDRI blog that Jeff Kerkove created for me.

So, there was already a site, I let the word slip, and next thing you know people are commenting on my blog to the effect that I was putting on a Summertime event. Keep in mind, there were like two, maybe three events promoted as gravel events in 2006. Initially I had chosen a date in June, but I found out in a hurry from the endurance MTB riders that the date I picked was in conflict with the 24 Hour Nationals in Wisconsin. They wanted me to reschedule it to a date that would work for them.

So, on June 12th, 2006, I announced the first "Guitar Ted Death Ride Invitational". It was scheduled to occur on August 19th, a Saturday, and it would be "Sunup to Sundown". I was going for a ride of about 150 miles. If you wanted to come, you could.....

Next: Just What Is This?

Saturday, August 27, 2022

Guitar Ted Productions Podcast

 Announcing the new 'Guitar Ted Productions Podacst" now on Anchor.fm. I'm going to be sharing news, things I am up to, details regarding Trans Iowa, the Guitar Ted Death ride Invitational, and the "series" on this blog related to that.

I'll also be posting Riding Gravel radio ranch stuff there as well. You can listen to the latest one of those HERE which features Dave Pryor of the unPAved of the Susquehanna River Valley.  OR listen by licking the link below right here.


Muluk Maintenance: Part 2

New bottom bracket, chain ring, and chain installed.
A couple of weeks back I mentioned that the Ti Muk 2 was up for some work. I decided that since the Ti Muk is priority #1 for Fall/Winter commuting/errands/just riding, that I'd better make the funds available to repair it. That I did, and so I was able to scrape up enough funds on my own to purchase a new Race Face bottom bracket, a Race Face 32T 'narrow-wide' chain ring, and I found a new chain in my stash to complete that part of the job. 

This left the annual Rohloff servicing to be done. I had a Rohloff Oil Service kit on order from Waterloo Bicycle Works since March. (Thanks supply chain issues!) and what do you know?! Earlier this week it showed up. So, more money scraped up, more maintenance to do.

Since Rohloff hubs are kind of rare 'in the wild', I figured I'd share a bit on the oil service for this hub. I won't do a break down in images and text to guide you on a servicing of a Rohloff Speed Hub, but I'll give you the gist of it and how it helps the hub life and operation.

The Rohloff's drain plug is shown here in the center of the hub.

First off, many don't know what this is at all, so a brief introduction. The Rohloff Speed Hub is an internally geared hub meant to replicate the gearing range of a mountain bike. Inside the hub shell is an array of 'planet' and 'sun' gears which are shifted in such a way that you get 14 "gears", or gearing choices, to use. The range goes from really low to moderately high, and this will be dependent upon your chain ring and rear cog choices as far as where that range falls. 

So, for instance, if I were using this on a touring bike, I might go for a larger chain ring and smaller rear cog to move the gearing range toward the speedier end. Conversely, my set up has the Rohloff's range shifted into the lower speed stuff, which makes sense for a fat bike. That said, I have a gear to cruise at 12mph-15mph easily, which is good on fat bike. The lower gears can move me and this bike through 6" of fresh snow, deep mud, or scale steep dike walls with ease. So, for my needs, this range is awesome. But again- if I were using this on a strictly pavement bike the chain ring and rear cog would be different. 

Why spend the money on a system like this? Well, for me, it is because of Winter and the snow, slush, and chemical road treatments used here which destroy derailleur drive trains and make them work poorly in a hurry. Exposed cable bikes are even worse here. The Rohloff is unaffected by this. The chain, being a single speed set up, is up and out of the way of the slop, and therefore it lasts longer, plus being a single speed outwardly, that chain can be a heavier, more durable chain anyway. The only maintenance I have to do regularly is this oil change which is required once a year, or at every 5000Km/3,106 miles. This is to insure that the hub has the required 25ml of oil in it and that this oil is not contaminated or dirty. 

The Rohloff Speed Hub Oil Maintenance Kit.

So, for about 30 bucks a year and about an hour of my time, I can keep the Rohloff happy and full of oil. The kit I have used now three times has a bottle of cleaning fluid, a bottle of the special oil, a new grub screw with thread treatment for the drain hole, a plastic syringe and hose, and instructions. 

The first step is to introduce the cleaning oil and spin the cranks, shifting through all the gears and especially between 3 ad 5 for about five minutes or so. Then you drain out that fluid into the syringe and discard that properly. Re-introduce new oil into the hub, screw in the new drain plug, and that's pretty much the overview on servicing the Rohloff Speed Hub. 

The instructions say that if the thread treatment looks okay on the old drain grub screw, that you can reuse it, but I never do. I suspect that the treatment is an oil resistant one that seals that grub screw because I've never had oil leak from there. 

The old oil mixed with the cleaner oil.

I made a mistake when I did my first oil change procedure on this hub and I did not get all the old oil/cleaner oil out. That left me with an over-filled condition after I put the new 25ml of Rohloff oil in. (This is a clear oil in color, by the way) 

I remember that when I started riding the Ti Muk afterward that the hub was super-silent! I suppose all that oil in there was damping the gear noises. But I would also see a big oil spot on my concrete floor after every ride. The oil was seeping past the seals due to the overfilled condition. 

So, the next time I did service I concentrated on the draining of the cleaner oil/old oil. I got out approximately 40ml of fluid. (25ml was the cleaner oil) This time I reached that same amount, so I was down about 10ml, or maybe less, in the hub to begin with. I doubt you can get every drop of old oil out, and so I figure this amount I got back out isn't completely accurate to gauge what I had in there to begin with. I would guess that instead of the 25ml I was down about 5-7ml due to leakage or what have you. 

I did notice each time I've done servicing that the hub is quieter and that it shifts incrementally better than it did just before servicing. And obviously, getting that dirty, contaminated oil out is a good thing. 

Idea: I'm thinking about running this old oil, (I have it from three changes of oil so far) through a filter, mixing it with something like alcohol, and running that as a chain lube for single speeds. Might be a dumb idea, but what the heck! Gotta do something with it or take it someplace to recycle.it.   

So now I'm good to go, right? Not so fast! The next ride after servicing the hub, I had the generator lights quit on me. Gah! Back in the shop and it is time to bust out my volt/ohm meter. An update will be forthcoming.

Friday, August 26, 2022

Friday News And Views

The new Stormchaser single speed color- "Silver"
Salsa Cycles Announces New Color For Stormchaser SS Bike:

The pandemic craziness of 2020 was mostly a bummer, with the exception of one bright spot, for me at least. That was that I had a Salsa Cycles Stormchaser single speed around to get out in the country and ride on. 

If I did not already have too many bicycles and single speeds, I'd probably track one of these down. I really enjoyed riding it that much. With the exception of its too-stiff front fork, I absolutely loved riding it. 

Since then the Stormchaser has been offered in a shiny red, a suspension equipped, geared version, and now once again in a new color. Basically all else about this bike remains unchanged from the 2020 bike I rode. (Except that it costs more at $1899.00 USD vs $1499.00 at introduction in '20) I had to laugh a bit when I asked about the press release I got on this bike. It did not say what the color was specifically and it looked like it could be grey, or maybe silver, or pearl white? I asked and the answer was "They tell me it is Silver". 

So, there ya go! Silver it is.

The Otso Fenrir Ti. Image courtesy of Otso Bikes
 Otso Fenrir Ti Announced:

It was a very long time before any good "Fargo-Alternatives" were available and one of the better ones is Otso Bikes Fenrir. Offered in stainless steel, now it is offered in titanium

The bike is designed to be built up either with drop bars or flat bars, lending it even more versatility. The tire clearances are 29" X 2.6" or 27.5" X 2.8". A Fenrir Ti frame set with fork is $4050.00USD. 

Comments: The price! (ouch!), but you'd better look around and see that things have all gotten much more expensive in terms of bicycles now. And if history teaches us anything, we are not going back to pre-pandemic levels of pricing again. better suck it up if ya want a new bike. 

So, why this over a Ti Fargo? Well, the Tuning Chip drop out, which thankfully now can be converted to a single speed, is a nice feature. That is a thing that can be useful instead of just a "feature'. The Fargo has its way of doing single speed, but that Alternator plate is not without its drawbacks. This idea, and Trek's very similar drop out, seems to me to be a good solution. 

Otherwise?  Yeah, pretty similar idea, but it wouldn't be a good Fargo alternative if it wasn't similar, so there is that. 

Standard Rando v2 in "Fog" Image courtesy of Twin Six

It's Not You- It Really Is Foggy!

Twin Six recently introduced another new color for their Standard Rando v2. It's called "Fog", and in the images I've seen it looks like the pictures were taken with black & white film. Put Fausto Coppi from some grinding Alpine climb on this and you could easily believe this was a period-correct design from the 1940's. 

This is a favorite bike of mine, but of course, mine is yellow. About as opposite as one can get from this color scheme. That said, everything else about the bike is the same and I know it would ride quite nicely. 

Worth noting (AGAIN! Sorry!) is the price increase here. I got mine right as the pandemic was hitting and it was about 200 bucks less than it is now, but even at $850.00, this frame and fork are a great buy. If you like classic design, steel, and good looking bicycles with an eye toward the understated side, the Standard Rando should be on your radar. There really is nothing else quite like it.  

The Jones Bikes H Bar circa 2002. Image courtesy of Jones Bikes.

Jones Bikes Celebrates 20 Years:

I first heard about Jones Bikes in a magazine. (Remember those?) The weird Space Frame and truss fork idea was out of this world. The first time I saw anything related to the company with my own two eyes was their "H-Bar", which was on a bike used by one of the guys at the first DK200 in 2006. 

Those H-Bars really had my attention. They were possibly one of the first "alt-bars" for a flat bar set up I ever encountered. The swept back extensions fell in line with what I had been reading about flared drop bars at the time and my experience with those made me think that the H-bar might not be a bad idea. 

This is my OS Bikes Blackbuck in 2008 with a set of Titec H-Bars. The design was licensed from Jones Bikes.

 Well, the closest I ever got to trying them out was a Titec version of them. Then later on I used the Jones Carbon Loop Bar on my fat bikes. I know people that own a Jones bike, and they are huge fans, and I've even spoken to The Man him self, but I haven't ever gotten around to trying one of those far out creations yet. 

Anyway, I consider Jones Bikes as being one of the last "innovators" in bicycle design and no one has really ever quite come close to what he has done. Happy Anniversary, Jones Bikes!

That's a wrap for this week. Thanks for reading Guitar Ted Productions!