Showing posts with label gear review. Show all posts

Wednesday, July 22, 2026

Fleet Review: Part 3

 Finalizing the Fleet review today which will close out this look at all the bicycles I have at Guitar Ted Headquarters. This post will cover my "utility fleet" of bikes. Bikes with different purposes and uses. The last Fleet review can be seen HERE. A link on that post will take you back to Part 1. 

2020 Twin Six Standard Rando Fixed Gear:

When I received the Singular peregrine Mk4 last year, I retired the Twin 6 Standard Rando v2 bike. The entire point being that the Singular had better tire clearance and an even more classically inspired look than the T-6 did. Then I got an idea....

I retired my old Shogun fixie conversion due to its limited tire clearances and built up the T-6 Standard Rando as a disc brake fixie. I could run fenders with 37mm tires, and this was perfect for what I needed to get around in the city with. 

It has become a great commuter bike and errand bike. If anything it is too nice, as people might want to make it their own, whereas the Shogun looked old, and not very desirable. But be that as it amy, I do like the T-6 as a fixed gear bike. 

2012 Surly Big Dummy:

Back several years ago I obtained an Xtra Cycle long tail conversion and bolted it to a late 1980's Schwinn Sierra. My goodness! I was hooked, but I found the limitations of the set up rather quickly. The donor bike attached to the Xtra Cycle longtail conversion made for a flexy, not super-capable rig. I had cantilever brakes which weren't good enough, and the drive train was old as well. The purpose-built Surly Big Dummy sure looked a lot more attractive to me! 

Well, along about 20 16 I posted a "Wish List" all about wanting a Big Dummy. The post was read by a local, Mike Johnson, who just so happened to have a Big Dummy which he was willing to pass along. We negotiated a price, and by the middle of the Summer I had a Big Dummy! 

I use it most to do our recycling and to pick up items for the Cedar Valley Bicycle Collective. Once in a while I use it for another errand, but those are its main uses these days. 

The bike probably needs to have parts upgraded or replaced, since I haven't touched anything on it since I got it ten years ago! Better get on that! 


 2013 Singular Cycles Buzzard:

Well, this one came out of nowhere, seemingly, as I had not ridden this bike in years and, in fact, it had been retired for quite some time.  I had zero interest in bringing it back into the fleet until an idea popped into my brain one day back in 2024. "What if I had a bike which had front and rear identical wheel axle widths which could be swapped out like a Surly Pugsley's

I had a Salsa Cycles Enabler fork, the early fat bike fork in steel which was made to accept a 135mm quick release rear hub. This was an influence of the Surly Pugsley, which had swappable wheels in case your derailleur got whacked. The idea being that you had either a fixed cog on that front wheel, (really a rear wheel mounted on the front), or a free wheel single speed cog, and you could bail yourself out of a tight place.  

The Buzzard was just early enough that still had a quick release rear drop out. Perfect! So I got around to lacing up a new front wheel out of the old Buzzard front wheel. I used a thread-on rear hub for a single speed and there ya go! I had a swappable front wheel bike packing bike! 

Not that I've actually used this bike for anything. Well, anything other than testing. My intentions are to use it for an actual sub-24 event this year yet, So, stay tuned! 

Pieces and Parts:  

No pictures,but I do have four frames sitting around here too. A Salsa Cycles Big Mama, a Gary Fisher HiFi, a Badger Cycles Dorothy, and a Mongoose All Mountain Pro. I also have an Ibis Trials Bike stuffed away somewhere down there that needs brakes. 

And that does it! Those are the bicycles I have. I'm working on whittling down the numbers of bikes, and in fact, I've already broken down one from the Part 2 of this series, the On One Inbred. So, this list should get smaller as time goes on. That's my hope, at least. 

Tuesday, July 07, 2026

Fleet Review: Part 2

Last week I presented my "Fleet Review: Part 1" where I showed off all my gravel bikes. Click the link to see those in case you missed that. This time I am featuring my off-road and fat bike bicycles.  This will not be everything and there will be at least one more Fleet Review post after this one. 

Okay, here we go with a look at the off-road specific bikes I have here at Guitar Ted Productions

2003 Surly Karate Monkey

This is my very first 29 inch wheeled bicycle. Well.....the frame and fork, headset, and seat collar are 2003 bits! The rest is far newer than 2003. Of course, if you remember, Surly wasn't selling complete Karate Monkeys back then. Just a frame and a fork.  

Long-term blog readers have seen this bike before. It has had disc brakes and drop bars on it for most of the time I've owned it. It never has had a derailleur mounted to the frame. Always single speed! It even has briefly been a fixed gear bike.  

Notable bits are the XTR hubs, vintage 2000 or so. Those are laced to Salsa Delgado rims. The head set came out of my 1996 Diamond Back V-Link Pro and is a Race Face head set. The apple green Brooks B-17 was gifted to me for this bike by one of you dear readers. The chain wheel is from a mtbr.com member who had a cottage company called Homegrown or something to that effect. He only did single speed stuff in various anodized colors.  

I could have placed this bike in my "other" category, since it is mainly my commuter bike, or in the gravel category, as it was my main gravel bike for years, or as a mountain bike, because this is what it is, a mountain bike. 

I have kept this bike because 9a) I really like it, and 9b0 it was the bike I have done my longest ever one day ride on, approximately 165 miles, on the first Guitar Ted Death Ride Invitational in 2006. 

2006 OS Bikes Blackbuck
2006 OS Bikes Blackbuck:

This is an oddball bike. Well.....aren't all first gen 29"ers oddball? They all look like they've been rammed head on into a brick wall with those steep, out of fashion head angles. The Blackbuck is no exception. 

But even if the Blackbuck had modern slack, long and low geometry, it would still be weird. It has parallel head tube and seat tube angles. The bike could be had with the special Blackbuck fork, which was a short axle to crown affair with a long offset giving this bike a steep 74° head tube angle and razor sharp, super nervous handling. (Yes, I have the steel rigid Blackbuck for as well) It is a single speed specific design, yet you could get this floating rear derailleur hanger if you wanted to gear it up. The blackbuck has a really short wheel base, in comparison to modern 29"ers, and it carves Mid-West single track with precision as a result. 

The fork is a Bontrager Switchblade with 38mm offset. The 470mm axle to crown works nicely here giving the bike a 71-ish degree head angle. The head set is from Chris King's first run of pink anodized head sets. The brake levers are 1996 Avids with adjusters to make them work with cantilevers or linear pull brakes. I built the wheels using White Industries hubs donated to me by my friend in SoCal. The rims I won at a giveaway at QBP for Frostbike when only myself and one other person showed up for a giveaway of a pair of Salsa Gordo rims. Back when 29"ers were still considered weird! 

The anodized seat collar, a Salsa model, was given to me by Tim Krueger when he still worked at QBP. The green ano cranks are Sugino branded and were anodized by a local guy back in the 2000's. 

Great bike. Nice to ride around here in the Fall because the sticks and blow-downs cannot rip off a rear derailleur, since there isn't one to rip off! 

2005 On One Inbred

2005 On One Inbred: 

Here we have a really rare one since it is a very early On One Inbred. I got this from a distributor on close out because they were going to be On One dealers in the USA, then something happened on the back end business-wise and whatever stock the distributor had they closed out before any were announced to the public.  Anyway, I grabbed this size 18" example with its matching steel segmented fork in early 2006. 

I set this bike up as a single speed and entered the first Dirty Kanza (now Unbound) in 2006, so this is one of the first 34 bikes to do that event. (Along with myself, of course!) Anyway, I grew tired of the bike and sold it to a coworker not many years afterward. Then the bike went out of my reckoning for years. The coworker, Craig, gave it to his brother who was going to college. Then he used it as a mountain bike in Kansas and Colorado. Eventually the brother grew tired of the bike, and because I had told Craig I wanted first dibs on teh bike if it ever was to be sold, he brought it back to me. 

Well, the fork came home first. It was cracked though, after years of mountain abuse, so it went to the scrap heap. The frame came later with a lot of teh parts bolted to it you see above. Craig didn't charge me a penny! So, I have it back now and it doesn't get ridden much, but I have this history with it and..... 

You know? 

The wheels I built from WTB Frequency i23 rims on American Classic hubs. The handle bar is a Wilde branded made by Nitto of Japan. The shifters are SRAM TT bar end shifters on Paul Components base mounts. The fork is an On One Carbon version of the steel fork. 

Origin 8 Scout XLT

  2016 Origin 8 Scout XLT: 

This is a bittersweet addition to this list. This was my son Jacob's last bike. An Orgin 8 model frame I sourced on close-out to take the place of the 2012 Salsa Cycles Mukluk he had outgrown. Most of the parts came over from the Salsa, but the wheels are Beargrease wheels I got from N.Y. Roll. The fork was the replacement fork from his Mukluk which had been recalled. I never cut the steer tube because I figured Jacob might outgrow this bike and then I could swap the fork over to a larger frame, but that need never came.  

I struggle with keeping this or selling it, or giving it to a needy kid, or.... I don't know what the right thing to do is for myself yet. But my feeling is this bike is likely going away at some point. But right now I have it, so here it is..... 

2025 Salsa Cycles Titanium Mukluk

 2015 Salsa Cycles Titanium Mukluk (Ti Muk 2)

Long-time readers know this bike. It's the Rohloff equipped, dynamo hubbed fat bike I call the Ti Muk 2 because I had a 2011 Titanium Mukluk for a while before this bike came here. 

This was a very special bike because my brother, MG, rounded up a bunch of folks to make this purchase super-low cost for me. They paid the majority of the asking price, I paid essentially very little, but the main point is that this bike was a gift and a surprise one at that. 

It's my main Winter commuter and sometimes single track machine. It has carbon Whiskey rims and the tires are tubeless and this makes riding this bike way easier than most fat bikes are to ride. The 14 speed internally geared hub has all the range I'd ever want here. It is the perfect Winter bike for me.  

2014 Blackborow DS
2014 Salsa Cycles Blackborow DS

DS stands for "Dual Single Speed". The bike has an odd "dinglespeed" set up where you can manually drop the chain on an inner set or an outer set of gears. As long as the teeth count from both cogs equals the other set, the chain doesn't need to be shortened or lengthened and you don't have to re-tension the drive train. 

So, you end up with a Low or High gear set up. This allows this bike to be simple, light in weight, yet it has a low enough gear to crawl through very deep snow with its 100mm wide rims and 4.8" tires. 

And oddly enough, the bike is stock but for a Thompson seat post and the saddle. 

2011 Salsa Cycles Mukluk

2011 Salsa Cycles Mukluk

Another very special bike to me. I got the frame and fork for my 50th birthday funded by several friends. So, it is hard to let this one go, even though I rarely ride it these days. 

This one needs a new drive train, and I probbaly should rebuild the wheels....again. This bike has had a few wheel issues since I have had it, with the worst being centered around a pair of bad Phil Wood fat bike hubs.  

This one could also very easily become a frame on the wall thing too. We will see..... 

That's a wrap on the off-road stuff I have. Next will be utility bikes and parts bikes. Stay tuned..... 

Thursday, October 30, 2025

C.O.G. 40 Gear Review

The Honeman Flyer by King Fabrications
 This post will conclude my C.O.G. 40 musings for the week. Here I will go over the specifics of my bicycle and what I wore for this ride. I then will go over what I would change if this ride were t happen again. 

The course was mostly rolling hills with a few monster grades thrown in for good measure. As a single speed rider, gearing is always of the utmost concern, so I will go over this first. 

The Bike: 

I used a 42T chain ring with a 20T rear freewheel. This results in a low 60's gear inch, which isn't all that 'fast' in terms of what people use for gravel racing, but I do not set up my single speed gravel bikes for racing. I set them up for adventure. 

The 42T/20T gearing leaves me spinning madly on the flats but it is an easy enough gear that I can manage most gradual grades or shorter hills. Consecutive steeps can grind my legs to paste, but one here or there is okay. 

One thing I tell anyone asking for advice on single speed gravel gearing is that you have to know you will never have a perfect gear. Never. If you are the type that is driven crazy by the mere thought of not having the right gear, I would suggest single speed is not for you.  

So, I really like where I am at with gearing and my crank set length also, which is 172.5mm. The big thing these days is to go shorter on cranks, but with single speed it has always been the move to put on a longer crank set than usual. 

There are a TON of theories and opinions as to why one would want to do this. I did it partially out of convenience. The cranks I was using for single speed gravel just so happened to be 172.5mm in length for each arm. I chose these partially out of the desire to go shorter on crank arm length but still give a nod to longer than normal crank arms for single speed usage. 

Because the crank set had a 42T chain ring already the Shimano 20T free wheel was a perfect match to get me into a gear inch range I wanted. So, it all sort of fell into place. It has all worked out very well also, so I do not see any major changes to sizes and types for my drive train. I would like upgrades though. 

My crank arms are chipped and beaten up by gravel. They are carbon, so I feel as though it is getting time to switch cranks. Then the Shimano freewheel, while being reliable and quiet, has been popping randomly now and again. I think a White Industries freewheel is in the cards soon. But all the specifics stay the same if and when those upgrades happen. 

I could get lighter wheels, but I don't need them. And besides, I cannot be more happy with what I have on the bike now. Blunt SS rims are perfectly durable, lightweight, and the specs are dead-on for modern gravel usage. The Paul hubs? I cannot say enough good things about these. They are so smooth and roll like crazy. So, I will be sticking with these wheels for a long time. 

I ran Ritchey SpeedMax tires and they are also highly recommended. I see no reasons to switch those out at any time until they wear out. 

The zero offset Thomson seat post is spot on, but I wonder if I couldn't find a bit more compliance in a carbon post, or a titanium one. I may look into this as well in the future.  

The Clothing:

Image courtesy of Twin Six
Last year about this time I wrote up a review on the Twin Six Thermal Cargo Bib Knickers. I wore these on the C.O.G. 40 ride where the temperatures were in the 50's with a pretty hefty wind for most of the day. 

These bib knickers worked great from the standpoints of comfort and warmth all day long. The chamois pad is perfect for me and there was no binding or pinching in the undercarriage area. The legs stay where you put them, but are not too tight or too loose. The grippers are nice, but they do not tear out hair or grab skin. I just find these to be great in cooler weather. 

I wore a Twin Six base layer under an old Bontrager Classic long sleeved wool jersey. Twin Six hasn't had a wool long sleeved jersey in a while, but they did announce a new piece this week which may bear looking into. (Note: It is only available for women at the moment)

Over the jersey I wore a Twin Six wind vest. I wore Hand-Up gloves for my hands. For socks I had a pair of 12" Sock Guy wool socks I have had for years now. Shoes were Shimano mid-range gravel shoes with plastic shopping bag vapor barriers to keep the toes warm. 

On my head I wore a red bandana and my Bontrager Circuit helmet. All this stuff worked to perfection and I had zero issues with any of it on the cool, brisk day out in the country. Had it been a touch colder or wet, or both, I would have went with warmer stuff. 

That's a wrap on my gear. I was pretty happy with everything. Overall, the bike was fantastic and the gear I wore is mostly tried and true stuff I know works for myself. I hope you all enjoyed the gear review, but if you have any questions about what I used and need to know something I did not cover, let me know in the comments. 

Thursday, August 28, 2025

Guitar Ted's Ride For Jacob: Gear Review

Now the tale has been told about the first GTRFJ, so it is time for the promised gear review. This will include a bit of commentary on crank length, wheels, and some technical opinions. Then after this I will give a few closing thoughts about this ride. Now on to the review. 

I used my Gen I Fargo, as mentioned previously. This bike is set up in a fairly unique way. I am using a 9 speed cassette with a Deore XT 9 speed triple crank set. 46/36/28 is the tooth count for the crank. The arm length is also odd at 180mm. The shifting is done via an ancient pair of Gevenalle levers. If you are not familiar with Gevenalle, check the link for details on them. 

The brakes are also odd, being the TRP HyRd hydraulic calipers with mechanical actuation. The wheels are actually box-stock Trek Sawyer wheels featuring the venerable Duster rims laced to Shimano disc brake hubs. These are shod with Surly Extraterrestrial tires at 29" X 2.5". The seat post is a Salsa Ti Regulator which is topped with a Brooks Cambium C17 saddle. The handle bar is the Redshift Sports Kitchen Sink bar with lower Cruise Control Grips. The Kitchen Sink handlebar bag is also present, as was a ShockStop stem. My top tube bag is a prototype J-Paks top tube bag which MG gifted me years ago now. I also used a Wahoo Elemnt ROAM as a GPS data collector more than anything else. 

The Gen I Fargo after the GTRFJ

Comments: Well, I know this bike like the back of my hand, so when I say anything about how it rode or how it handled, it is with some deeper perspective. Having said this, I was not really in tune with what to expect from the crank set. Here is my take on the subject after having spun the cranks around for the better part of seven hours.

One hundred and eighty millimeters doesn't seem like a whole lot of difference from 175, but there couldn't be a more noticeable difference in my opinion. Crank revolutions were down in terms of strokes per minute, but leverage was noticeably better. The result was that my legs were less worked over, but my speed was severely impacted. It was really not very comfortable to spin a high cadence, but medium to lower cadences were fine, and using the gears to keep myself in a "RPM sweet-spot", was paramount to getting around. I also found that "kicking" the pedal at the nearest point to six o'clock during a grinding climb was a better technique than trying to spin pure circles as I would on a shorter crank set.  

The wheels and tires were heavy, but they worked, and the tires were extremely comfortable. I ran the front at about 17psi and the rear at about 19psi. There was no squirming in corners, no bouncing, and the damping of vibrations was actually really good.  

I'd rather run lighter wheels and tires, but this is what I have now. This bike deserves some nicer wheels though. As far as the crank set goes, I think I am going back to 175mm, and I have an SLX triple 9 speed crank waiting to go on this bike soon. 

Wearables: I wore a PCL kit from Voler, which is good stuff and it worked quite well. I had on a Twin Six base layer, Mint Socks, and Shimano RX6 shoes. (Now called RX600)

I had an orange bandana on which had been given to me by a former church band mate who is now dead. (A tribute to Larry) I also wore my newer Trek Circuit helmet.  

I kept track of some data on my Apple Watch as well. The iPhone was also invaluable as a navigation tool. Besides these things, I had a pair of Hand-Up gloves in my jersey pocket in case things got too sweaty and the handle bar became too hard to grip.

Everything worked with my kit, so there is really nothing else to add but that I was satisfied with it all.

Final Comments: Now on to my thoughts about this ride. I am going to - most likely - keep doing this ride in honor of Jacob every year I am able. It will be called GT's Ride For Jacob. I will gladly accept anyone who wants to come and ride with me, but I am not binding my putting on this ride based on participation by others. If someone wants to ride, so be it. If not? I'll go anyway.

My feeling is I just want to have a good day on the bike, pass through a few towns, go at it easy, and see some sights. I may move it around some, I may do exactly the same route, (with the roads I missed though!) next year. I don't know. So, if you were wondering if this might be something you could come along and ride, yes - it might be this as well.

Overall I feel good about my ride this year, and since this has a different meaning for me now, it seems new and I am motivated to do this some more. Maybe on a different bike next time though. Stay tuned on this front.....

Thanks for reading my GTRFJ recaps and review. 
 

Wednesday, July 02, 2025

Gear Review From The TITRR & Final Thoughts

With the outcome of my ride so heavily influenced by weather and my fitness level, it may not make a lot of sense to delve into the gear, on the surface of it. However; I wanted to look at what I used and give my opinion on how it worked, and what could I have done better or worse.

I'll also give a few final thoughts on the matter of the Tree In The Road Ride. Then I'll move along to other things.

Okay, so let's dig in. My first thoughts were about the bike. I used the Singular Gryphon Mk3. This was, by far, it's biggest ride I've done on it so far. "Big" as in the level of importance and the difficulty level of the ride, which was pretty "big",in my opinion. 

I chose the Gryphon because MG wanted to see it, on the one hand, but I had my reasons for why I thought this bike would be a great choice. First of all, I knew it would be a comfortable bike, and not just because of the poofy, 29 X 2.8" Teravail tires. I had put the rare Luxy Bar on it, which is the friendliest bar for my upper body there is, I put Redshift Sports Cruise Control grips on the bar, furthering its potential for comfort.

The cherry on top of all this was the Redshift Sports ShockStop stem. With the front end addressed, I went with some tried and mostly true seating components. First up, I used a titanium Salsa Cycles Regulator seat post. These are strong enough, but not so stiff, and this combination is perfect on gravel. Some carbon posts are nice, yes, but when you want something that likely will not break, titanium is a good choice. Suspension seat posts are okay, but almost every one I try has too much give, and honestly, it drives me nuts after a while, so they come off and the titanium post goes back on.

The saddle was the Brooks Cambium, and usually those are "okay" with me. I was going to tilt the nose down slightly before the ride, but you know you should never mess with your saddle right before a big ride, right? So I didn't. With these bits I was pretty convinced I'd be alright. 

And in practice I could not have been happier. Everything worked really well. In the future I would try that saddle tilt, and maybe a new, zero-offset titanium seat post. The reach on this bike is juussst a bit much yet. 

The gearing was spot-on. I never wanted a deeper gear, and the front derailleur worked great. I did drop the chain once, so I could maybe add a chain watcher or look at my derailleur stop and adjust this bit again.

Despite my running a 3 X 9 speed set up, which would be considered antique by today's standards, I can say I would not go back to a 1X on this bike, since this is what the Singular is designed to have. Call me crazy, but the wonky chain line in lower gears on 1X set ups is something I do not like the feel of while riding.

If I could, I think I'd get a shorter crank arm length than the 175mm arms on the Gryphon currently. My thinking is that 170mm cranks would work a bit better.

The wheels were fine, and the big tires were stable and grippy, but I cannot help but feel these were overkill and that the weight of this assembly was unnecessarily heavy for such a climb-heavy course. I probably will think long and hard about getting a separate, lighter wheel set with lighter, narrower tires mounted on it for a ride like we did Saturday. Or......just choose another bike I have

The Black Mountain Cycles MCD would have probably been my alternative here. I have an XTR 11-40T 11 speed cassette I could have used with it's Spinergy wheel set which would have made the climbs fine and the bike would have been lighter. The wheel set has 700 X 50 WTB Resolutes on it as well, so grip should have bee good also.

I also could have shoe-horned in one of my carbon wheel sets for an even lighter alternative. Then another way I could have gone was with my Fargo Gen I.

The trouble there would be that it is still almost as heavy as the Gryphon and I have 180mm cranks on it as an experiment! I do have a fairly light wheel set for it, but I just don't have time to swap everything around on that bike just for one ride.

Finally, I could have brought my lightest bike, the Noble GX5, but being a 1X, the gearing is limited unless I convert to a mullet set-up using a lot lower geared cassette. Again, a lot of faffing around for one ride. So, the Gryphon, while not being the lightest choice, had the gearing and the comfort bits covered. 

In terms of my kit I was completely satisfied. I wore an old Showers Pass wool "shirt"/jersey thing which they no longer offer, sadly. Mine is about due for the bin soon and I cannot find anything like it with real rear jersey pockets and a loose fitting cut to it. Underneath was a base layer from Endura. I wore some lightweight, Summer season GORE bibs, and those were perfect. The Mint socks and Shimano shoes were great, along with my bandana and new Trek Circuit helmet.

The Wahoo Elemnt ROAM was a curse and a blessing. Maybe it is me. Maybe not, because others were experiencing GPS issues also. But when Life throws a curve ball into your route out of the gate, (a freight train, in this instance), and the GPS goes berserk, and it gets worse from there? Yeah..... I'm still not impressed with turn-by-turn functionality.

However; I did like the Climb notification and how the climb was broken down on the screen for me. This is a help, and knowing what to expect helped me meter out effort in a way I was not able to do without a GPS unit with this feature. So, on a ride like this, where climbing was a seemingly constant thing, I appreciated the Wahoo.

If I could criticize the Climb feature at all it would be when I was on a climb it did not recognize for whatever reason. There were more than a few where I felt I could have used the feature and it was not automatically popping up on screen for me.

Another annoyance was the way the Wahoo was always on the turn-by-turn map screen and would not show me time of day, mileage total, or elevation. I probably could have switched over to a different page for this, but I was not willing to mess with the unit thinking I'd best leave well enough alone. I still like having the Wahoo over anything else I've yet tried, but this thing is far from perfect. 

Final Thoughts on the Tree In The Road Ride:

I had been looking forward to this ride for months and thanks to N.Y. Roll, it was something that came true for me. Without his assistance and care, I would not have ever had a chance at getting out of town for any kind of a ride. So, thanks to N.Y. Roll, this was a success.

My son's health issues and my wife having car trouble over 200 miles from home on Friday nearly derailed this ride for me. I am glad neither thing did, and both things seem to be either resolved, or on their way to being so. But that was close! 

We had a bad draw on weather. The only thing which could have been worse would have been severe storms and rain. But you cannot choose your weather, so it was what we had to work with.

Then also I could have been in better shape, but as it turned out, I think a few of the others, at least, were happy the route was cut short. So, while I have some disappointment in my self, and in not completing the planned route, I am somewhat consoled by  how others were seemingly satisfied.

I was so glad I finally had the chance to ride in this portion of Iowa. As Jason Boucher said several times during the ride, he was always looking at the terrain around Atlantic on his way to other destinations and longing to follow those white gravel ribbons over the rolling hills he was seeing from his vehicle. Now he has done this, and so have I.

I cannot recommend Atlantic, Iowa and the surrounding area to ride and visit strongly enough. As Steve Fuller told me, "Atlantic is just big enough to have decent services". But it still has the distinct small-town Iowa flavor. Plus those hills and the views are as good as anything I've experienced in Iowa or in many other Mid-Western states, for that matter.  

Image by N.Y. Roll

I regret the Frys had experienced the accident coming home. I wish this would not have happened.  I have always been worried about everyone else's travels and experiences connected to my rides, so this hurt me. But my main concern is for Robert and Cary's well being and restoration. Similarly I was bummed for Dan Buettner who missed out joining our group by a handful of minutes. 

I was filled to the brim with happiness and joy from being able to see my friends and to ride with them. So, thank you to all who made the trip out and back. You all made me very happy. 

Now it is time to move on.

I have a ride planed for the 4th of July, as I am wont to do every 4th. Besides this, I may get out on something big and adventurous later in the year, but more than likely I will be plying the gravel roads of Black Hawk, and maybe a couple of other counties, for the remainder of 2025.  There are still things to get done on the bike....

Thursday, August 31, 2023

Old Man Mountain Juniper Trunk, Ponderosa Panniers: Review

Note: Old Man Mountain sent over a set of Ponderosa Panniers, and Juniper Trunk Bag, and a Divide Rack for test and review at no charge to Guitar Ted Productions. I have not been paid nor bribed for this review and I always strive to give you my honest thoughts and opinions throughout. 

Well, this whole bikepacking idea took a turn when back a few weeks ago I got an email telling me that the Juniper Bag and Ponderosa Panniers were available to me for test/review. So, I agreed to have a look and here they are. 

I'm no stranger to the idea of panniers and rack mounted bags. I've done cross-country, self-contained touring before, (it's what we called it before it was called "bikepacking"), and panniers and racks were integral to making that work for me. We carried tents, clothing, food, and other gear on those tours. So, working out of a pannier isn't something I haven't ever done before and I looked forward to getting these Ponderosa Panniers and the Juniper Trunk Bag on my Singular Cycles Gryphon Mk3 to see how this would all work. 

I was informed by my contact at OMM that the Juniper Trunk Bag would not fit on the Elkhorn Rack I already have on the Gryphon, so they sent out a Divide Rack to help me out there. Update 9/12/23: There was some misunderstanding/miscommunication here which led to my previous statement. The truth of the matter is that the Elkhorn rack is not compatible with the Ponderosa Panniers. The Elkhorn Rack and Juniper Trunk Bag ARE compatible. 

Now, let's take a quick look at each component and then we'll see how it all looks once it all is attached to the Gryphon.  

The Divide Rack

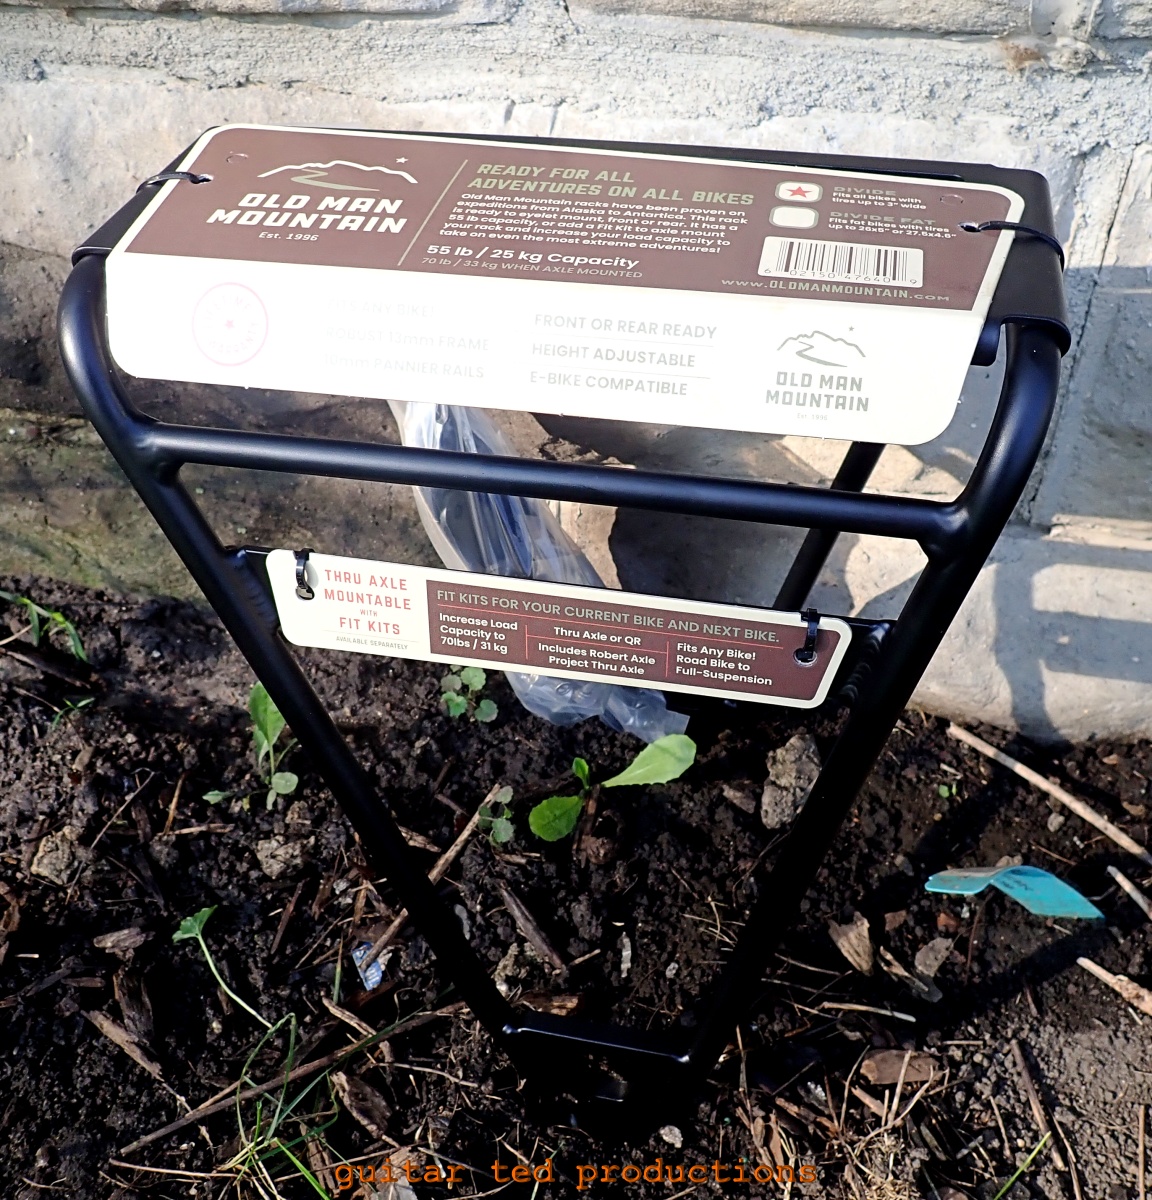
The Divide Rack: Okay, Old Man Mountain prides themselves on racks that won't let you down. Translation: This rack is heavy duty and looks bullet-proof. This one weighed in at 700 grams without any stays or hardware. OMM claims that with all stays and hardware it weighs 980 grams. OMM has said this rack has never let them or their customers down and they stand behind it with a lifetime warranty. Oh....and it is rated to carry 70lbs. That's about 20lbs more than most heavy-duty touring racks are rated for load bearing. 

I've toured with big loads using a rack that wasn't nearly this nice. So, I was excited to see this and with all the hardware provided to fit about anything on two wheels, I think this is a pretty impressive bit of kit. 

The Juniper Trunk: Think "Big Shopping Bag With Roll Top" and you are there.

The Juniper Trunk Bag: While it looks like a handlebar roll in my image here, it really is a big bag, much like a grocery bag, only made out of 100% waterproof TPU fabric. It's got a side zip pocket, but other than that, it is a simple roll-top bag meant for a rack deck. 

The Juniper Trunk unfurled. It is a 10L capacity bag

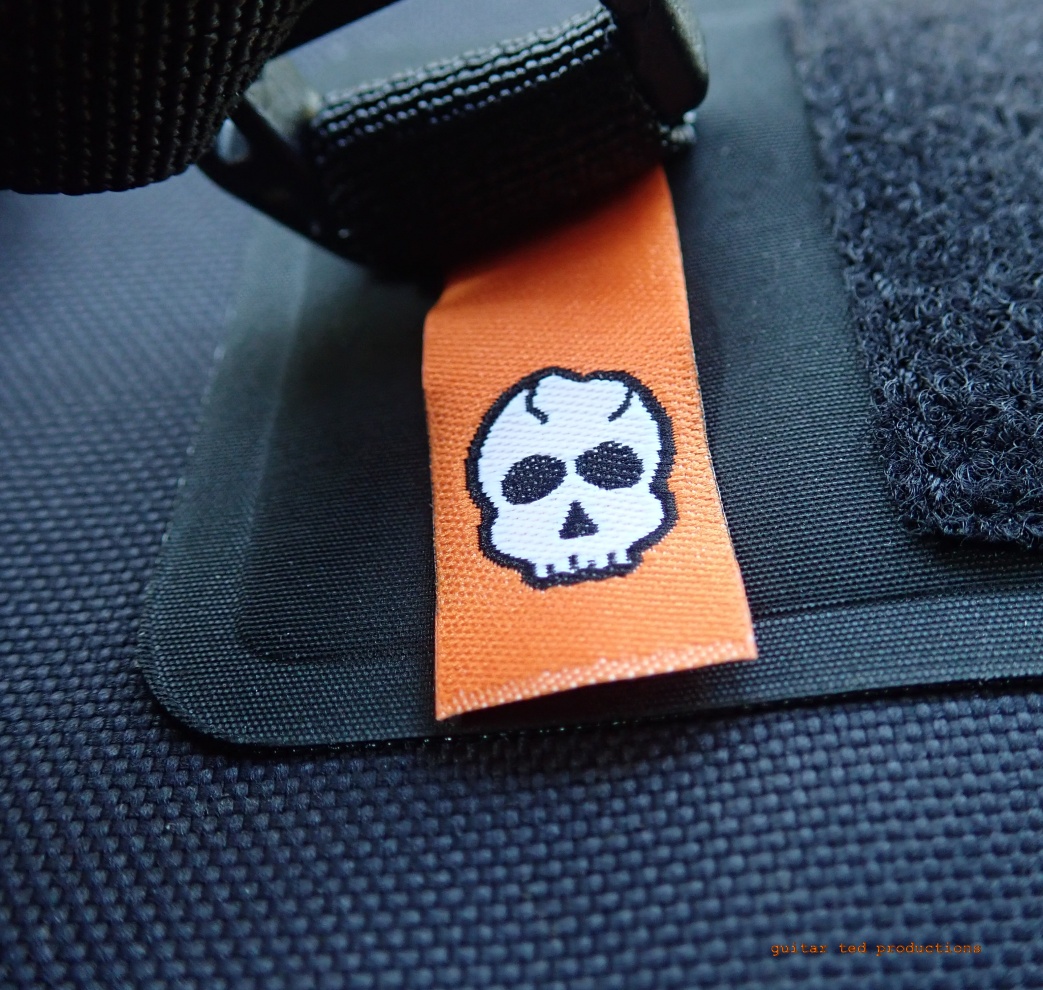
 It attaches via four cam-clip buckles and straps which are adjustable. The roll top is secured by straps and buckles over each end of the "trunk" and on one end there is a handy light mount. The Velcro patch is embossed with an OMM logo which is so subtle I didn't see it until I was attaching the bag to the rack. From the OMM site:

  • 10 Liter capacity per bag.
  • Fully welded and waterproof construction made from TPU fabric
  • HypalonⓇ reinforcements at all attachment points are more abrasion resistant and provide extra grip where needed
  • PFAS/PFC free materials
  • Roll top enclosure.
  • Waterproof zipper pocket on the outside.
  • Minimal branding on Velcro patches.
  • Clip light slots on the back.
  • Great fitment on all racks with a deck. Perfect fitment for OMM pannier racks.

The Ponderosa Panniers

Ponderosa Panniers: Okay, this is the bit that I was most interested in seeing since I have used and worked with many different pannier set ups over my time as a cyclist and shop mechanic. I've seen what works and what is so-so. 

The frame sheet and my foot for size comparison.

The Ponderosa Panniers are made from the same waterproof fabric as the Juniper Trunk Bag and are 13L capacity, per bag, and that's with the top rolled 3 times. The attachment method is done via a cam-action strap mechanism with large Velcro patches to hold everything down while the bottom attachment is a hook and strap affair to keep the panniers from flopping outward on corners or over rougher terrain. 

Inside there are two frame sheets. Basically two pieces of plastic, these give you better compression action and give form to the bags. The outer sheet in each bag is removable if that isn't your jam though. 

The roll-top functions like it does on the Juniper Trunk, but you can decide to arrange the straps to attach over the bag which kind of makes handles for carrying by hand. Might be convenient at times... (See Comments below for more on that) 

  • Removable and replaceable straps
  •  Minimal branding on Velcro patches
  • Lower attachment/compression strap remains under load to prevent bags from flapping around
  • HypalonⓇ reinforcements at all attachment points are more abrasion resistant and provide extra grip where needed.
  • Clip light slots on the back.
  • Great fitment on all racks designed for panniers. Perfect fitment for OMM pannier racks
  • Minimalist weight = 475g (each), 950 grams per pair. Without side compression straps, front framesheet, or side roll top clips.
  • Full Featured weight = 560g (each), 1120 grams per pair

Costs: Ponderosa Panniers: $200.00, Juniper Trunk Bag: $125.00, Divide Rack: $168.00

This was hiding under one of the strap attachment points. Hmm..... I have no idea!

Impressions: The quality of all the Old Man Mountain stuff seems to be at a pretty high level. The Elk Horn Rack I was sent last year is solid and shows no signs of weakness no matter what I loaded on it. When I mounted that rack on my pink BMC? Well, my load was a bit much, causing some "tail wag" with that bike, but the Elk Horn was stellar. This Divide Rack, if anything, is even burlier. I suspect I will be impressed with its performance. 

The Juniper Trunk Bag was sent out with the Divide Rack.  Once again, as I was advised that the Juniper Trunk would not be compatible with the Elkhorn Rack I already had. (See UPDATE above) Once the Juniper Trunk was in hand though, I found this statement to be odd. It looked like it would work.....

The Ponderosa Panniers had a different attachment system than I'd ever seen, but I was willing to give it a go. The size seemed perfect for a bag that would stay "out of the way" yet have enough cargo space to prove useful.

If the hardware isn't in the kit to make it work, OMM sells kits that will work.

 Installation & Comments: Anyway, it was time to start mounting things. The Divide Rack was super-easy to install on my Gryphon. I have 29 X 2.8" tires and the rack mounts on the Gryphon are about an inch or so above the rear dropouts on the seat stays. Still, the clearance was juuussst enough to comfortably clear my Teravail Coronado's. Whew! Close, but not too close.

That said, OMM sells kits to help you fit the rack to almost any bicycle, so there is almost always an option that will make their racks work. Even on dual suspension bikes. Thankfully the copious amount of fasteners, spacers, and washers was enough to make it all work on my bike without extras.

Mounting instructions are sewn into the backside of the bag.

Now with that on and leveled up, I was set to mount the panniers. Interestingly, the strapping method OMM uses with the Ponderosa Panniers requires some dexterous maneuvering to attach the panniers to the rack's cross bar. I quickly realized two things.

 First off, these panniers would be a chore to remove, and then also, they would be a chore to remount, and maybe impossibly so if you had a heavy load in the bag. This is because you have to support the bag and its weight, use one hand to guide the upper loop over the rack's cross bar, and then with the other hand you have to loop the strap through a piece of plastic on the upper loop, pull that through, and then attach its hook and loop material to the hook and loop material on the back of the pannier. So like what? Three hands required? It was difficult enough to hook these up in my shop with empty bags and I cannot imagine trying to do that on a trail with a loaded bag.

With that done the lower stabilizing strap was easily attached. I loaded up the panniers with my sleeping bag in one and clothing in the other. Compressing the load down and rolling the top up revealed a very stable, tight to the rack load that looked like it wasn't going anywhere. So, at least all that hassle with the attachment method was worthwhile. Just don't expect me to remove these bags until I'm all through with them!

Now where to put that Juniper Trunk Bag? Even though I was told that it would not work on the Elkhorn Rack on the front of my Gryphon, I was looking at the rack and at the Divide Rack and thinking, "Why not?" So, I tried it and you know what? It went on fine. While I have a ton of experience with the cam type clips and strapping style attachments, I wasn't 100% impressed with how the OMM ones were working. They are not "bad" in any way,. They work just fine. It's just that if you have used Revelate's cams you will see that there is a difference. It'd be nice to see OMM raise the bar in this area since they are a premium product in the marketplace.

That said, the trunk bag is great and held my sleep pad, an ancient Thermarest one, perfectly with room to spare. I feel good about that since now the pad is protected from the elements and I won't have a dusty or wet pad to deal with once I get where I am going.

And there she be! Fully loaded using the OMM products sent for this review.

A Look At The Set-Up: Here is the final set up. I'll go over everything here to let you know what you are looking at. Of course, the bike is my Singular Cycles Gryphon Mk3 with a three by nine speed drive train running Gevenalle shifters and levers operating Shimano derailleurs and State Bicycle Co brakes. I've also got the Enduro bottom bracket in this bike.

The two-man Sierra Designs tent is on the Divide Rack in that Outdoor Research dry bag with the Ponderosa Panniers on the sides. Up front we have the OMM Elkhorn Rack with the Juniper Trunk Bag up top. On the sides we have one Salsa Anything Cage HD and a State Bicycle Co Cargo Rack on the other both holding a Salsa Cycles dry bag. In the cockpit I have two Bike Bag Dude Chaff Bags and a Cedaero top tube bag. I've got five water bottles to drink from as well. (Option to use seven bottles if I utilize the Chaff Bags as water bottle holders)

First Ride Impressions: To simulate my planned trip, I loaded up the bike with full water bottles, clothing, my tent, sleep system, food, and tools/spares. I maybe didn't have everything there. I might have been missing my stove or something, but I did not inventory my bags, I just know that they were all loaded. Anyway, that's how I rode the bike to test ride the set up. And?

The racks and bags were totally silent, as OMM promised, and they were all rock-solidly attached and they did not waver or seem to move at all. Using panniers may not be familiar to many people these days since the advent of "rackless touring" and the prevalence of seat packs, frame bags, and the like. I had this bike set up previous to this current set up in a "hybrid", rackless/racked configuration. I had the tent in a seat pack and nothing else out back. I had a handle bar bag as well.

The front load isn't really any different than before with the exception of the removal of the handle bar bag and the addition of the Juniper Bag, which is now keeping my sleeping pad from being naked! So what has changed is that now the load weight has shifted a little to the rear, and that rear load is lower, and most importantly, more stable on the bike. This has resulted in a better handling bike with less frame flexing and "tail-wagging" than before.

There is something about a long, big seat pack load that really doesn't benefit handling and makes the bike feel squirrely to me in comparison to a load that is lashed tightly to the bike/racks and cannot sway or move at all. This cannot be ignored, and added with the lowered center of gravity, this is a much more pleasurable ship to pilot than it was before.

I've been cooking up a plan with N.Y. Roll for a sub-24 trip using the bike as set up here. Stay tuned...

Old Man Mountain Juniper Trunk, Ponderosa Panniers: Review

Note: Old Man Mountain sent over a set of Ponderosa Panniers, and Juniper Trunk Bag, and a Divide Rack for test and review at no charge to Guitar Ted Productions. I have not been paid nor bribed for this review and I always strive to give you my honest thoughts and opinions throughout. 

Well, this whole bikepacking idea took a turn when back a few weeks ago I got an email telling me that the Juniper Bag and Ponderosa Panniers were available to me for test/review. So, I agreed to have a look and here they are. 

I'm no stranger to the idea of panniers and rack mounted bags. I've done cross-country, self-contained touring before, (it's what we called it before it was called "bikepacking"), and panniers and racks were integral to making that work for me. We carried tents, clothing, food, and other gear on those tours. So, working out of a pannier isn't something I haven't ever done before and I looked forward to getting these Ponderosa Panniers and the Juniper Trunk Bag on my Singular Cycles Gryphon Mk3 to see how this would all work. 

I was informed by my contact at OMM that the Juniper Trunk Bag would not fit on the Elkhorn Rack I already have on the Gryphon, so they sent out a Divide Rack to help me out there. Update 9/12/23: There was some misunderstanding/miscommunication here which led to my previous statement. The truth of the matter is that the Elkhorn rack is not compatible with the Ponderosa Panniers. The Elkhorn Rack and Juniper Trunk Bag ARE compatible. 

Now, let's take a quick look at each component and then we'll see how it all looks once it all is attached to the Gryphon.  

The Divide Rack

The Divide Rack: Okay, Old Man Mountain prides themselves on racks that won't let you down. Translation: This rack is heavy duty and looks bullet-proof. This one weighed in at 700 grams without any stays or hardware. OMM claims that with all stays and hardware it weighs 980 grams. OMM has said this rack has never let them or their customers down and they stand behind it with a lifetime warranty. Oh....and it is rated to carry 70lbs. That's about 20lbs more than most heavy-duty touring racks are rated for load bearing. 

I've toured with big loads using a rack that wasn't nearly this nice. So, I was excited to see this and with all the hardware provided to fit about anything on two wheels, I think this is a pretty impressive bit of kit. 

The Juniper Trunk: Think "Big Shopping Bag With Roll Top" and you are there.

The Juniper Trunk Bag: While it looks like a handlebar roll in my image here, it really is a big bag, much like a grocery bag, only made out of 100% waterproof TPU fabric. It's got a side zip pocket, but other than that, it is a simple roll-top bag meant for a rack deck. 

The Juniper Trunk unfurled. It is a 10L capacity bag

 It attaches via four cam-clip buckles and straps which are adjustable. The roll top is secured by straps and buckles over each end of the "trunk" and on one end there is a handy light mount. The Velcro patch is embossed with an OMM logo which is so subtle I didn't see it until I was attaching the bag to the rack. From the OMM site:

  • 10 Liter capacity per bag.
  • Fully welded and waterproof construction made from TPU fabric
  • HypalonⓇ reinforcements at all attachment points are more abrasion resistant and provide extra grip where needed
  • PFAS/PFC free materials
  • Roll top enclosure.
  • Waterproof zipper pocket on the outside.
  • Minimal branding on Velcro patches.
  • Clip light slots on the back.
  • Great fitment on all racks with a deck. Perfect fitment for OMM pannier racks.

The Ponderosa Panniers

Ponderosa Panniers: Okay, this is the bit that I was most interested in seeing since I have used and worked with many different pannier set ups over my time as a cyclist and shop mechanic. I've seen what works and what is so-so. 

The frame sheet and my foot for size comparison.

The Ponderosa Panniers are made from the same waterproof fabric as the Juniper Trunk Bag and are 13L capacity, per bag, and that's with the top rolled 3 times. The attachment method is done via a cam-action strap mechanism with large Velcro patches to hold everything down while the bottom attachment is a hook and strap affair to keep the panniers from flopping outward on corners or over rougher terrain. 

Inside there are two frame sheets. Basically two pieces of plastic, these give you better compression action and give form to the bags. The outer sheet in each bag is removable if that isn't your jam though. 

The roll-top functions like it does on the Juniper Trunk, but you can decide to arrange the straps to attach over the bag which kind of makes handles for carrying by hand. Might be convenient at times... (See Comments below for more on that) 

  • Removable and replaceable straps
  •  Minimal branding on Velcro patches
  • Lower attachment/compression strap remains under load to prevent bags from flapping around
  • HypalonⓇ reinforcements at all attachment points are more abrasion resistant and provide extra grip where needed.
  • Clip light slots on the back.
  • Great fitment on all racks designed for panniers. Perfect fitment for OMM pannier racks
  • Minimalist weight = 475g (each), 950 grams per pair. Without side compression straps, front framesheet, or side roll top clips.
  • Full Featured weight = 560g (each), 1120 grams per pair

Costs: Ponderosa Panniers: $200.00, Juniper Trunk Bag: $125.00, Divide Rack: $168.00

This was hiding under one of the strap attachment points. Hmm..... I have no idea!

Impressions: The quality of all the Old Man Mountain stuff seems to be at a pretty high level. The Elk Horn Rack I was sent last year is solid and shows no signs of weakness no matter what I loaded on it. When I mounted that rack on my pink BMC? Well, my load was a bit much, causing some "tail wag" with that bike, but the Elk Horn was stellar. This Divide Rack, if anything, is even burlier. I suspect I will be impressed with its performance. 

The Juniper Trunk Bag was sent out with the Divide Rack.  Once again, as I was advised that the Juniper Trunk would not be compatible with the Elkhorn Rack I already had. (See UPDATE above) Once the Juniper Trunk was in hand though, I found this statement to be odd. It looked like it would work.....

The Ponderosa Panniers had a different attachment system than I'd ever seen, but I was willing to give it a go. The size seemed perfect for a bag that would stay "out of the way" yet have enough cargo space to prove useful.

If the hardware isn't in the kit to make it work, OMM sells kits that will work.

 Installation & Comments: Anyway, it was time to start mounting things. The Divide Rack was super-easy to install on my Gryphon. I have 29 X 2.8" tires and the rack mounts on the Gryphon are about an inch or so above the rear dropouts on the seat stays. Still, the clearance was juuussst enough to comfortably clear my Teravail Coronado's. Whew! Close, but not too close.

That said, OMM sells kits to help you fit the rack to almost any bicycle, so there is almost always an option that will make their racks work. Even on dual suspension bikes. Thankfully the copious amount of fasteners, spacers, and washers was enough to make it all work on my bike without extras.

Mounting instructions are sewn into the backside of the bag.

Now with that on and leveled up, I was set to mount the panniers. Interestingly, the strapping method OMM uses with the Ponderosa Panniers requires some dexterous maneuvering to attach the panniers to the rack's cross bar. I quickly realized two things.

 First off, these panniers would be a chore to remove, and then also, they would be a chore to remount, and maybe impossibly so if you had a heavy load in the bag. This is because you have to support the bag and its weight, use one hand to guide the upper loop over the rack's cross bar, and then with the other hand you have to loop the strap through a piece of plastic on the upper loop, pull that through, and then attach its hook and loop material to the hook and loop material on the back of the pannier. So like what? Three hands required? It was difficult enough to hook these up in my shop with empty bags and I cannot imagine trying to do that on a trail with a loaded bag.

With that done the lower stabilizing strap was easily attached. I loaded up the panniers with my sleeping bag in one and clothing in the other. Compressing the load down and rolling the top up revealed a very stable, tight to the rack load that looked like it wasn't going anywhere. So, at least all that hassle with the attachment method was worthwhile. Just don't expect me to remove these bags until I'm all through with them!

Now where to put that Juniper Trunk Bag? Even though I was told that it would not work on the Elkhorn Rack on the front of my Gryphon, I was looking at the rack and at the Divide Rack and thinking, "Why not?" So, I tried it and you know what? It went on fine. While I have a ton of experience with the cam type clips and strapping style attachments, I wasn't 100% impressed with how the OMM ones were working. They are not "bad" in any way,. They work just fine. It's just that if you have used Revelate's cams you will see that there is a difference. It'd be nice to see OMM raise the bar in this area since they are a premium product in the marketplace.

That said, the trunk bag is great and held my sleep pad, an ancient Thermarest one, perfectly with room to spare. I feel good about that since now the pad is protected from the elements and I won't have a dusty or wet pad to deal with once I get where I am going.

And there she be! Fully loaded using the OMM products sent for this review.

A Look At The Set-Up: Here is the final set up. I'll go over everything here to let you know what you are looking at. Of course, the bike is my Singular Cycles Gryphon Mk3 with a three by nine speed drive train running Gevenalle shifters and levers operating Shimano derailleurs and State Bicycle Co brakes. I've also got the Enduro bottom bracket in this bike.

The two-man Sierra Designs tent is on the Divide Rack in that Outdoor Research dry bag with the Ponderosa Panniers on the sides. Up front we have the OMM Elkhorn Rack with the Juniper Trunk Bag up top. On the sides we have one Salsa Anything Cage HD and a State Bicycle Co Cargo Rack on the other both holding a Salsa Cycles dry bag. In the cockpit I have two Bike Bag Dude Chaff Bags and a Cedaero top tube bag. I've got five water bottles to drink from as well. (Option to use seven bottles if I utilize the Chaff Bags as water bottle holders)

First Ride Impressions: To simulate my planned trip, I loaded up the bike with full water bottles, clothing, my tent, sleep system, food, and tools/spares. I maybe didn't have everything there. I might have been missing my stove or something, but I did not inventory my bags, I just know that they were all loaded. Anyway, that's how I rode the bike to test ride the set up. And?

The racks and bags were totally silent, as OMM promised, and they were all rock-solidly attached and they did not waver or seem to move at all. Using panniers may not be familiar to many people these days since the advent of "rackless touring" and the prevalence of seat packs, frame bags, and the like. I had this bike set up previous to this current set up in a "hybrid", rackless/racked configuration. I had the tent in a seat pack and nothing else out back. I had a handle bar bag as well.

The front load isn't really any different than before with the exception of the removal of the handle bar bag and the addition of the Juniper Bag, which is now keeping my sleeping pad from being naked! So what has changed is that now the load weight has shifted a little to the rear, and that rear load is lower, and most importantly, more stable on the bike. This has resulted in a better handling bike with less frame flexing and "tail-wagging" than before.

There is something about a long, big seat pack load that really doesn't benefit handling and makes the bike feel squirrely to me in comparison to a load that is lashed tightly to the bike/racks and cannot sway or move at all. This cannot be ignored, and added with the lowered center of gravity, this is a much more pleasurable ship to pilot than it was before.

I've been cooking up a plan with N.Y. Roll for a sub-24 trip using the bike as set up here. Stay tuned...