Showing posts with label Old Man Mountain. Show all posts

Wednesday, June 25, 2025

Two Ways To Tour

Frame bags or....
 How Do You Carry Your Cargo For Overnights?

With Tour Divide in full swing, and a press release I received prompting my thoughts, I wanted to dive into the two ways to tour.  I have extensive experience with racks and bags, but while I do have all the stuff here to do a rackless type set up, I have not actually spent much time using this way of touring. My thoughts on the matter may be skewed, but I thought this exercise would be a fun one to consider.

Racks and bags have been the default way to tour for decades. When I participated in two fully-self-contained tours in the 90's, racks and bags were the only option. However; when the Great Divide Race/Tour Divide got rolling in the 2000's, rackless type set ups quickly became a thing based upon certain advantages this style of touring has. Okay- I can hear some of you already saying "bikepacking". But let's be honest: Bikepacking is touring. You can do this off-pavement or on pavement. Being a temporary homeless person via bicycle is essentially no different either way you decide to carry your stuff. So, let's get on with deciding which way is best.

....fully racked and bagged?
Full disclosure: I wrote a bit on this back in 2023. So, why dig into this again? Well, for a few reasons. First of all being that N.Y. Roll and I have a believe more and more people are tiring of |racing and want to have experiences via bicycle in a more non-competitive, relaxed manner. Focusing more on camaraderie and shared experiences instead, and what better way to do this than by touring?

Secondly, more rack options are becoming available which are easier to install and take off, making it easy to configure your bicycle for specific rides and not having to dedicate a bike to being "the bag-bike". Furthermore; frame bags are fine, but they have to be custom-made to fit, and again - dedicated to a specific bicycle. The "convertible" and versatile set ups, which often do not even require a bicycle to be rack compatible, are making touring and sub-24's easier than ever.

Frame bags have to be custom-fitted to a specific bicycle for best results. However; they are easily removed, unlike many racks. 
As I stated, I have a lot of frame bags, seat packs, top tube bags, and other bags as well. It was not until recently when I started reviewing some Old Man Mountain gear that I was reintroduced to racked touring options.One of the many features of their gear is one which I found fascinating, and that was the ability of thir racks to fit almost any type of bicycle.

It used to be racks only went on bicycles with rack mounts. Those eyeletted frames and forks were most often found on hard tails, touring bikes, and hybrid bicycles made from metal. Carbon fiber bikes? Yeah......rrrright! (Said in a Patrick Warburton voice) But no more! Even carbon bikes, full-suspension bikes, and non-eyeletted bikes can all have racks nowadays.

Who said you had to use racks or frame bags? Why not both!

And now quick-mount/dismount racks are making things even easier for those who want to just pop on a rack, attach a couple of panniers, and go have a picnic, or an over-night trip. So, choosing a rack system over a frame bag system is becoming less of a defined line. Heck, you can even use both types of systems on one bike.

There are finer points to discuss and you can get way into the weeds when it comes to bikepacking/touring stuff, but I think all those details only dampen the itch to go out and try something. I'd caution against too much thinking about details which really don't matter a lot. I will say a few things here which I have learned over the years which may help you out though, and are important to consider. I did mention three things to think about in the previous post mentioned above, and those are Weight, Wheels/Tires, and Comfort. I'll add a few things here and the first has to do with weight. 

Brakes: More weight means more to stop when the time comes. Your brakes need to be in tip-top shape. Not only that, but if your brakes are rim brakes, this means your rims need to be in good shape as well. Rims wear out at the braking track, so if those wheels are old, and your brake track feels concave when you check it out, it may be time for new wheels. (And your spokes and hubs will be better as well.) Disc brake pads wear out, as do rotors, and these points of possible failure are imperceptibly fine lines which, if crossed, can be catastrophic to you and your adventure. Cables, housings, and brake lines/fluid, (if using hydraulic brakes) should be in good order as well.

Air Pressure: Heavier loads will require you to adjust your air pressure upward. Using what usually works for your normal riding isn't going to be correct for loaded riding. Make sure to check tire recommendations and rim spec so you do not go overboard, but raising your air pressure somewhat from normal will be a best practice for loaded touring. 

Attention To Details: I know I intimated earlier to not sweat the small stuff too much, but if you plan on spending hours in the saddle to get somewhere, then those niggling bits you've been meaning to address should be taken care of before you embark on your voyage.  That dangling bit of bar tape, the stem that is slightly off center, or the squeaky seat you've been putting up with should be cleared up so you have one or two less things to stress you out mentally while you are traveling by bicycle. This isn't a point about "do this or that" as much as it is about getting mentally comfortable for long hours in the saddle. Little things you could get cleaned up before hand will bug the crap out of you on longer rides if you don't address them.

Racks or frame bags? Just get out there!
So, back to the way to go - Racks and bags or frame bags? You can go back and forth on either one, but whichever way you go, there are a lot more important things to think about hen going touring for a day or a month. The main thing should be "the main thing" and that would be just to get out there and do it.

Plus, who said you had to use racks and bags or frame bags? Use whatever you can get your hands on, and works for you, and get out there.

Also, I am writing this to myself more than any of you dear readers. I need to just get out there and do an overnight trip. I've had one planned for several years which I've wanted to do, and time keeps slipping away. It is a problem I need to address myself, so I am not trying to be preachy or whatever.

Hopefully I make the trip happen this Summer. Stay tuned.... 

Thursday, February 29, 2024

Review: Old Man Mountain Axle Pack: The Riding

 NOTE: Old Man Mountain sent over the Axle Pack kit, a fit kit, and through axle from the Robert Axle Project to Guitar Ted Productions for test and review. I am not being bribed, nor paid for this review and I always strive to give my honest thoughts and opinions throughout.

The Old Man Mountain Axle Pack was mounted a while back and with this wild and weird Winter I was off the bike it was installed on until recently. Hit this LINK for a look at the install, or read on further for my take on how the Axle Pack works with my riding and how I carry stuff. 

I chose the Noble Bikes GX5 carbon gravel racer as my test bike because it has no provisions for cargo or bottle cages on the fork. The Axle Pack allows me to carry a water bottle or a cargo cage on the fork now. I chose one of each. Why not?! 

For the riding test, I was curious as to whether or not the weight on the fork would adversely affect the handling of this light carbon gravel bike. I also purposefully used the different loads to see how an imbalance there might affect the handling. Finally, the question abut the front wheel removal with this rack on there needed to be answered, and I'll get to that in this review as well.

Rides were completed on various surfaces and terrain. I almost always kept a full load in both racks but I did also leave the cargo cage empty and used a full water bottle on one side as well. This will be a mid-term look at the Axle Pack and a final review will appear later this Spring. With that, let's get to the good stuff.

The Axle Pack is, first and foremost, essentially like having a fork built with Three-Pack bosses. At least functionally as you ride, it feels that way. You'd never know without looking that you have an add-on accessory rack. Bottle cages and cargo racks attach seamlessly, and even loaded the Axle Pack is rock-solid and steady on the bike. 

In terms of handling uneven loads and the effect of loads on the bike's handling, I saw no real issues there either. Yes, you will notice a little more inertia to steering inputs, but you most likely will adapt to this easily, as I did. After a few miles, it seems all normal. 

I did a steep descent with a need for very precise, controlled braking and also did not notice any detrimental effects to handling. Overall, this cargo carrier caused me no grief at all. Obviously, if you put a heavy enough load on the Axle Pack, it would begin to degrade handling, but most folks, hopefully, will have better sense than to put very heavy things on a fork that most likely was not rated to carry such a load. 

And furthermore; most racing gravel bikes don't make for great bikepacking bikes, but with Old Man Mountain's products, I suppose you could turn your race-rocket into an adventure bike of sorts if the need arose. 

The Axle Pack can be installed on many different bikes, obviously, but from a gravel riding standpoint, if we are limiting this to gravel bikes, the Axle Pack does come in handy for those events with long enough distances that you might require more water than your bike would normally carry, or gear that would make an over-night stay easier. 

There is one thing that is a bit of an annoyance with the Axle Pack and that is if you want to, or when you need to, remove the front wheel. Since the Axle Pack relies on the through axle, in this case, to attach the rails, you have to go through a couple more steps to get the wheel out. 

Remove three bolts to get a wheel out vs one.

There are the two attaching bolts that require a 4mm hex wrench and then you can get at the 6mm through axle bolt's hex pocket to remove the through axle and then the wheel comes out. You have to push aside the rails of the Axle Pack while doing this, and this also is another good reason not to put heavy cargo on the Axle Pack, unless you are okay with removing that cargo first. 

But besides this, there are no real negatives to using the Axle Pack that I have experienced. The wheel removal thing is a compromise for making your bike more versatile. I think it is worth the trade-off. 

Now as for temporary use of the Axle Pack, it may become a bit of a hassle if you go through a lot of those special Panduit cable ties because they are not cheap. Old Man Mountain does sell spares, so you always have those available, but this may be a hindrance to using the Axle Pack on and off for special occasions. My tendency would be to just leave it on there for extended periods of time, but not everyone will think like I do about this.

So Far... I think the Axle Pack is a well thought-out design that can make a bike without fork mounts a more versatile machine. Handling seems to be minimally affected in my case with the Axle Pack attached and with loads on it the stability of my bike was not adversely affected. 

There are a couple of compromises to the Axle Pack. Wheel removal being one. The special cable ties that are a bit hard to go through due to their expense, hindering, perhaps, off-and-on usage of the Axle Pack being the other. However; these are minor compromises in light of how effective the Axle Pack is and looking at how versatile this can make a bike. 

See the webpage for the Axle Pack HERE

Next up: A Long-Term Review.

Thursday, February 01, 2024

Review Updates: OMM, Tumbleweed, WTB

The OMM Axle Pack
 I have a few review projects in the works here at Guitar Ted Productions. Two were put on hold by the weather and one just arrived Tuesday afternoon. This post will serve as an update on the ongoing reviews and a teaser for the new one that is coming up soon. 

Please keep in mind that all these items being mentioned in today;s post were provided to me at no charge for test and review.  I am not being bribed, nor paid for this review and I always strive to give my honest thoughts and opinions throughout.

First we have the Old Man Mountain Axle Pack (last updated HERE) This is a rack strip that you can mount to any fork that does not have bottle bosses or "Three-Pack" mounts and then attach cages or racks to that to carry more stuff. 

I have the one sent to me all ready to go on the Noble Bikes GX5 carbon gravel rig and I should be able to get some country rides in on that set-up soon with these crazy warm temperatures which are forecast. So, hopefully I can get finished up on that one real soon. 

Next up I have that Tumbleweed Big Dipper handlebar that I am reviewing. (Last update HERE) I have a very specific test and route in mind for this review and I need the weather to clear up and warm up before I can get that review put to bed. However; in the meantime I probably will be doing a mid-mid-term update. (Ha!) I have been riding the bike off and on that the handlebar is on. Plus, in light of the aero/narrow drop bar trend, I thought it might be a good idea to compare and contrast what super-narrow bars give you versus the mega-wide drops like the Big Dipper. 

The Big Dipper bars on my Singular Gryphon Mk3.

Finally I have news of a new review that will start on these pages in March. This one I cannot 100% say much about other than the products I received to review are from WTB. 

I will say that one of the products is pretty surprising, but it does make sense in a way. Yeah.....I better stop there. Look for this stuff to be revealed sometime in March when I will have already had several weeks of riding done on the stuff and will give a final review on the products. 

Oh! And the Honeman Flyer single speed should be finished up sometime soon and sent out to me to complete the build on. There's a LOT more to this whole project than just a bike, so stay tuned for more on that as well. 

And as always; Thank you for reading Guitar Ted Productions!

Thursday, January 04, 2024

Review: Old Man Mountain Axle Pack: The Installation

The component parts of the OMM Axle Pack and fit kit.
 NOTE: Old Man Mountain sent over the Axle Pack kit, a fit kit, and through axle from the Robert Axle Project to Guitar Ted Productions for test and review. I am not being bribed, nor paid for this review and I always strive to give my honest thoughts and opinions throughout.

If you missed the introduction to the Axle Pack from Old Man Mountain, you can read that HERE. This post will detail the installation process and my first impressions of the Axle Pack.

OMM has an excellent step-by-step instructional for the Axle Pack which was very helpful. I will say that it lacks in imagery though, which may be a detriment to those who are more visual learners. Also, the instructions are found by scanning a QR code. Neat. Great stuff, but having to trigger your phone back on again and again gets annoying. One vote for paper instructions here. But I get it. I'm not against how OMM did this, but everything has its drawbacks and the experience I had was a bit tedious due to the way the instructions were implemented. Paper is wasteful, probably more expensive, etc. Like I said, pros and cons there.....

Now, as far as how things went together, this was seamless. All the parts were well made and I had all the fasteners necessary. There is a bit of a trick that I will share here that I think would make life easier for you if you should decide to get an Axle Pack and want to install it yourself. 

That would be to "mock up" the way it will go on first. You can read through the instructions and then get a feel for how the parts can be arranged, because you have options. Plus, you'll want to ascertain where the Mounting Pucks will go so you can clean up and apply the protective film precisely where it should go. 

The first step is to swap out your through axle for the specified Robert Axle Project axle for your particular bike. Then you can get to mocking up the set up and go forward with installation.

The special Robert Axle Project through-axle will protrude a bit on either side. (Those are Berd spokes, by the way, in case you were wondering.)

By mocking up the set-up I was able to ascertain where I needed to place my protective film on the fork blades.

Once you've gotten the Robert Axle Project through-axle in place, you can then grab the rails of the Axle Pack and see which orientation works best on your fork. The attachment at the wheel is offset so it will better align with your fork in one way than the other. Once you've determined that, you should take the proper bolts and pass them through the hole at the axle end of the rails and carefully screw them into the Robert Axle Project through-axle. The threads are fairly fine and the axle is aluminum, so you definitely want to take care in this step. 

Leaving those bolts loose enough that you can rotate the rails by the axle end, swing up the rail to be in line with the fork, grab a Mounting Puck, (I actually went ahead and attached mine first to the rails), and determine where you want to apply the protective film. Once you've gotten that figured out, everything starts to fall into place. 

Here I have the protective film in place and one of two cable ties started.

A closer look at those special cable ties.

As a bike mechanic with 30 years of experience, I have seen a TON of cable ties and I know the quality of them can vary from absolute garbage, useless ties to really nice and everything in between. However; I had not yet met the Panduit cable ties. Holy smokes! These are - by far and away - the very best cable ties I've ever laid hands on. Kudos to Old Man Mountain for sourcing those for their Axle Pack kits because I have no doubt these will last and I have full confidence in using them. 

Also, you get a few extras, so don't worry if you accidentally cable tie a spoke in with the Mounting Puck. (Be careful of that!) You have a "mulligan" with those ties since you have a couple extras. One other note on those ties. I found that a craft X-acto knife with the angled blade cut through the tie like butter, so you can trim back the extra ends after tightening them down very cleanly. OMM recommends using a fingernail clipper, and that would also work well. 

This is what it all looks like once it is all buttoned up.

All installed and loaded up.

I finished up the installation and loaded the Axle Pack up with a water bottle cage on one side and an Anything Cage HD on the other side with a Salsa Cycles Dry Bag which has a Thermos inside of it. This is going to be my test set up for the Axle Pack for the Winter. 

My thought being that if it is very cold but conditions are okay for a ride that a Thermos will keep a drink from freezing, or could hold a warm drink, like cocoa or coffee. Or I could use that bag to hold dry gloves and head gear, or.... Whatever! It just takes a frame and fork that is minimalist and makes it more versatile. And remember, I can always take the Axle Packs off if I want to go to a race, or use it on another bike. (Gotta get more of those Panduit cable ties from OMM though! See HERE

Next: The riding will show how the Axle Packs work out. Stay tuned....

Monday, January 01, 2024

Happy New Year! Now Let's Get Caught Up

Happy New Year! I hope that you all had a great 2023. So, with all that nonsense that I posted last month having to do with the past year, what was I doing in the meantime? This post will get you all caught up here.

There isn't a whole lot to say, because I had two over-arching things pretty much dominate the last half of December here. One was my wife's and my daughter's birthdays, and the other was getting sick. 

Yeah......fun times

The whole family got it too. Some kind of cold/flu thing. It was awful. I pretty much stayed in the house over Christmas because of it. So, no bicycle tales to speak of that I can share.

Well.....I did do something with bicycles. I commuted back and forth to work, but I also did install those Axle Packs I got in on the Noble GX5. The Introduction to those Axle Packs from Old Man Mountain was posted here last Wednesday. (See that post HERE)

The Axle Pack went on without too much bother and I have a ride planned once I feel good enough to do that. Maybe pretty soon... Anyway, I am hoping there will be soup involved. You'll see..... 

The Old Man Mountain Axle Packs mounted and loaded up.

So, there was that going on as well. But mostly it was a lot of home cooked chicken soup and water. Rest, and boredom, with a side of NFL football. I really was not surprised that I got sick when we had some of the best riding weather in December, ya know, par for the course and all. But hopefully we can stay out of the really frigid air for a bit so I can get in a few rides soon. 


I did get a last ride in for 2023 on New Year's Eve in the Green Belt.

Starting on Christmas Day I began to feel on the upswing. That said, it took a full week to be back to any semblance of myself and I rested a lot all week in between Christmas and New Year's day. I chanced a ride on the 30th at night for about 20 minutes and felt no worse for the wear. This emboldened me to try a longer ride on New Year's Eve, which I did. It was about two hours on the fat bike in the Green Belt. 

That sure felt good to do. Now it is time to start pedaling in 2024.

Wednesday, December 27, 2023

Review: Old Man Mountain Axle Pack

OMM Axle Pack on a bike. (Image courtesy of OMM)
NOTE: Old Man Mountain sent over the Axle Pack kit, a fit kit, and through axle from the Robert Axle Project to Guitar Ted Productions for test and review. I am not being bribed, nor paid for this review and I always strive to give my honest thoughts and opinions throughout.

The idea of mounting accessories, bags, or water bottles from a fork is not a new one. Touring cyclists have been using brazed-on mounts for racks to hold panniers from forks for years. I first saw water bottles mounted off a fork at the first Trans Iowa gravel race in 2005. A rider had hose-clamped two cages to the fork blades of his Redline Team Conquest cyclo-cross bike. 

Now days any "adventure" or bikepacking bike worth its salt comes with fork braze-ons, those little warts sticking out with bolts that can accept a Three-Pack style rack or water bottle cages. However; many "racing" style gravel bikes and older bikes do not have such accessories. What to do?

That's where Old Man Mountain's recently developed and manufactured "Axle Pack" comes in. It allows any bike to have "three-pack" style attachments on the fork - even suspension forks. What's nice about this is that not only can you add this accessory on your bike, but it is not permanent. So, you can use the Axle Pack for the over-nighter you've got planned and then remove it for the fast-paced gravel group ride the following week. OMM have made the Axle Pack versatile by way of their famous "Fit Kits", Mounting Pucks, and through axles which are available through the Robert Axle Project.

My Noble GX5: Great bike, but no fork mounts!

The Problem: I have a Noble Bikes GX5 which is a great bike for long gravel rides but for one detail. It does not have any way to mount a water bottle to the forks. This, to my way of thinking, is a handicap in that I have to find more creative ways to go long distances on this bike and have the hydration capabilities that my body requires on a hot, Summertime gravel grinder. 

I do have other bikes, and some of those do have the mounts on the forks I desire, but none of those bikes are lightweight carbon fiber machines that have the stiffness under power that the Noble has. What if I could add water bottle cages to this bike? 

Sure, there are other ways to solve this conundrum, but I happen to think that fork mounted bottles are actually easier to access while riding than even a traditional cage placement in the main triangle, not to mention any bottle in a bag, frame bag, or jersey pocket. Hydration bladders are also an option here, but again - I like my fork mounted bottles. Your mileage may vary there.

The Solution: The Axle Pack will easily mount to this Noble GX5 and allow me to use water bottle cages, or even a larger cargo cage that might hold a Nalgene bottle, or gear for a sub-24 trip. The through axle needed to be swapped and the Mounting Pucks ordered along with that to make it all work, but the solution is there. And as I stated earlier, I can easily remove the Axle Pack with no harm done. Suddenly, the GX5 just became a lot more versatile!

The Parts: So, as stated, I received the Axle Pack, which is two long rails with slots and threaded bolt holes in it. On one end is the receiving side that mates with the special Robert Axle Project through axle. The upper portion of the Axle Pack will be cable tied to the Mounting Puck using the heavy-duty cable ties provided in that kit. Those cable ties are a special design which does not "zip", (no teeth), and they are UV resistant. That's a great quality to have for peace of mind hauling. 

The Axle Pack retails for $60.00 USD and most fit kits, which includes the proper 12m through axle and Mounting Pucks, costs $80.00 USD.

Here is what OMM has to say about the Axle Pack:

"Old Man Mountain Axle Pack is unlike any fork mount adapter you’ve seen. Rather than trying to clamp to round or tapered surfaces and just hope it doesn’t slip or spin, Axle Pack is, you guessed it: Thru Axle mounted! Attaching to the axle makes it impossible to slip or spin.

Axle Pack is lightweight, reliable, robust, and rigid. With four mounting point you can also choose to run your gear higher or lower depending on your needs.
"


 What I Got:
Referencing the image above, starting out in the center and then rotating counter-clockwise: We have a Robert Axle Project through axle for the Axle Pack, or any Old Man Mountain Rack as well (#1), then we have the two rails that make up the Axle Pack itself (#2). Following that we have two sheets of protective film to avoid scratching the fork legs (#3). Then in the upper right hand portion of the image you can see the two rectangular shaped objects which are the Mounting Pucks (#4). Then we have a handful of cable ties (#5) followed by the mounting hardware that comes with the through axle (#6) Finally we have the mounting hardware that comes with the Axle Pack (#7)

The OMM site has a nice step-by-step procedure to help you find the Fit Kit and axle for your bike, and they also offer "real people" contact via the phone if you have further questions. 

Next: In my next update I will go over that installation process on my Noble Bikes GX5 and show you how this will all go together to offer me a more versatile bike. I'll then go on several rides and see how the Axle Pack works in practice. Since it is cold I was thinking of strapping on an old Thermos full of chicken soup or tomato soup for a nice lunch stop on a ride. Mmmmm...... Soup

Thanks to OMM for the opportunity to review and try out these products. Stay tuned for an update soon.

Wednesday, November 15, 2023

Review Briefs

 As many of you know, I get in a fair amount of stuff to review and sometimes just to give feedback on/test for others. I figured I may as well shoot a few words this way on some things being currently tested and reviewed by giving a few, brief thoughts on those items. As always, The Standard Disclaimer applies.

Orange Seal Sub-Zero Sealant:

Tubeless tires are ubiquitous within many segments of cycling now. It's not just for mountain bikes anymore and with that, we have run into issues with colder weather use of tubeless sealant. Particularly with fat bikes, but not necessarily relegated to those bikes. 

My sealant that I learned to make from MG isn't cold-weather compliant, and neither is the sealant I have been predominantly using for the past several years. So, when Orange Seal reached out and asked me if I wanted to try out their Sub Zero formula, I agreed to give it a whirl. 

The Sub-Zero formula is rated for temperatures down to -20°F and it is rated as their longest lasting formula as well. Rated for 60 - 180 days. So, that's going to cover me for my Winter riding! 

I'm no stranger to Orange Seal either, by the way, having reviewed it before. (Their "Regular" formula), but they also have an "Endurance" formula which is rated down to 0°F, and it seals a bit bigger punctures and tears, so maybe if sub-zero riding isn't in your future, you might get on with that sealant.That said, their best sealing formula, the "Regular" version, is good to 11°F, so..... Yeah. Pick yer poison. 

I'm going to stick this Sub Zero stuff into the Ti Muk and see how it does.  Orange Seal actually sent me samples of the other two as well, so I'll be testing out those also. Stay tuned....


State Cargo Cage & Silicone Molded Straps:

Back in mid-August I received the State Bicycle Co. Cargo Cage and the Molded Straps that you can get with that cage. I immediately mounted that to my Singular Cycles Gryphon Mk3 and mounted a stuff sack filled with cargo as well. 

The cage held up well and never was an issue. I did like that there are several ways to mount things to it. All the odd shapes cut into the aluminum cage make for a lot of options to attach straps, bungees, or the Molded Straps, which were really pretty slick, by the way. 

I only received one of the Cargo cages so I matched it up with a Salsa HD Anything Cage. The Salsa cage can only be mounted in one way, while I was able to mount the State cage lower, which is an advantage to some degree if you can get away with a lower center of gravity and not get into trouble hitting things where you ride. I can do that, and I appreciated the option to mount the State cage lower. 

The cage functions well and has options. But its looks might be too kitschy for some. It's fine, but I could have done without the unnecessary "cuteness". Matched with the excellent Molded Cargo Straps this can be a great way to carry stuff on a bikepacking rig. So, in the end I can say it is good, as long as you get on with the design look.

The Old Man Mountain Juniper Trunk Bag

Old Man Mountain Juniper Trunk Bag:

The Juniper Trunk Bag was also originally on my Singular, but it really came into its own mounted to my Salsa rack on my Ti Muk 2. 

The thing about this bag is that it essentially is a roll-top grocery bag. It obviously has straps to mount it to a rack, and it is made from a durable, waterproof material, but I think of it in terms of practical uses since the design is that of a standard grocery bag. 

I've carried all manner of stuff in the Juniper Trunk Bag and as long as you roll the top tightly and cinch that down with the strap and buckle it, the cargo you carry will be pretty stable and almost "invisible" in terms of riding. 

Honestly, this trunk bag solves a problem on the Ti Muk because I generally would want a frame bag for storage of extra gloves, clothes, and repair gear, but that takes away from water capacity and it makes portaging a bit tougher. The Juniper Trunk Bag adds a copious amount of space that is just enough to do what I want, but is pretty much out of the way otherwise. 

The bag is simple, yet well designed and made from quality materials. I have found it to be immensely useful already, but I think this Winter that practicality will be amped up even further. Plus, a strap and roll top is something a gloved hand can handle, which is important to keep in mind. 

I'll have a Long Term update on this bag and the Ponderosa Panniers here at some point next year. So, look for that coming here at some point in 2024

Wednesday, November 08, 2023

Review Briefs

 As many of you know, I get in a fair amount of stuff to review and sometimes just to give feedback on/test for others. I figured I may as well shoot a few words this way on some things being currently tested and reviewed by giving a few, brief thoughts on those items. As always, The Standard Disclaimer applies.

Ergon GP1 Evo Update:

I did a "Two Things" post on these grips a while back, but now that I have several rides in using them and one or two on gravel as well, I can finally chime in with my verdict here. 

They are very much like the original grip, but a bit better. A bit better feeling, a bit more forgiving, and a bit better design as well. Nothing "earth-shattering" here, but if you are an Ergon GP 1 user, and you need new grips, these will make you very happy. They didn't "screw them up". These are actually an evolutionary change for the good. 

And if you've ever wondered what the fuss was about, well, while there are a lot of imitators out there, the Ergon GP1 Evo is what those grips are all chasing after, and none have done it any better, or as in many cases, they don't even come close to being what a GP1 Evo is. 

One thing I've found that trips a LOT of people up with regard to an Ergon grip, especially the winged ones, is that they are very position sensitive. You really have to spend some time dialing them in because if you do not, the Ergon grip may actually seem like the worst grip ever. There is a 'sweet-spot' and it pays to search for it, because once you do, it will make all the difference in the world.

State Bicycle Co All Road Disc Brake Calipers:

I posted back in August about my first impressions concerning these brake calipers. (See that HERE) Since then I have ridden these mostly in a loaded (the bike had a fully racked and bagged set up with cargo) state. That, I figured, would test these calipers in a more stressful state than just riding them with an unloaded bike.

First of all, I think it bears consideration that your levers , cable, and housings will have a great bearing on braking feel and performance. As well, so will the way that they are set up, So, there are a lot of variables here that could negatively or positively affect the outcome of the braking performance. 

In my case I was using standard, box-stock brake housing, brass ferrules, and standard stainless steel cables. I have had the pleasure of setting up hundreds of mechanical brake calipers over the years. So, I kind of know what it is I am looking for in a set up. It really makes a big difference in feel and performance, so if you aren't getting what you are after, maybe someone else that has experience with setting up various brakes can help. Just a thought to chew on....

Now, with all that in mind I will say that these brakes are really quite good. I am sure some of my "modulation feel" I am getting is actually losses in the standard cable housing, but even so, the hydraulic caliper makes up for some of that by increasing efficiency in use to the point that I found it very easy to apply more than enough power to haul me and my rig down to zero mph in a big hurry. 

And fine-tuned braking was top-notch as well. So, no "on-off", no modulation feel here. No "super-mushy", low power affair either. But these work pretty much like a lot of drop bar, fully hydraulic set ups will work. And they are really quiet. At least my set up is.

The All Road Calipers are no slouches then, and the most stunning thing is that you can score a pair for a "C note". That's just outrageous, in my opinion. Out of all my bikes, the Shimano GRX brakes are really the only brakes I have (disc brakes) that I would say are really better brakes than these are. But again - The set up, the cables, housings, ferrules, and levers all will affect the outcome, and that is a LOT of variables. So, let's say that the potential for great performance is here

But for a hundred bucks? You could do a lot worse, and many competing products are much more expensive. So, consider these with the advisement that you will need to have good complimentary components in the system to get the most out of the All Road Calipers. 

Ponderosa Panniers:

I wrote the introduction for the Ponderosa Panniers (HERE) earlier this year and since then they have lived on the Singular Gryphon fully packed. Several test rides later, I can say the following....

These are good panniers.Maybe even great ones. I feel like you need to have a set of panniers through a few trips before you can really say any pannier is "great". I will say that the Ponderosa Panniers are trending in that direction though. 

They stay put on a rack, which is job number one for a pannier. Loose panniers really hurt handling, not to mention cause one to wonder how many times you'll have to stop to tighten them up, or if they will just randomly fall off. I'd rather have panniers I never have to worry about at all. The Ponderosa bags seem pretty much like "that" pannier to me. 

These bags have tightening straps to cinch the bags against the rack, which work great. The remaining, extra lengths of those straps are supposed to be rolled up and held in place by two short bits of Velcro material. Nice idea, but in practice these can be knocked loose and then you have a streamer waving in the wind. I'd rather see some other more secure way of dealing with the loose ends. 

I mentioned in the intro that the Ponderosa was hard to mount, and because of that, I never tried taking them off, and I wouldn't on a tour. In fact, I would dread having to do that. Not ideal there. It isn't that you can't mount them, but wow.... Is that a tough thing to do or what? Loaded bags would be almost impossible to do without a companion helping to support the bag while you threaded the upper straps to the rack from behind the rack and between that and the rear wheel. 

Yeah.....

But other than that, the Ponderosa Panniers are very well made, they are easily opened and closed, and they really can be cinched down tight for single track usage or rough road riding. Your contents won't be jostling around in a cavernous space here. I just wish that Old Man Mountain could redesign that upper rack mount to be easier to use which would encourage removal when you need to work on the bike, or allow you to take the panniers off and put them in a tent, for instance.

Notice: There may be long-term updates on any of these items in the future here on the blog. Use the search function in the header to find those posts. 

Friday, September 15, 2023

Friday News And Views

Image courtesy of Pirelli USA.
Pirelli Announces New Offerings In SmarTube Tubes:

Pirelli offers its own version of a TPU tube, tubes that are not butyl rubber, as in traditional tubes, but made from TPU material which is much lighter and can be similar in characteristics to a latex tube but with far better air retention than a latex tube. 

Pirelli announced two new SmarTube offerings, but we are most concerned here with the SmarTube X as it has offerings in sizes for gravel/all-road bikes. 

SmarTube X in the 622-40/622-50 size (fits 40mm to 50mm tires) is three times thicker than the original SmarTube and therefore much more resistant to punctures. yet the tubes are far smaller when stored and take up much less room in a bag or jersey pocket than a similarly sized butyl tube does. 

Available in Schrader or Presta valves, these tubes should provide excellent air retention as well. Currently these are not quite yet available. ETA is set as the end of September. Pricing - SmarTubes are  $39.90/each. 

Comments: I find tubes to be useful in bikes I don't ride often, and I usually carry one on every ride, no matter the bike, just in case. So, these TPU based tubes are pretty nice from that standpoint of space savings, and weighing less. I have tried the Tubolito TPU tubes and have found that they seem to work well. 

Forty bucks a pop is steep, but for the sheer space saving and weight saving benefits, I could see it for someone who runs tubeless and needs an emergency bail-out option that may as well be minimalist if you have to carry that. I also see TPU tubes as being a nice way to get a tubed bike closer to tubeless benefits without going tubeless. You don't get the pinch flat resistance, but other than that, the more robust SmarTube X seems like a decent choice for those not wanting to do the tubeless dance. 

OMM's Basket (Image courtesy of OMM)

A Basket For The Old Man:

Old Man Mountain just released the news publicly about a product they were showing privately at the MADE Show recently. It's a new aluminum basket made to fit most of their current rack line. 

  • Stamped and welded aluminum construction is corrosion proof and designed to last.   
  • Molle compatible: Customize your basket with accessories designed for Molle mounting pattern.
  • Compatible with basket bags designed for “137” baskets.
  • Bolts directly to OMM Divide, Divide Fat, Elkhorn, and Pizza Rack for a reliable and rattle free connection.
I'll admit, I am not a basket guy, so a lot of those specs are lost on me, but if the thing bolts directly to an Elkhorn or Divide rack, then I bet these will be rock solid additions to most any bike. These are available now from Old Man Mountain for $80.00. (As are the Ponderosa Panniers and Juniper Trunk Bag I am testing now) For more on this rack, see HERE
Image courtesy of 45NRTH

45NRTH Risor Wool Gloves:

 I posted about it being "Light Season" earlier this week, and well....glove season isn't far behind! In that vein, I have been sent a press release from 45NRTH detailing a couple of their glove offerings. One of them caught my eye which is named "Risor"

The Risor is a Merino wool blend glove that will get you by on cool, Fall rides, but it's more than that. This is a perfect liner glove for a Winter mitten, or larger full-fingered gloves. So, it can be a three-season use glove and being that it uses Merino wool, it will stay warm even if you sweat it out. Well, mostly, as it does have a synthetic fabric outer layer to it. 

But that combination of fabrics does give a wool blend glove a longer lifespan, in my experience, so that's good, plus 45NRTH have put that synthetic fabric in places where it matters most for wear. I also like the length of this glove for keeping cold air at bay since you would be able to overlap that cuff with a long sleeved jersey, or jacket, or another glove. 

I guess I should also mention that 45NRTH says this glove is touch-screen compatible. In my experience most gloves that claim this are not all that compatible with touch screens, so take that with a grain of salt. But there- 45NRTH says these gloves work with touch-screens. 

Anyway, I always am on the lookout for nice liner-type handwear for cold weather and this glove looks like it is pretty well thought out. You can pick up a pair for $45.00. Plus, if black isn't your jam it comes in a nice light blue color as well.

Image courtesy of Wolf Tooth

Wolf Tooth Offers 12spd GRX Chainrings:

The "johnny-on-the-spot" award for this week goes to Wolf Tooth, who have offered 12 speed replacement rings for Shimano's new 12 speed GRX before almost anyone has even ridden the stuff yet. 

That's pretty amazing! However, the press release I got says that not only can you get 36T-46T round chain rings, but that you can get the same sizes in oval chain rings, plus Wolf Tooth is promising to have an expansion of offerings going up to 52T!

These rings feature Wolf Tooth's "Drop Stop" design and the GRX 12 compatible version is dubbed "Drop Stop ST", so don't mix that up with the various other versions available there for 11 speed SRAM, Shimano, Campy, and the rest. 

52 teeth rings, eh? Will we be seeing a time trial stage at Unbound using aero gravel bikes? HA! You heard it here first! 

Maybe Wolf Tooth could be persuaded to do inner rings for Shimano 2X GRX 12's and then I could get my preferred 46T/36T set up. Hmm.... Anyway, you can check out the details here on Wolf Tooth's site

Gravel with a friend...

Special Guest Gravel Grinding:

Today I should be out on a special ride with someone I haven't seen for many years. That will be going on this morning. Hopefully everything comes together to make this happen.

And you know, there is always the "if factor" and things may not pan out, but "if" they do, I'll have a special Country Views post coming up showing just who this individual is and where we rode. Hopefully.... 

Stay tuned on that one.

In the meantime, have a great weekend and thanks for stopping by to read "Guitar Ted Productions"!

Thursday, August 31, 2023

Old Man Mountain Juniper Trunk, Ponderosa Panniers: Review

Note: Old Man Mountain sent over a set of Ponderosa Panniers, and Juniper Trunk Bag, and a Divide Rack for test and review at no charge to Guitar Ted Productions. I have not been paid nor bribed for this review and I always strive to give you my honest thoughts and opinions throughout. 

Well, this whole bikepacking idea took a turn when back a few weeks ago I got an email telling me that the Juniper Bag and Ponderosa Panniers were available to me for test/review. So, I agreed to have a look and here they are. 

I'm no stranger to the idea of panniers and rack mounted bags. I've done cross-country, self-contained touring before, (it's what we called it before it was called "bikepacking"), and panniers and racks were integral to making that work for me. We carried tents, clothing, food, and other gear on those tours. So, working out of a pannier isn't something I haven't ever done before and I looked forward to getting these Ponderosa Panniers and the Juniper Trunk Bag on my Singular Cycles Gryphon Mk3 to see how this would all work. 

I was informed by my contact at OMM that the Juniper Trunk Bag would not fit on the Elkhorn Rack I already have on the Gryphon, so they sent out a Divide Rack to help me out there. Update 9/12/23: There was some misunderstanding/miscommunication here which led to my previous statement. The truth of the matter is that the Elkhorn rack is not compatible with the Ponderosa Panniers. The Elkhorn Rack and Juniper Trunk Bag ARE compatible. 

Now, let's take a quick look at each component and then we'll see how it all looks once it all is attached to the Gryphon.  
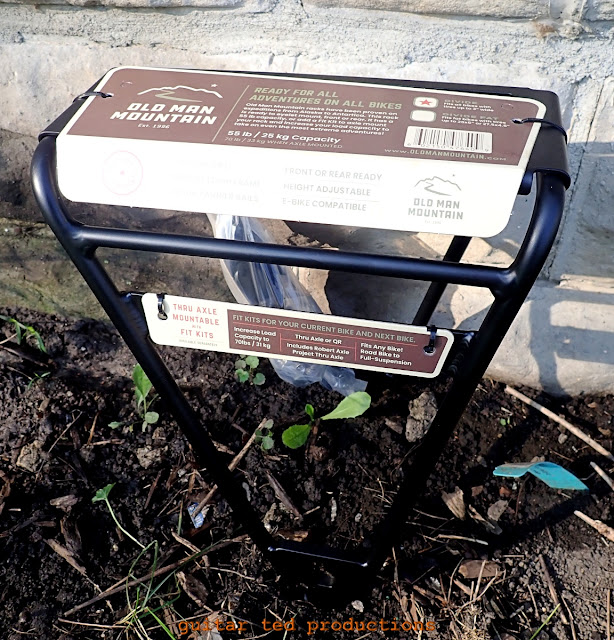
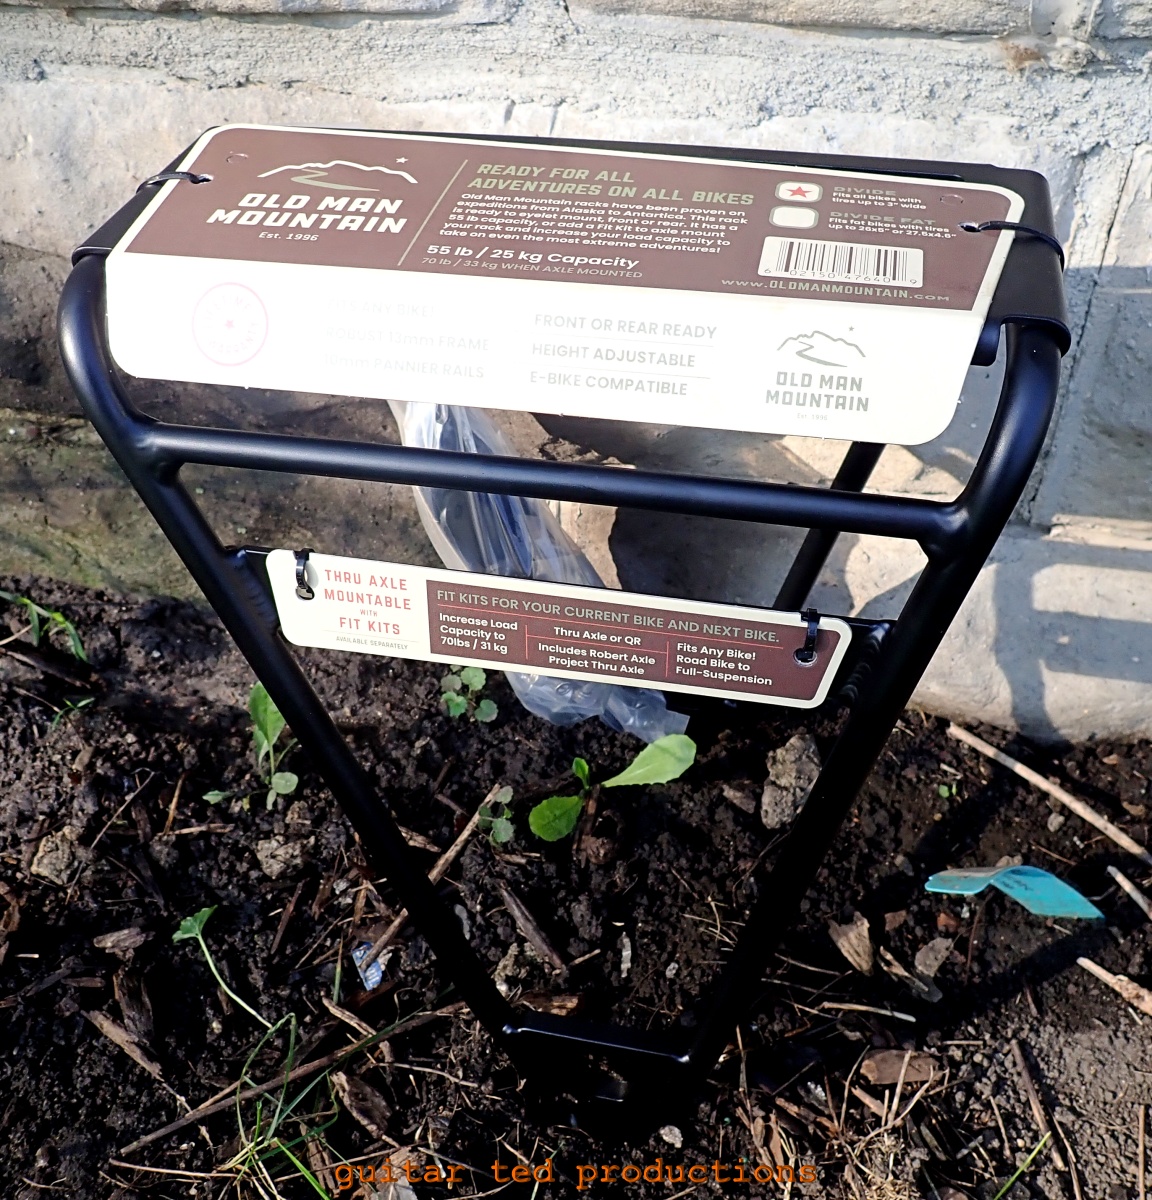
The Divide Rack

The Divide Rack: Okay, Old Man Mountain prides themselves on racks that won't let you down. Translation: This rack is heavy duty and looks bullet-proof. This one weighed in at 700 grams without any stays or hardware. OMM claims that with all stays and hardware it weighs 980 grams. OMM has said this rack has never let them or their customers down and they stand behind it with a lifetime warranty. Oh....and it is rated to carry 70lbs. That's about 20lbs more than most heavy-duty touring racks are rated for load bearing. 

I've toured with big loads using a rack that wasn't nearly this nice. So, I was excited to see this and with all the hardware provided to fit about anything on two wheels, I think this is a pretty impressive bit of kit. 
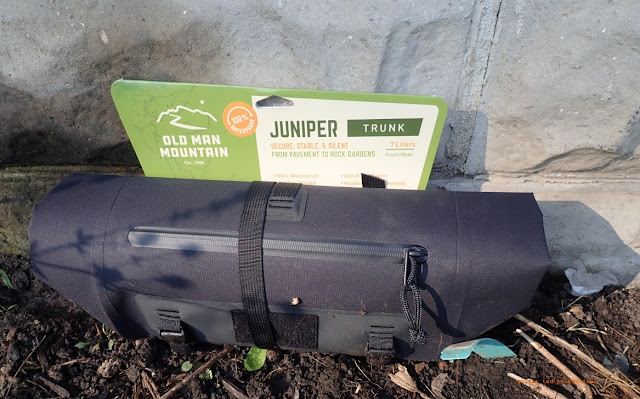
The Juniper Trunk: Think "Big Shopping Bag With Roll Top" and you are there.

The Juniper Trunk Bag: While it looks like a handlebar roll in my image here, it really is a big bag, much like a grocery bag, only made out of 100% waterproof TPU fabric. It's got a side zip pocket, but other than that, it is a simple roll-top bag meant for a rack deck. 
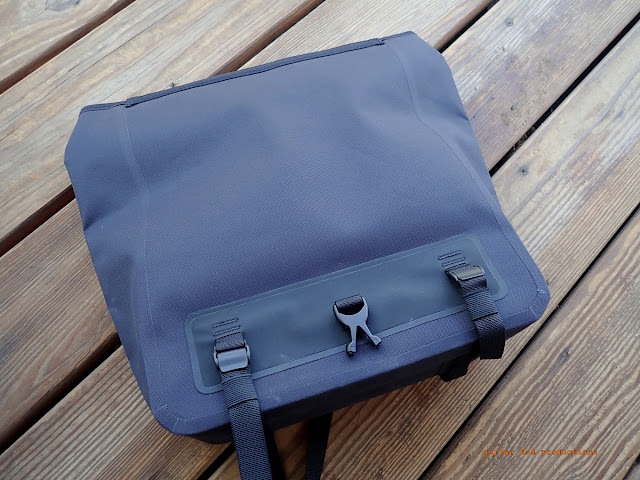
The Juniper Trunk unfurled. It is a 10L capacity bag

 It attaches via four cam-clip buckles and straps which are adjustable. The roll top is secured by straps and buckles over each end of the "trunk" and on one end there is a handy light mount. The Velcro patch is embossed with an OMM logo which is so subtle I didn't see it until I was attaching the bag to the rack. From the OMM site:

  • 10 Liter capacity per bag.
  • Fully welded and waterproof construction made from TPU fabric
  • HypalonⓇ reinforcements at all attachment points are more abrasion resistant and provide extra grip where needed
  • PFAS/PFC free materials
  • Roll top enclosure.
  • Waterproof zipper pocket on the outside.
  • Minimal branding on Velcro patches.
  • Clip light slots on the back.
  • Great fitment on all racks with a deck. Perfect fitment for OMM pannier racks.
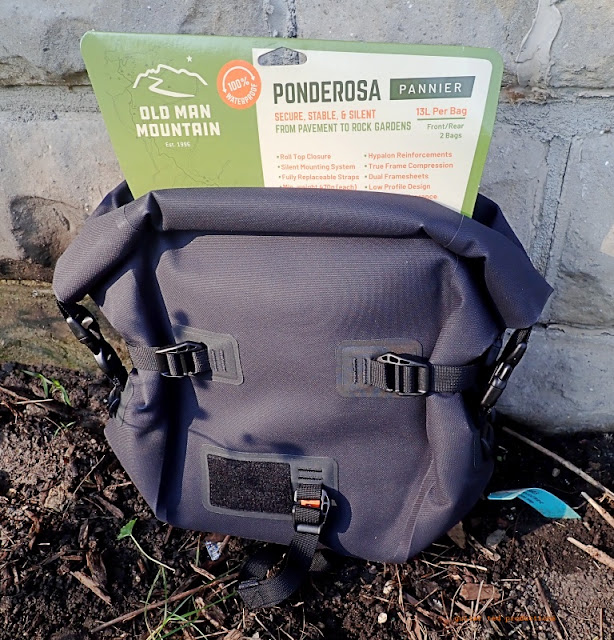
The Ponderosa Panniers

Ponderosa Panniers: Okay, this is the bit that I was most interested in seeing since I have used and worked with many different pannier set ups over my time as a cyclist and shop mechanic. I've seen what works and what is so-so. 
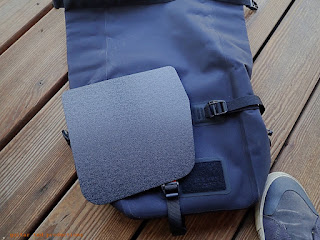
The frame sheet and my foot for size comparison.

The Ponderosa Panniers are made from the same waterproof fabric as the Juniper Trunk Bag and are 13L capacity, per bag, and that's with the top rolled 3 times. The attachment method is done via a cam-action strap mechanism with large Velcro patches to hold everything down while the bottom attachment is a hook and strap affair to keep the panniers from flopping outward on corners or over rougher terrain. 

Inside there are two frame sheets. Basically two pieces of plastic, these give you better compression action and give form to the bags. The outer sheet in each bag is removable if that isn't your jam though. 

The roll-top functions like it does on the Juniper Trunk, but you can decide to arrange the straps to attach over the bag which kind of makes handles for carrying by hand. Might be convenient at times... (See Comments below for more on that) 

  • Removable and replaceable straps
  •  Minimal branding on Velcro patches
  • Lower attachment/compression strap remains under load to prevent bags from flapping around
  • HypalonⓇ reinforcements at all attachment points are more abrasion resistant and provide extra grip where needed.
  • Clip light slots on the back.
  • Great fitment on all racks designed for panniers. Perfect fitment for OMM pannier racks
  • Minimalist weight = 475g (each), 950 grams per pair. Without side compression straps, front framesheet, or side roll top clips.
  • Full Featured weight = 560g (each), 1120 grams per pair

Costs: Ponderosa Panniers: $200.00, Juniper Trunk Bag: $125.00, Divide Rack: $168.00
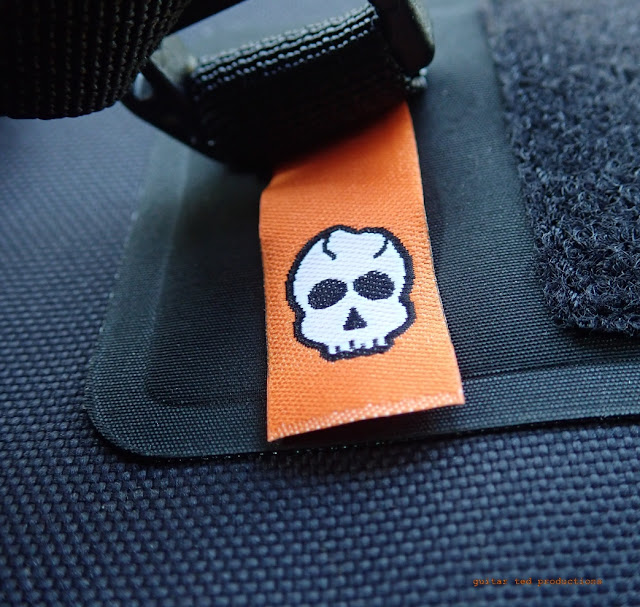
This was hiding under one of the strap attachment points. Hmm..... I have no idea!

Impressions: The quality of all the Old Man Mountain stuff seems to be at a pretty high level. The Elk Horn Rack I was sent last year is solid and shows no signs of weakness no matter what I loaded on it. When I mounted that rack on my pink BMC? Well, my load was a bit much, causing some "tail wag" with that bike, but the Elk Horn was stellar. This Divide Rack, if anything, is even burlier. I suspect I will be impressed with its performance. 

The Juniper Trunk Bag was sent out with the Divide Rack.  Once again, as I was advised that the Juniper Trunk would not be compatible with the Elkhorn Rack I already had. (See UPDATE above) Once the Juniper Trunk was in hand though, I found this statement to be odd. It looked like it would work.....

The Ponderosa Panniers had a different attachment system than I'd ever seen, but I was willing to give it a go. The size seemed perfect for a bag that would stay "out of the way" yet have enough cargo space to prove useful.
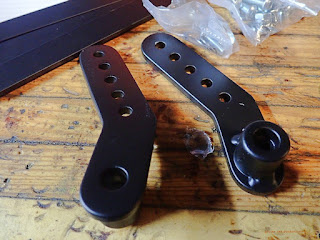
If the hardware isn't in the kit to make it work, OMM sells kits that will work.

 Installation & Comments: Anyway, it was time to start mounting things. The Divide Rack was super-easy to install on my Gryphon. I have 29 X 2.8" tires and the rack mounts on the Gryphon are about an inch or so above the rear dropouts on the seat stays. Still, the clearance was juuussst enough to comfortably clear my Teravail Coronado's. Whew! Close, but not too close.

That said, OMM sells kits to help you fit the rack to almost any bicycle, so there is almost always an option that will make their racks work. Even on dual suspension bikes. Thankfully the copious amount of fasteners, spacers, and washers was enough to make it all work on my bike without extras.
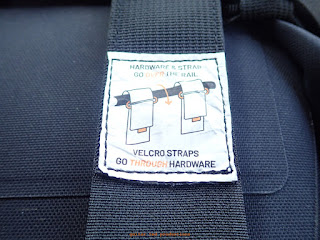
Mounting instructions are sewn into the backside of the bag.

Now with that on and leveled up, I was set to mount the panniers. Interestingly, the strapping method OMM uses with the Ponderosa Panniers requires some dexterous maneuvering to attach the panniers to the rack's cross bar. I quickly realized two things.

 First off, these panniers would be a chore to remove, and then also, they would be a chore to remount, and maybe impossibly so if you had a heavy load in the bag. This is because you have to support the bag and its weight, use one hand to guide the upper loop over the rack's cross bar, and then with the other hand you have to loop the strap through a piece of plastic on the upper loop, pull that through, and then attach its hook and loop material to the hook and loop material on the back of the pannier. So like what? Three hands required? It was difficult enough to hook these up in my shop with empty bags and I cannot imagine trying to do that on a trail with a loaded bag.

With that done the lower stabilizing strap was easily attached. I loaded up the panniers with my sleeping bag in one and clothing in the other. Compressing the load down and rolling the top up revealed a very stable, tight to the rack load that looked like it wasn't going anywhere. So, at least all that hassle with the attachment method was worthwhile. Just don't expect me to remove these bags until I'm all through with them!

Now where to put that Juniper Trunk Bag? Even though I was told that it would not work on the Elkhorn Rack on the front of my Gryphon, I was looking at the rack and at the Divide Rack and thinking, "Why not?" So, I tried it and you know what? It went on fine. While I have a ton of experience with the cam type clips and strapping style attachments, I wasn't 100% impressed with how the OMM ones were working. They are not "bad" in any way,. They work just fine. It's just that if you have used Revelate's cams you will see that there is a difference. It'd be nice to see OMM raise the bar in this area since they are a premium product in the marketplace.

That said, the trunk bag is great and held my sleep pad, an ancient Thermarest one, perfectly with room to spare. I feel good about that since now the pad is protected from the elements and I won't have a dusty or wet pad to deal with once I get where I am going.

And there she be! Fully loaded using the OMM products sent for this review.

A Look At The Set-Up: Here is the final set up. I'll go over everything here to let you know what you are looking at. Of course, the bike is my Singular Cycles Gryphon Mk3 with a three by nine speed drive train running Gevenalle shifters and levers operating Shimano derailleurs and State Bicycle Co brakes. I've also got the Enduro bottom bracket in this bike.

The two-man Sierra Designs tent is on the Divide Rack in that Outdoor Research dry bag with the Ponderosa Panniers on the sides. Up front we have the OMM Elkhorn Rack with the Juniper Trunk Bag up top. On the sides we have one Salsa Anything Cage HD and a State Bicycle Co Cargo Rack on the other both holding a Salsa Cycles dry bag. In the cockpit I have two Bike Bag Dude Chaff Bags and a Cedaero top tube bag. I've got five water bottles to drink from as well. (Option to use seven bottles if I utilize the Chaff Bags as water bottle holders)

First Ride Impressions: To simulate my planned trip, I loaded up the bike with full water bottles, clothing, my tent, sleep system, food, and tools/spares. I maybe didn't have everything there. I might have been missing my stove or something, but I did not inventory my bags, I just know that they were all loaded. Anyway, that's how I rode the bike to test ride the set up. And?

The racks and bags were totally silent, as OMM promised, and they were all rock-solidly attached and they did not waver or seem to move at all. Using panniers may not be familiar to many people these days since the advent of "rackless touring" and the prevalence of seat packs, frame bags, and the like. I had this bike set up previous to this current set up in a "hybrid", rackless/racked configuration. I had the tent in a seat pack and nothing else out back. I had a handle bar bag as well.

The front load isn't really any different than before with the exception of the removal of the handle bar bag and the addition of the Juniper Bag, which is now keeping my sleeping pad from being naked! So what has changed is that now the load weight has shifted a little to the rear, and that rear load is lower, and most importantly, more stable on the bike. This has resulted in a better handling bike with less frame flexing and "tail-wagging" than before.

There is something about a long, big seat pack load that really doesn't benefit handling and makes the bike feel squirrely to me in comparison to a load that is lashed tightly to the bike/racks and cannot sway or move at all. This cannot be ignored, and added with the lowered center of gravity, this is a much more pleasurable ship to pilot than it was before.

I've been cooking up a plan with N.Y. Roll for a sub-24 trip using the bike as set up here. Stay tuned...