Showing posts with label cleaning. Show all posts

Thursday, March 21, 2019

How I Clean My Bicycles- Answering Questions

Back in late January I posted this about how I clean my bicycles. If you missed that, please go back and read it (or re-read it if you need a refresher) before you ask further questions. I may have already answered them there. Drivetrain specific questions were answered the next day in this post. Again- go hit that link and read up before asking me anything else here. Anyway, I have a few new questions to answer since that post, so I thought I'd take the time to answer those now.

The first two are regarding chains. Here's one of them: "Do you strip the packing grease from new chains before using them?"

Answer: Yes. Longer Answer: (Because the follow-up question will be "How?") New chains are coated with......something. In the case of Shimano it seems to be some foul smelling light oil and with SRAM it seems to be a very tacky grease. Some folks will tell you to run the chain with whatever is on it from the package because, "It's the best lube the chain will ever have", or some such nonsense. Being a mechanic, I get to see the results of the "just leave it on" technique all the time. It doesn't work very well. Period.

So, strip the new chain with WD-40 bath, or parts washer fluid that is clean, or an ultra sonic cleaner if'n ya gots one. Then follow that up with a good scrubbing of water and Dawn dish soap with a brush. Make sure you scrub it so clean you'd put it in your mouth with no reservations. I mean clean! Shake the chain dry, blow dry it with a hair dryer, (if you don't have compressed air), and then immediately after drying lubricate the chain with whatever lube you choose according to label directions.

I drip one drop of DuMonde Tech on each chain roller, then I wet a rag with DuMonde Tech and wipe the chain, getting all the outer plates of the chain wet. Then I let it sit for 12 hours before installing it. Your lube choice will dictate what you do. Read the instructions.

Sound like too much work? Then pay someone to do it for you, or accept that your chain won't be the best it could be. Your choices there.

The next question was in reference to how I clean a chain when it is still on the bike. I did answer this to some degree in my first post (link above), but I will address this once again here.

Cleaning a chain is made far easier if you use a chain lube correctly. If you don't, you get a huge mess. If you don't clean your chain often enough, (you will have to use yer noggin' to determine frequency of maintenance for your bikes/riding style/conditions), you will have a mess. With that said......

First check your chain for wear. There is no reason to clean a worn out chain. Just replace it. (Check your cassette too while yer at it, and you very well may need to replace it also) Don't know how to check your chain for wear? Get a chain checker, or Google "how to measure for wear on a bicycle chain".

Now, refer to the image of the drive train here. See the run of chain that comes off the lower jockey wheel of the rear derailleur and which goes to the lower part of the crank? That's the "lower chain run". Now, shift your bike into a combination which leaves the chain as straight as possible. (Single speeders are already there) This will allow you to pedal the drive train backward without derailling the chain. Now, hold a crappy rag in one hand, cup it around the lower run of the chain, and spray on some degreaser, keeping the over-spray controlled with the rag so it doesn't get all over the place. (You maybe should put on some Nitrile gloves first before doing this. Sorry!) Spray downward through the chain allowing gravity to work for you. Backpedal the chain as you work through the cleaning procedure until you've shot the entire chain with degreaser. (Use whatever you are a believer in. I use WD-40 most often) Now set the degreaser down, clamp that rag around the lower section of chain with a light grip, but firmly, (if that makes sense), and carefully backpedal the chain through the rag. Be careful not to allow a loose end of the rag to get entangled in the chain/cassette!

Do the above a few times, then maybe work a brush through the chain links. An old toothbrush is brilliant for this job. Then I follow up with another blast of degreaser and wipe down with the rag. Wipe down the chain several times with a clean rag then lubricate with your favorite lube.

Dirtier than that? Need a cassette and crank cleaned? Stay tuned.............

How I Clean My Bicycles- Answering Questions

Back in late January I posted this about how I clean my bicycles. If you missed that, please go back and read it (or re-read it if you need a refresher) before you ask further questions. I may have already answered them there. Drivetrain specific questions were answered the next day in this post. Again- go hit that link and read up before asking me anything else here. Anyway, I have a few new questions to answer since that post, so I thought I'd take the time to answer those now.

The first two are regarding chains. Here's one of them: "Do you strip the packing grease from new chains before using them?"

Answer: Yes. Longer Answer: (Because the follow-up question will be "How?") New chains are coated with......something. In the case of Shimano it seems to be some foul smelling light oil and with SRAM it seems to be a very tacky grease. Some folks will tell you to run the chain with whatever is on it from the package because, "It's the best lube the chain will ever have", or some such nonsense. Being a mechanic, I get to see the results of the "just leave it on" technique all the time. It doesn't work very well. Period.

So, strip the new chain with WD-40 bath, or parts washer fluid that is clean, or an ultra sonic cleaner if'n ya gots one. Then follow that up with a good scrubbing of water and Dawn dish soap with a brush. Make sure you scrub it so clean you'd put it in your mouth with no reservations. I mean clean! Shake the chain dry, blow dry it with a hair dryer, (if you don't have compressed air), and then immediately after drying lubricate the chain with whatever lube you choose according to label directions.

I drip one drop of DuMonde Tech on each chain roller, then I wet a rag with DuMonde Tech and wipe the chain, getting all the outer plates of the chain wet. Then I let it sit for 12 hours before installing it. Your lube choice will dictate what you do. Read the instructions.

Sound like too much work? Then pay someone to do it for you, or accept that your chain won't be the best it could be. Your choices there.

The next question was in reference to how I clean a chain when it is still on the bike. I did answer this to some degree in my first post (link above), but I will address this once again here.

Cleaning a chain is made far easier if you use a chain lube correctly. If you don't, you get a huge mess. If you don't clean your chain often enough, (you will have to use yer noggin' to determine frequency of maintenance for your bikes/riding style/conditions), you will have a mess. With that said......

First check your chain for wear. There is no reason to clean a worn out chain. Just replace it. (Check your cassette too while yer at it, and you very well may need to replace it also) Don't know how to check your chain for wear? Get a chain checker, or Google "how to measure for wear on a bicycle chain".

Now, refer to the image of the drive train here. See the run of chain that comes off the lower jockey wheel of the rear derailleur and which goes to the lower part of the crank? That's the "lower chain run". Now, shift your bike into a combination which leaves the chain as straight as possible. (Single speeders are already there) This will allow you to pedal the drive train backward without derailling the chain. Now, hold a crappy rag in one hand, cup it around the lower run of the chain, and spray on some degreaser, keeping the over-spray controlled with the rag so it doesn't get all over the place. (You maybe should put on some Nitrile gloves first before doing this. Sorry!) Spray downward through the chain allowing gravity to work for you. Backpedal the chain as you work through the cleaning procedure until you've shot the entire chain with degreaser. (Use whatever you are a believer in. I use WD-40 most often) Now set the degreaser down, clamp that rag around the lower section of chain with a light grip, but firmly, (if that makes sense), and carefully backpedal the chain through the rag. Be careful not to allow a loose end of the rag to get entangled in the chain/cassette!

Do the above a few times, then maybe work a brush through the chain links. An old toothbrush is brilliant for this job. Then I follow up with another blast of degreaser and wipe down with the rag. Wipe down the chain several times with a clean rag then lubricate with your favorite lube.

Dirtier than that? Need a cassette and crank cleaned? Stay tuned.............
Tuesday, January 22, 2019

How I Clean My Bicycles

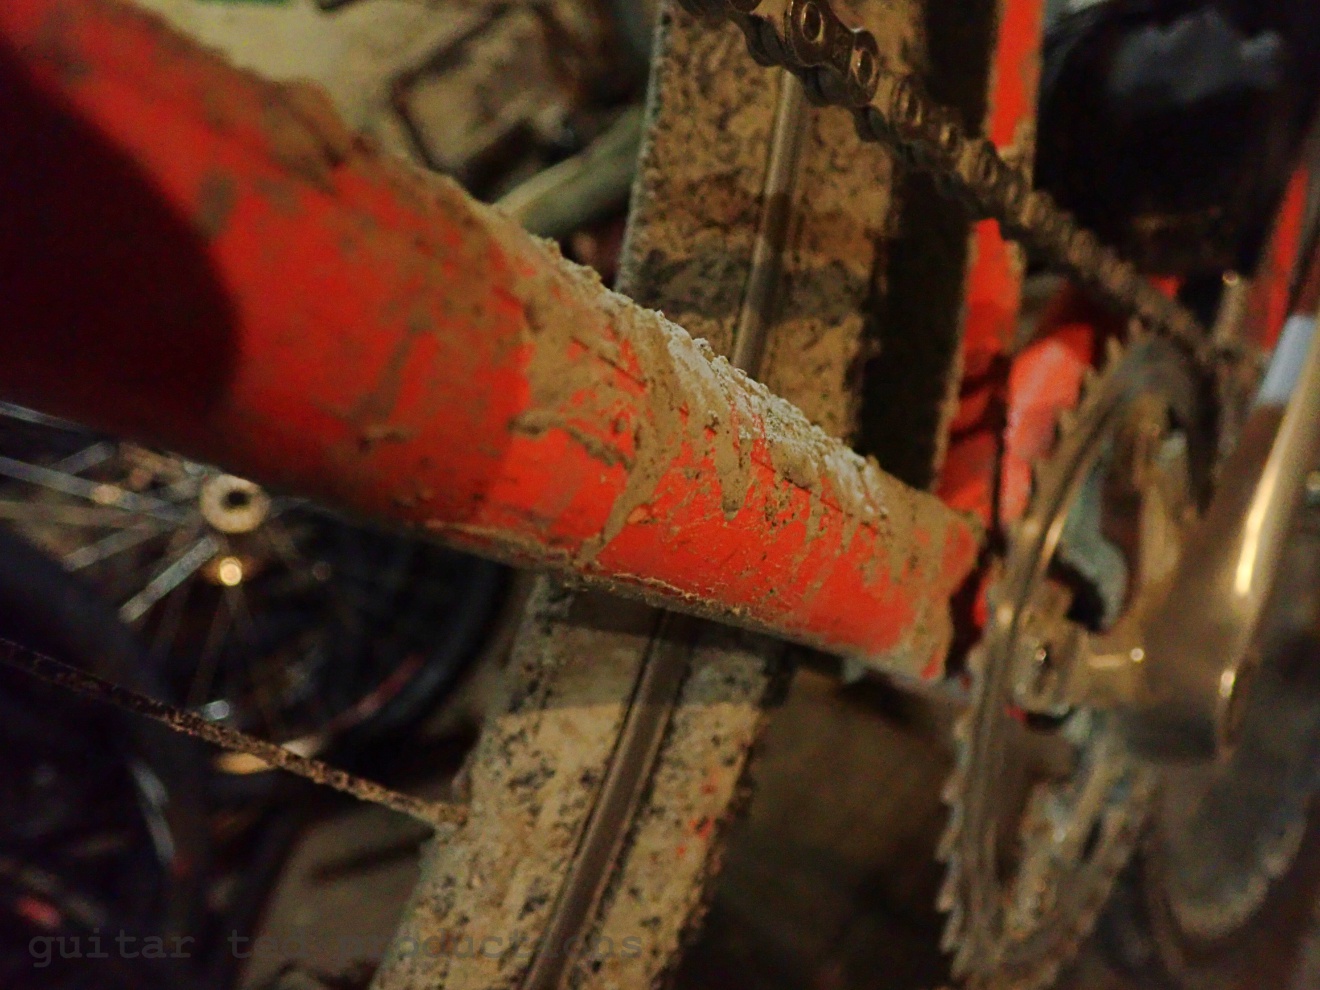
I'd already started cleaning the chain and crank set before I thought about this story!
I was down in the Lab doing some maintenance and set up when I remembered that one of you readers out there had suggested that I might tell you all how I clean my bicycles after they get all dusty and dirty from gravel riding. Of course, this thought appeared in my mind only after I had started cleaning the Orange Crush rig from the mud and grit it had accumulated over a few wet country rides. But that didn't stop me from making this post! So, here following are my unconventional tips for cleaning a filth ridden bicycle that has been treated poorly and put away wet.

First though, I need to tell you that these techniques have been honed over the span of 27 years. That's a LOT of dirty, filthy bicycle cleaning. Also, keep in mind that I am a mechanic and that "pristine finish" preservation is waaaaay down on my list of priorities. If you want to keep your bicycle looking perfect- don't ever ride it. And certainly, don't read the following tips. They aren't for you.

So, over the years of cleaning, not only my own bikes, but those I get in at the shop, and those from past shop gigs, I have developed one, major cardinal rule, never to be messed with.......

Don't Ever Use Water To Clean Your Bicycle!

Yep! Never, never ever, and don't spray anything on your bike with a hose. Spray bottles are okay. I stay away from any of that if I can help it though. So, you are probably wondering how I ever get a bicycle clean. Well, it's easy, actually. I just don't let water anywhere near my bicycle, unless it rains, it is snow, or I ride through a puddle. Water rusts, corrodes, and gets in places you cannot see it hiding. The absolute worst bikes for water intrusion I have ever worked on were almost always bicycles which were meticulously cleaned by their owners with water from hoses, buckets, or whatever it was they did. Water ruined their bottom brackets, head sets, wheel bearings, and cables. Keep water away from your bicycle and guess what? That cannot possibly happen to you, that's what.


Secondly- if you get your bike muddy or dirty, let that stuff dry out first! It will be easier to get off, in most cases, and believe it or not, you'll be less likely to scratch your finish. Wet, gritty mud takes the shine off your finish far easier than dried out dirt and mud do. Typically I end up knocking off dried up mud with my fingers, a soft cloth, or soft brush. In fact, in the instance above, which is my Black Mountain Cycles "Orange Crush", I used a soft brush and a t-shirt torn up into rags. That's it. Nothing else.


So, there is the result. Clean and shiny! That took less than three minutes to do, by the way. Now after doing that, I might come in afterward with some Pedros Bike Lust. It cleans up remaining dust, and like they claim, it leaves a protective coating behind which does make future cleanings much easier. Plus it helps your bike and parts "glow" which is something a lot of other cleaners do not do.

So, you may have some fine dust left over, but a spritz of Bike Lust will knock that right off.
I generally do not spray anything directly on a bicycle to clean it, not even Bike Lust, but instead, I spray some directly on a rag, then apply it. That way you keep overspray from infecting certain things like disc brake pads, or rotors, which can contaminate easily.

Now, there are a LOT of tight places in and around a bicycle. Bottom brackets, front derailleurs, wheels/hubs, and around brakes, just to name a few. I use the t-shirt shreds, spray some Bike Lust, or in extreme cases, some other stronger cleaner, on the strip, and then thread the t-shirt strip through the "tight spots" and use it like dental floss to wipe away grime, dirt, and mud. A soft bristle brush can be employed in and around spokes, hub flanges, and other tight spots to scrub off stubborn bits of dirt lodged into tight corners.

Now, I've used TONS of different degreasers, cleaners, polishes, and elixirs on bicycles, but Bike Lust is the best of the lot. It even breaks down many greases, cleans off bug guts, and dried worms are no match for this stuff. It just cuts through like most other cleaners only wish that they could. So, you may have, (and you probably do), a favorite cleaner or degreaser. I understand. However; I don't want to hear about it unless you know it is better than Bike Lust. I doubt that it is.

You may also wonder how bad my finish must be. Well, keep wondering. It looks perfectly fine for a bicycle drug through the knothole more than once in the eight years I have owned it. My other rigs all get cleaned similarly. No one notices any oddness in my finishes in relation to their own rigs. Plus, scratches and biffs only add character to your bike. A little dulling of the finish, if there is any, (I can't tell), only adds to the patina.

That's pretty much it. I usually keep a cleaning under a half an hour, but sometimes in extreme cases it can take longer. My post-2015 Dirty Kanza clean up (the "Mud Year") took hours! But that is the exception, not the rule. I usually don't have to take anything off the bike either. Not even the wheels. It just goes a lot faster that way, and look......I'd rather ride than clean. But it is super cold here, snowy, icy, and gravel riding isn't going to happen for a bit. Time for maintenance! So I am cleaning up the fleet a bit and sprucing up a couple of rigs.

Got questions? Hit me up in the comments section.

How I Clean My Bicycles

I'd already started cleaning the chain and crank set before I thought about this story!
I was down in the Lab doing some maintenance and set up when I remembered that one of you readers out there had suggested that I might tell you all how I clean my bicycles after they get all dusty and dirty from gravel riding. Of course, this thought appeared in my mind only after I had started cleaning the Orange Crush rig from the mud and grit it had accumulated over a few wet country rides. But that didn't stop me from making this post! So, here following are my unconventional tips for cleaning a filth ridden bicycle that has been treated poorly and put away wet.

First though, I need to tell you that these techniques have been honed over the span of 27 years. That's a LOT of dirty, filthy bicycle cleaning. Also, keep in mind that I am a mechanic and that "pristine finish" preservation is waaaaay down on my list of priorities. If you want to keep your bicycle looking perfect- don't ever ride it. And certainly, don't read the following tips. They aren't for you.

So, over the years of cleaning, not only my own bikes, but those I get in at the shop, and those from past shop gigs, I have developed one, major cardinal rule, never to be messed with.......

Don't Ever Use Water To Clean Your Bicycle!

Yep! Never, never ever, and don't spray anything on your bike with a hose. Spray bottles are okay. I stay away from any of that if I can help it though. So, you are probably wondering how I ever get a bicycle clean. Well, it's easy, actually. I just don't let water anywhere near my bicycle, unless it rains, it is snow, or I ride through a puddle. Water rusts, corrodes, and gets in places you cannot see it hiding. The absolute worst bikes for water intrusion I have ever worked on were almost always bicycles which were meticulously cleaned by their owners with water from hoses, buckets, or whatever it was they did. Water ruined their bottom brackets, head sets, wheel bearings, and cables. Keep water away from your bicycle and guess what? That cannot possibly happen to you, that's what.


Secondly- if you get your bike muddy or dirty, let that stuff dry out first! It will be easier to get off, in most cases, and believe it or not, you'll be less likely to scratch your finish. Wet, gritty mud takes the shine off your finish far easier than dried out dirt and mud do. Typically I end up knocking off dried up mud with my fingers, a soft cloth, or soft brush. In fact, in the instance above, which is my Black Mountain Cycles "Orange Crush", I used a soft brush and a t-shirt torn up into rags. That's it. Nothing else.


So, there is the result. Clean and shiny! That took less than three minutes to do, by the way. Now after doing that, I might come in afterward with some Pedros Bike Lust. It cleans up remaining dust, and like they claim, it leaves a protective coating behind which does make future cleanings much easier. Plus it helps your bike and parts "glow" which is something a lot of other cleaners do not do.

So, you may have some fine dust left over, but a spritz of Bike Lust will knock that right off.
I generally do not spray anything directly on a bicycle to clean it, not even Bike Lust, but instead, I spray some directly on a rag, then apply it. That way you keep overspray from infecting certain things like disc brake pads, or rotors, which can contaminate easily.

Now, there are a LOT of tight places in and around a bicycle. Bottom brackets, front derailleurs, wheels/hubs, and around brakes, just to name a few. I use the t-shirt shreds, spray some Bike Lust, or in extreme cases, some other stronger cleaner, on the strip, and then thread the t-shirt strip through the "tight spots" and use it like dental floss to wipe away grime, dirt, and mud. A soft bristle brush can be employed in and around spokes, hub flanges, and other tight spots to scrub off stubborn bits of dirt lodged into tight corners.

Now, I've used TONS of different degreasers, cleaners, polishes, and elixirs on bicycles, but Bike Lust is the best of the lot. It even breaks down many greases, cleans off bug guts, and dried worms are no match for this stuff. It just cuts through like most other cleaners only wish that they could. So, you may have, (and you probably do), a favorite cleaner or degreaser. I understand. However; I don't want to hear about it unless you know it is better than Bike Lust. I doubt that it is.

You may also wonder how bad my finish must be. Well, keep wondering. It looks perfectly fine for a bicycle drug through the knothole more than once in the eight years I have owned it. My other rigs all get cleaned similarly. No one notices any oddness in my finishes in relation to their own rigs. Plus, scratches and biffs only add character to your bike. A little dulling of the finish, if there is any, (I can't tell), only adds to the patina.

That's pretty much it. I usually keep a cleaning under a half an hour, but sometimes in extreme cases it can take longer. My post-2015 Dirty Kanza clean up (the "Mud Year") took hours! But that is the exception, not the rule. I usually don't have to take anything off the bike either. Not even the wheels. It just goes a lot faster that way, and look......I'd rather ride than clean. But it is super cold here, snowy, icy, and gravel riding isn't going to happen for a bit. Time for maintenance! So I am cleaning up the fleet a bit and sprucing up a couple of rigs.

Got questions? Hit me up in the comments section.