Showing posts with label shop. Show all posts

Wednesday, December 11, 2024

Fixin' A Wheel

The Tamland with the temporary wheel
 Last Summer I was going round and round with my Tamland's Roval wheels and figured out that the noise I was hearing was some of the spokes getting loose due to unwinding nipples. 

I temporarily solved the issue by using an old wheel I had sitting around. However; I wanted to save that Roval wheel somehow and I thought maybe rebuilding it would be the way to go. 

However, straight pull spokes are expensive, and buying a minimum of 32 of them, (what one wheel would need) was going to be costly. So, since the spokes were really not the issue here, I decided that maybe I had nipples that would work to replace the red alloy DT Swiss nipples the wheel had originally. 

I searched for some brass DT Swiss nipples I knew that I had but there were only 26 nipples in that little box. Hmm.... I started digging through my stash of wheel stuff and I found these red alloy nipples I had saved for years. They had come from a wheel off a Raleigh Rush Hour track bike. If I recall correctly we were tasked to remove all the alloy nipples for the customer right away when the bike was purchased and replace them with brass nipples and different spokes. Anyway, I hadn't found a use for them all these years. 

Oddball red alloy nipples.

As I recalled these nipples were weird. They would not thread on Wheelsmith spokes as they had a slightly different thread pitch. I usually use Wheelsmith spokes, so that was maybe why I still had not found a home for these red nipples. 

I had no good idea what the spokes were in the Roval wheel but my guess was DT Swiss. (And no - I did not check the head for a stamp) I grabbed a red nipple half expecting it to not work when hey! It went on!

Now I have plenty of these nipples, so I started going through the Roval wheel one spoke at a time. Unwinding the old nipple, putting Wheelsmith Spoke Prep on the threads, and then installing with the red alloy nipples from the old Rush Hour track bike. 

The new nipples are longer, which I guess is 'good', assuming that the nipple has a bit more support. The thing is, the old, I assume DT Swiss nipples, had a hex head inside the rim portion that was hidden from view so the support thing may be a wash. 

Straight pull spokes are a bit weird because they usually have to pierce a thicker "flange" so they tend to be a bit longer than you might expect. These are 300mm and 302mm in length for this rear wheel application. 

Plus, they can spin while you are tightening up the spoke nipple. There is no "J" bend to work against, so I have to kind of tension them up by applying sideways pressure which jambs the nail head and helps prevent the spoke from spinning until you get enough tension for that to hold the spoke immobile. 

While I have two tensionometers, I am doing initial tensioning by plucking the spokes and matching pitch. I'll go through and do a final tensioning with the tensionometer at the end. But in my experience, it probably will need only very minor adjustment. 

'Spose I should do some cleaning too.

This will save the rear wheel, use the spokes I have without having to purchase new ones, and get this wheel back on the Tamland again. 

It is important to save this wheel because I don't have much for quick release wheels anymore and less that are suitable for a gravel application. These are pretty light wheels as well as being thematically similar in color scheme to the Tamland, so they kind of look at home on that bike. Those red painted DT Swiss Aerolite spokes are definitely unique! 

So, that's but one of the Winter projects I have in mind to do this Winter. I'll be busting out more as the season rolls along. Hopefully I get around to everything I have in mind to do. That will depend on the weather we get, of course. 

Stay tuned.....

Saturday, October 30, 2021

Foul Weather Projects

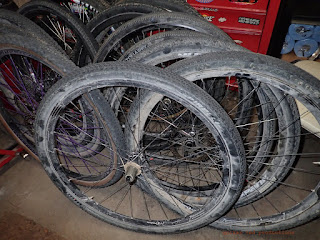
Finding storage for these is one of but many tasks for the foul weather days ahead.
 This past week has been filled with rainy days. "Too wet to plow", as the farmers used to say. So, riding has been mostly off the menu and that leaves me with a lot of time on my hands of late. 

That means that I had to find something to do. There is only so much 'sitting around' that I can tolerate in a day. This prompted me to start in with some much needed, long put off projects in my 'shop' in my basement here at Guitar Ted Headquarters. 

I have already set my double arm work station 90° from where it was, cleaned out a corner that had accumulated a bunch of tires and wheels, and I have uncovered my tool box I brought home when I switched jobs in late 2019. Then I swept some of the floor, gathered together a pile of wheels I need to figure out storage for, and I am making plans for some ceiling mounted 'hooks' to do that with. Then it will be on to two other corners of the shop, a work bench clearing and cleaning, and then who knows what. 

I also have a couple of odd-ball bike ideas to tackle and I have one idea which, if I can pull it off, will be pretty weird, but rad. I don't know exactly how I am going to approach that idea yet, but I am pretty excited about what it could turn out to be. 

Anyway, I have a lot lined up for those days when it is just too nasty out to do any meaningful riding. Hopefully I don't get around to all of it because, well, I'd rather be riding. But these are things that would make the quality of shop life around here better and clear up a lot of space in the doing of those tasks. 

Stay tuned......

Tuesday, October 22, 2019

Getting My GRX On

The special gravelly derailleur of  Doom and Destruction!
The other day two big boxes showed up with a bunch of Shimano stuff inside of it. Shimano had contacted me recently to get me on a GRX group and to give my opinions on it. This was unexpected and I am flattered that Shimano wanted me to try this out and give my opinions.

So, that will all be on RidingGravel.com in the near future. That's all good, but this did create a lot of work for me down in the Lab. But first, before that, I had to pick a bike to put the stuff on and then actually pick the stuff I wanted from the GRX group.

So, I chose the Noble Bikes GR5. Since that bike is not compatible with a mechanical front derailleur, I went with the GRX 1X mechanical group. I could have gone Di2, but Riding Gravel already is reviewing that stuff. So, 1X was what was on the menu. That meant I had to go down that path which meant a 11T-42T 11 speed cassette. I got a 42T drive ring. I have hydraulic brakes there. Annnnnndddd.........the Noble GX5 has internal cable routing. 

Gah! I was not too stoked. Why did I pick the Noble GX5? I could have chosen a lot easier bike to cable up, that's for sure. Well......it is what it is, right? I figured it would be a long process and I'd likely cuss and stuff. You know the drill if you are a mechanic. Get out your magnets, fish wires, and dig down for all the patience you can muster.

I also had the unique situation where the Noble GX5, as I have posted before, was equipped with a Wheels Manufacturing thread-together bottom bracket where generally you see a press fit type style bottom bracket. The thing here is that this bottom bracket has an unusual sized 16 point tool that you need to use to install and remove it. I didn't have that, so I put one on order. That is one thing that will put the completion of the build off a bit.

Shimano hydraulic levers connect at the lever on a new build.
So, I was down in the Lab off and on all day Monday working on this build. I figured I would just get done what I could get done. I avoided the internal routing nightmare as long as I could. In my mind, the hydraulic line would be the worst thing. Shimano connects the caliper to the hose on new builds, so the hose had to be routed from the back up to  the front. So I shoved the hose into the port on the chain stay and waited to see what would happen. I had the "door" off the bottom bracket shell, and the hose popped out there. Not too surprising, since most chain stays are ported, not completely hollow. The down tube was where I figured things would get gnarly. I found the groove in the bottom bracket area, shoved the hose in, and.......it popped out no problem! Huh. How about that!

Well, the Noble GX5 has only one more cable to go. The rear derailleur cable is fully internal from near the head tube to the back of the right chain stay. Okay.....here goes nothin'! I shove the cable in, there is a bit of resistance, which I figured was the cable rolling up against the bottom bracket. Well, I ran the cable till it went into the lever, and then I looked back and.....what! There was the cable dangling out the end of the chain stay! Hallelujah! 

That was the easiest internal cable route job I've ever done. Bar none. So, the Noble GX5 just went way up on the scale of bikes I like. It is how all those internal cable routed jobs should have been all along.

Now I have to get my hand on that bottom bracket tool and I'll be pretty much on my way to finishing this rig up. I'll have a run down on the bike once I get the thing done. There might be a surprise or two for some of you when you see what I have here. Stay tuned........