Showing posts with label Resolute 700 X 42. Show all posts

Wednesday, February 28, 2024

Brown Season: Sometimes Things Just Work Out

Things look pretty sad at Harold Getty Lake
February and shirt sleeves and shorts are not things you associate together in Iowa. Mexico? South America? Maybe there you might be thinking that is a normal association, but not in the Mid-West. 

That said, I rode on the 26th and the 27th in shorts and a t-shirt. That just ain't right, in my opinion. Cool? sure, but it is rather concerning. That and the lack of moisture. I've thought we were in for a doozy of a year in terms of a drought last year, but this year came in and said, "Hold my beer....

Things could turn around this Spring, and I sure hope that they do, or all I will be writing about all year is "Brown Season". Okay....maybe "Dust Season", that might actually work better. Again, I sure hope that I am wrong, but as of now, things look pretty dire out there.
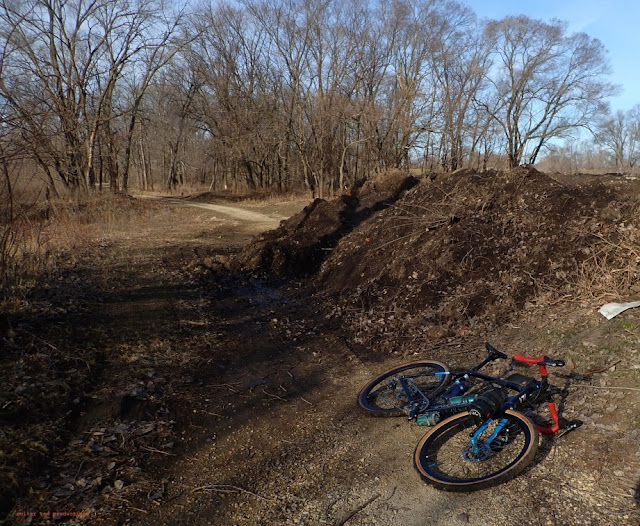
While this may look like a pile of dirt, it is actually melting snow underneath that duff.

I really did not feel like riding Tuesday at all. But I also could not live with myself and let this unprecedented weather pass without some sort of bicycle ride. Today it will struggle to get into the 30's, which, is about normal anyway for February, but Monday it was 74°F here and yesterday it was about 65°F before the winds came up around 2:00pm and the long slide downward overnight happened. We ended up being in the single digits!

Anyway, so I did not feel like riding, but I got kitted up anyway and headed over East thinking maybe I'd hit those B Roads over by Washburn. Maybe I'd feel better then and ride more gravel. I had time. I left the house by 8:30am. 

I had a special cargo in that dry bag attached to the OMM Axle Pack.

I decided to bring along a canister of coffee for a stop later on. I slid that into a dry bag and that attached to the cargo carrier which was attached to the Old Man Mountain Axle Pack. I figured on finding a bridge or somewhere suitable for a sit-down coffee break that morning.

The roads around here are already a mess with the bridges being repaired and replaced downtown. I was going to use the riverside bicycle trail, but I got shunted off onto an alley parallel to the Cedar River. Then I ended up on a street that led me to the Riverview Recreation Area which used to be a wild area called Mitchell Sand Pits. 

I was just fine with a ride around Harold Getty Lake and then heading back home. Plus there were lots of lakeside benches strewn along the shoreline that might make for a good coffee sipping spot. Or even better, that shelter house with picnic tables. So, I headed down the dike and onto the double-track path around the lake. 

Before there were Yeti's, there was the Thermos.

I knew that the shelter with picnic tables was located at the point where I would be leaving the lake. That was quite a ways around from where I was starting at. I was in no hurry to stop before then, but this certain bench near a fishing jetty called out to me somehow.  I stopped and sat down on a wobbly bench with my ancient but functional one-pint Thermos. It was relatively calm so the water was like glass. The sky was blue and there were a few clouds. The breeze was light. I found myself in a nice, peaceful state......

Does it really get any better than this?

I sat for, oh.....I don't know, a long time it was, for sure. It was great with very little to distract me and I meditated on a few things while I sipped my coffee in the Sunshine. Finally, I drained the last of it and was about to leave when suddenly to my right I saw movement on the lake.

Two ducks and a large, white swan (?) glide across Harold Getty Lake.

This large white bird was gliding across the surface of the water. At first I thought it was alone but then I noticed the two ducks in front of it. They made for a strange procession across the lake until the ducks disappeared and the white bird turned and headed back to the middle of the lake. 

I watched in silence and took a couple images. Then I decided it was time to head back to the house. On my way past the shelter, I realized why the bench by the jetty had attracted me. There were two pairs of men chatting away there and another cyclist. I would have found no peace had I went straight to the shelter for coffee. 

Right about this time I noticed something going on with my rear tire. A whomp-whomp-whomp! with every rear wheel revolution. Hmm...... I stopped to investigate it.....

My WTB Resolute developed a tread separation.

I noticed a bump in the tread and a distortion of the casing. Oh! This was bad! My tire casing and tread were separating and air was getting in between the casing and the tread, causing a bulge. This tire was about to blow up and when that happens? You're pretty much done. 

I had this very thing happen when I was down at the DK200 one year during a course pre-ride with my friend Tony and a few others. Between us all, I was able to boot the tire, put in a tube, and we taped the tire to the rim with black electrical tape! It worked long enough to get me home. This time I had no boot or tape, so if the Resolute failed, I would be walking. 

I managed to get about half way home at a snails pace, not wanting to risk a rear blow-out at any significant speed. Then I felt like the bulge was getting worse, so I dismounted, let out some air, and walked the remainder of the way home. 

Just think if I had decided I needed to go all the way out into the country and then have this happen? Things kind of have a way of working out for the best sometimes....

Friday, August 20, 2021

Friday News And Views

 New WTB CZR Wheels:

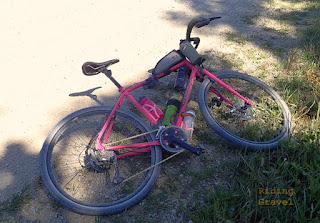
Tuesday news dropped that WTB had released some new carbon rimmed wheels. Well, as things would have it, RidingGravel.com was chosen to pre-ride/test a production set of wheels ahead of the launch date. (Insert Standard Disclaimer) I ran these at first on the Noble Bikes GX5, but as Gravel Worlds approached, my plan was to use the wheels there, so I swapped them over to the pink Black Mountain Cycles MCD. These wheels are shod with WTB Resolute tires as well, which are some of my favorites.

I'm pretty fortunate that I've been able to ride on these for almost a month now. Riding Gravel was one of only a few sites that were given this opportunity, so I am very grateful for that as well. I figured that before this review is over, what better venue to use them at than Gravel Worlds? If I can manage to complete the 150 mile ride, it will provide quite the test for these wheels, which is what the readers of Riding Gravel deserve. 

So, I've got my work cut out for me! I'll have a new post up on Riding Gravel after the event, but I also will be sharing more about these wheels, and the other stuff I used, after the event report next week. 

Gravel Worlds Weekend: 

So, as you read this I probably am riding on my way to Gravel Worlds with Tony, who I've made this trip with several times before. We're going to give this 150 mile deal another whirl, and see what happens, plus see some people we have not seen in almost two years or more. 

You've followed along as I've gotten everything dialed in and now it is time to put that all to the final test in the Lincoln area on some fine Nebraska gravel roads. I've been here before, so there isn't much I haven't seen before. 

That said, they managed a few newer roads and I see many, many turns on the cue sheets. The course is almost a double loop affair with the tie in at Branched Oak Lakes for the only checkpoint which we will go through twice. It is a unique affair, but given these times, it makes sense to use one place and keep costs and chances of exposure to COVID minimized. Such crazy times.....

What this course does that other Gravel Worlds courses never did before is keep us out of the headwind for long stretches at a crack. I can recall going - more or less- 50 miles into a headwind at a couple Gravel Worlds. The longest single stretch before a turn this year is 5 or 6 miles and that happens once. Most turns come at about 1-2 mile intervals. I always notice how many turns the cues say to make in ten miles. Most times for Gravel Worlds 2021 that number is 5, a couple more times it is six, two more times it is double that for town navigations, and one time it is 3- coming out of Lincoln to start- and there are a few with more than 6. 

That all to say that we will be in and out of headwind situations due to the loops all day. That is if the wind doesn't switch up on us! But I like that this gets broken up instead of taking a big, long push into some headwind during the heat of the day. That's brutal! 

After I return on Sunday I will start writing up my report, which typically takes three to five days on the blog to unload on you all. So, you can expect some images, stories, adventure tales, and maybe a story about my finish. But don't hold yer breath! At least on that part about finishing. I've tried this event eight times before and have finished one of those times!

My 2006 On One Inbred 29"er as it sits today

Remember When 29"ers Were Weird?

The old 29"er. Most folks don't even bat an eyelash when they see 29"ers anymore, or even think that 29 inch wheels were once oddball and 'revolutionary'. But.....that they were!

I was reminded of this when a commenter brought up some questions this past week in the comment section regarding the On One Inbred. The Inbred, one of the first British 29"ers you could get, was kind of an outlier. Most bikes from Britain at the time with fat tires were decidedly 26" wheeled. This American idea of using 700c format rims with 2" tires was 'daft', as they might say over there, or maybe they said worse. Probably worse. 

Anyway, this comment I received led to an old screen shot archive of On One's website, circa 2006, where the idea of 29 inch wheels is discussed. For context, 29"ers were, at that time, still really weird, and there was a pretty big push-back against the wheel size from many places. Vendors and brands were pretty sure this 'fad' was going to die. many said they would "NEVER" make a 29 inch wheeled MTB (Specialized, Giant, Yeti, to name a few) 

The blurb from the On One webpage for the 29" Inbred circa 2006. (From the "Wayback Machine")

So, obviously 29"ers grassroots support finally pushed all the major and second tier brands to do 29'ers. The aftermarket components followed, and now 29 inch wheels are 'no big deal'. But what all that did back in the 00's was make bicycle companies and industry partners very wary of missing "The Next Big Thing®".  So, when the 650B thing came around, the industry wholesale changed enduro bikes and long travel MTB's over to the slightly bigger wheels. They didn't wait for a 'grassroots' movement. Same thing with gravel, and e-bikes (HPC) rigs. 

Sales obviously matter, but without 29"ers the industry - perhaps - would still be reticent to move off anything not traditional in terms of cycling. New trends like electrified bicycles, gravel bikes, and the like might be still-born ideas if it were not for the way that 29"ers broke the mold of 'sameness' in the industry which had been in a rut since the mid-90's. That being the time when mountain bikes finally figured out what they wanted to be. 

New Podcast Episode #88

The Riding Gravel Radio Ranch rolls out another episode and just in time for your trip to Gravel Worlds- (or other places). Andy, of Andy's Bike Shop, and I discuss the news and the gravel scene. 

I'm pretty stoked that the podcasts have been rolling out on a fairly regular basis since the beginning of 2020 when we were working on Episode #40. This after the podcast had been in existence for four years! That's not a very good average number of podcasts per year! 

I think it is safe to say that we've improved on that number since then!

Okay, I'm off for my adventure, but I have scheduled posts for Saturday and the "Trans Iowa Stories" post will also appear Sunday. See ya on the other side.....

Thursday, August 05, 2021

Project Wide Gravel Wheels v2: Update

 Okay, it's been a while since my last update and I wanted to bring this up to speed with those who may have been wondering what is up on the PWGWv2 thing. My last update was directly after I got the wheels built and tires mounted which you can go back and see if you want by clicking this link

First off- a correction: I mentioned that the Resolute tires looked narrower than the ones on my Spinergy GX wheels. Well, that was because those tires on the Spinergy wheels were NOT Resolutes! They are the very similar looking Teravail Rutland 700 X 47mm tires! Those were covered in gravel dust and so I didn't see the patch on the side wall telling me they weren't WTB tires. My bad. Sorry for any confusion that may have caused. 

Secondly, the Resolutes I put on the Spank rims went on with much difficulty. Not so much in the initial mounting, but in seating the bead into the bead socket of the rim. See, Spank uses a sort of serrated bead socket designed to hold the tire there when you choose to ride with low pressures. That in turn makes the bead not want to sit into the side of the bead socket so well. I had a devil of a time seating the tire correctly, and since then I have noted something else which I believe is related to that rim's bead socket feature. 

The Resolutes now measure at right at about 45mm. A full 3mm wider than they should. At first, that was not the case. They measured around 43+mm. I think the beads are now pushed outward all the way and that in turn has given me the results I was hoping for here. Anyway, I still haven't ridden the dang things yet! 

That's because I have had a few other things in the hopper to do first. And....it may be a while before I get to this. Gravel Worlds has taken priority now and doing anything else with wheels and tires is off the radar for the time being. But that said, I have gotten the front hub converted to 12mm through axle and these wheels are ready to go right now. I'll be getting them ridden as soon as I can. 

I'll likely also be swapping over the Teravail 47mm tires at some point to see what these rims do to those tires, and afterward if they will fit anything I own! The only bike that has a chance is the Black Mountain Cycles MCD, I reckon. So, stay tuned! More on this project will be coming soon and after many miles, an analysis of what I think about such a wide rim on a gravel bike.

Wednesday, September 16, 2020

Big News Day: Salsa Cycles & WTB

 Yesterday was a big news day in cycling for new product with Salsa Cycles announcing a new mountain bike platform and WTB announcing new puncture protection gravel tires. First up, let's take a look at the news from Salsa Cycles from my viewpoint. I'm sure y'all have seen the news splashed across social media and endemic news sites already, so I'll spare the techy bits here. And as always.....

NOTE: Large doses of "my opinion" will be handed out in gloppy dollops today. You've been forewarned.....

The Cassidy aluminum frame-only option.
Okay, with that out of the way, here's what I think about these new full suspension rigs. The Blackthorn and the Cassidy are, for all intents and purposes, basically modular platforms, both being capable of being set up similarly. Only the basic spec of parts would be different here. A switch of a linkage sets and the rear shock yields a 140mm or 165mm rear travel bike. So, you can essentially buy one of these, the spare linkage sets and rear shock, and have the ability to tune your suspension for wherever the heck you want to ride. 

Versatility in wheel size is also there, as the new bikes accept 27.5+ and 29" wheels. So, although the bikes are spendy, you can, with a little extra coin, get two bikes in one basic platform. Nice. 

I'm not real big on the new 'long/slack' geometry that 'new-school' mountain bikes use. It isn't very Mid-West friendly, for one thing. Since that's where I ride, the whole new geometry thing is kind of lost on me. However; I can see the application for real mountain biking. I have ridden in places where bikes like these would make a ton of sense. For those that live in such places, bikes like the Cassidy, especially, make a lot of sense. 

The Blackthorn 140mm travel bike.

But in my opinion, the mountain biking situation is becoming much like the skiing industry. Why buy when you can rent? Going to Colorado, Utah, or Arizona? How about NorCal or even Pisgah or The Kingdom Trails? Why drag a bike from the Mid-West that, for one thing, doesn't work well here, and just rent one out there that is tuned for the riding there? Especially when three years from now, likely sooner than that, your shocks will be requiring overhauls and, more than likely, will be outdated by some new standard or feature set. 

And how about that SuperBoost, speaking of standards. Yeah..... Makes me want to buy a new bike, for sure..... Plus, in many ways, owning a big full suspension rig like this here seems like an equivalent to owning a Toyota TRD Tundra and never driving it off-road. I mean, it seems sorta useless to my mind when a rigid hard tail gets you everything you really need here. Especially with the poofy tires and wide rims we have now. 

OR- Where are all the Mid-West friendly designs Salsa used to make? It seems that the pendulum of geometry has swung hard over to the steep, long sight-line, manicured trails side. Anyway.......

Now as for the WTB thing.... They introduced a new technology for their tires, not any new tread patterns, just to clear up any confusion there. WTB sent me three sets of the SG2 infused tires about a month ago now.

I mounted the new SG2 Raddlers on the Orange Crush.
First of all- the newsy bits, techy stuff, and first impressions can be found here and here on Riding Gravel. 

Now for the opinions: It's about dang time WTB offered a puncture protection option. This has been an Achilles heel for the brand for many years. While all the other brands offered this, WTB suffered from folks having issues and puncture protection probably would have saved them a few customers. Oh well.... At least they offer it now.  

I like the way they added a supple casing and puncture protection to keep the ride feel basically the same as the 60TPI tires, which rode pretty well. WTB tires are not the smoothest riding, by any stretch, but typically those very smooth riding tires have their own issues and I've experienced them first hand. You can do a lot with air pressure and a tire like the new SG2 WTB tires which allow you to get that smoothness without the rest of the hassles of thin cased tires run tubeless. 

RidingGravel.com got three sets of tires- one set of Resolutes, one Raddler, one of the Byways. So far I am really liking the Byways, but that may be because they are the new ones to me. I put those on the G700 FLO Cycling wheels and I am really liking this combination. The Resolutes are.....Resolutes. I like Resolutes a lot. But the main thing is that they have that puncture protection belt. That's what is nice. If you need peace of mind or if you just like better air retention, or both. 

Oh, and the Raddlers? They are a curious tire. WTB and others have been sporting some models which seem to be more about trail riding than gravel/back road riding. The Raddler would fit that mold, to a degree. It isn't necessarily a bad tire for the Mid-West, but you can sure do a lot with less, as in the case of the Byways. The Raddler seems to my mind a tire best suited to Winter-ish riding around here, but that may be just me. 

More soon. 

Note: WTB sent over the three models of SG2 gravel tires to Riding Gravel for test and review at no charge. We were not paid nor bribed for this review and we always strive to give our honest thoughts and reviews throughout.

Monday, September 09, 2019

Tubeless Maintenance How-To

You're set up tubeless? Great. Do you know about maintenance for tubeless?
Tubeless tires are ubiquitous in gravel and MTB circles these days, but not everyone is running tubeless yet, and many who are don't know about maintenance of tubeless tires. If this describes you, read on. If not, then head on over to your next stop on the internet. (Unless you are just curious about how I do this)

Of course, just having your tires set up tubeless isn't the end of your concerns for your tires. Tubeless set ups require a sealant to seal the tires and to ward off any puncture issues, (hopefully) from sharp objects like bits of glass, thorns, or goat heads, for instance. That said, you can still get a tubeless tire to fail in any number of ways, (Which, by the way, would slay most any tubed tire anyway, so going tubeless doesn't get you a "get out of jail" card, so to speak)

I'm not going to give you the reasons to go tubeless, this article assumes you already have been over that road. No, this is going to give you some ideas on why, and then how, maintenance is done of tubeless bicycle tires. This mostly has to do with sealant, so let's talk about that briefly.

Bicycle tires could be made so they do not need sealant. I've tried those, and, for the sake of brevity, I'll just say you really don't want to go there! Why? Weight. Nuff said.

So, tubeless bicycle tires need sealant. This is typically from two major families of sealant products. There are the latex based sealants and the glycol based sealants. Examples of both would be Stan's and Slime, respectively. The carrier in a latex based sealant is typically ammonia, but in a glycol based sealant it is, well.....glycol, which is a liquid from the same family as your automobile coolants.  Glycol based sealants for bicycle use aren't common, and they act differently than the latex sealants do. Since latex is, by far and away, the most commonly used bicycle sealant, I will be focusing on maintenance for that type of sealant.

Tools needed: A valve core remover and a cable tie, (or Orange Seal dipstick, as shown)
Latex sealant is great stuff, when it is not dried up. Oh......maybe you didn't know, but your sealant has a service life. Typically this can be anywhere from three months to as long as six months. This depends upon the sealant brand, frequency of riding, and temperatures both while riding and where you store the bike. There is no "hard and fast" rule or service interval for sealant. It will vary with everyone. This is why you need to check your sealant levels. I typically go about three months in before I check on my tires. Here's how to do this.
  • Tools: First you'll need to have a small width cable tie at least 4" long, a valve core remover, and your air inflation device. (See image above for a visual on the core remover and cable tie/dip stick)

Valve stem at the "six o'clock" position.
Then you'll need to, preferably, hang your bike so that you have no weight on the wheels. Next, you should put the valve stems at the "six o'clock" position, make sure the wheels don't rotate freely from this position, and leave the bike hanging for at least three hours. This allows the sealant- if there is any left- to pool in the bottom of the tire underneath the valve stem.

Once the time has expired, we can safely assume any sealant has migrated to the bottom of the tire underneath the valve stem. then you should open the valve, release as much air as you can- but do not squeeze or touch the tire at all!  This and having no weight on the tires is VERY IMPORTANT so you do not break the seal on the bead/rim interface.

Once the air is mostly out, remove the valve core. I like the Park Tools VC-1 since if the valve core is tight, or gummed up with sealant, you can use a 10mm box end wrench to turn the tool without handling the tire. Hopefully you don't need to do that, but just in case, a tool like the Park one that allows for extra leverage of some sort could be helpful. Bonus: The Park tool also removes Schrader valve cores as well. So if you are running tubeless with those valves, the Park tool will work there as well.

Once you get the valve core out, examine it carefully. As stated, most latex sealants use ammonia as a carrier which is corrosive to rubber and metal. Also, there are two places on a Presta valve core which must seal correctly to make the valve air tight. If your valve core is corroded, or if those rubber, (or in some cases, plastic) seals are damaged, or look "collapsed", then just pitch them and put in a new one. Valve issues are a big reason for tubeless problems and you don't want to be chasing down a leak-down issue and find out it was your valve core. Valve cores can typically be purchased at most good bike shops, or on-line. Get some and make sure you do not re-use a corroded core, or one with used up seals. It isn't worth it. One more thing- Obviously the rest of the valve can get corroded and nasty looking at some point as well, but it is much more common to see a bad core first.

Once I cleared off the old sealant from this core, I found it to be okay. Note the white plastic seal.
Now lets take that cable tie, or use that dealie that Orange Seal sells with their sealant, and use this as a "dip stick" of sorts. Make sure the cable tie serrations are intact. The Orange Seal dip stick has these, by the way. Then insert the end of the cable tie carefully until it hits the bottom, which will be the inner carcass of the tire directly underneath the valve stem. Whatever pooled sealant s there will adhere to the cable tie and when you remove the cable tie, you can determine how much sealant is left, if any. Obviously, if it comes out dry, well then- you'll be needing sealant!

I used the Orange Seal "dip stick" to check my fat bike tires.
 In my estimation, if you see less than 1/4" wetness on your cable tie, you need to add sealant. You can introduce sealant in any number of ways, but most sealant brands have small bottles meant for re-upping sealant and will have clear tubes, or nozzles on the bottle that allow you to cleanly introduce new sealant through the core-less valve stem. I use a syringe set up from Effetto Mariposa since I do a ton of tubeless tire set up/maintenance here. I also mix my own sealant, using the "MG Formula" developed by my good Brother from another mother, MG. (Of course!) Here that is, (because I KNOW yer gonna ask)
  • Three heaping table spoons of Latex Mold Builder 
  • Four ounces of Purple Power windshield washer solvent.
  • Mix THOROUGHLY
  • Makes enough for two 29" X 2.4" tires. 
  • Adjust for smaller/larger tires to taste. 
I checked two of my bikes over the weekend. Obviously one was the Ti Muk 2 with the 26" X 4" Cake Eater tires. The other was the Black Mountain Cycles MCD rig with the 700 X 42mm WTB Resolutes. I found that the Cake Eaters had a little bit of wet sealant yet, but it was only about a 1/8th" on the "dip stick". So, I introduced about 60cc's of sealant into each tire. I could have rechecked then, but I am assuming that will get me by. NOTE- These tires were set up the second week of June, ridden fairly regularly, typical hot weather, and stored in a cool environment. 

The Resolutes were set up at the end of May and I found that they still had about a 1/4" sealant pooled at the bottom of each tire. That bike was ridden pretty consistently through June and July but then it was in the cool, dark storage for the month of August. 

Again- your mileage may vary. I just give you my examples as a data point to chew on.  

Despite running quite a bit in hot weather for a couple of months, the Resolutes didn't need sealant.
 So, if you don't need sealant, or if you had to introduce some, you then, obviously, have to put that valve core back in, or replace the old one with a new one. I cleaned up my old ones, which were new three months ago, and replaced them. Then aired up the tires, and I was good to go after that. 

That pretty much covers your maintenance issues with tubeless that will be the most common, recurring ones. You might, after some time, need to replace the valves. Depending upon your frequency in changing tires, you may need to re-tape your rims. But those things are far less commonly needed.  

Once again, I know I may have missed something you think I should have covered. Maybe I am not as clear as I could be on some points. Perhaps you just have a question you'd like answered. Well, if any of those are true for you, please hit me with a comment here or e-mail me at g.ted.productions@gmail.com 

Okay, I hope that helped someone out there. Thanks again for reading. 

Monday, June 17, 2019

Ready Or Not

This coming weekend I am signed up to do this century on gravel starting in the little village of Malcom, Nebraska. It's called the "Solstice 100" and, as you may recall if you are a regular reader here, that was the event I was supposed to have gone to last year when my truck's gas tank fell out. That made it so I had to miss the inaugural event, but this year, hopefully, nothing of the sort will prevent me from at least getting there.

Once I get there, and at the starting line, who knows how it will all go. 100 miles in one go will be about three times the length of my longest ride this year. Well......maybe I've done 40 once or twice. Whatever. It is what it is. All I'm going to say is that this year has not been the year for long rides and weather has thrown a wrench in the works more times than I can count.

The bike, at least, will be dialed in. I'm going to be taking the Black Mountain Cycles MCD with me and it is all set to roll. I was thinking I may have to swap out wheels on that bike, but now I don't even have to do that. The Spinergy GX wheels I just reviewed on RidingGravel.com normally would have to go back, but Spinergy has allowed me a bit longer time with them. That was extra nice of them since now I don't have to peel off the WTB Resolutes I mounted up on those wheels and stick them on my Irwin wheels. The last thing I want to do is swap out tires a week ahead of an event. In fact, you shouldn't change anything a week ahead of an event. Although I've certainly been guilty of that before.

I made one significant change recently.
I did swap out the saddle though. I had been running a Brooks C-17 on it, then I swapped out to try the Tioga Undercover saddle. That turned out to be just too narrow for my posterior. So, I went to the "tried and true' choice, a WTB Pure saddle. My ride last weekend pretty much settled the debate on saddle choice. The Pure is still the one for me. I like those Brooks saddles as well, but the Pure just does not have any nits to it that I can find. It just plain works. The C-17's can be a bit ouchy sometimes because on long rides that shape chafes me at times. But it is good and I'll continue to use them.

 I probably will add another Bike Bag Dude Chaff Bag to the mix, but otherwise, this is the rig. Oh....I may rig up a cue sheet holder. The Solstice has GPS or cue sheet navigation, but since my GPS doesn't do turn by turn, (or- more likely- I cannot figure out how to get it to do turn by turn), so I'll be using good ol' cue sheets, I guess.

So, a bit of light riding the rest of the week and Friday I'll be heading down to see MG and do the Solstice. (No.....I won't forget my shoes)