Showing posts with label Tubeless. Show all posts

Tuesday, May 12, 2026

Review: Stan's Sealant Injector & Universal Valves

 Note: Stan's Sent over several bicycle products for test/review to Guitar Ted Productions at no charge. Guitar Ted is not being paid, nor bribed, for these reviews. All opinions are Guitar Ted's. 

I used the Stan's products sent to review to set up these tires tubeless.
A couple of weeks ago I introduced a bunch of Stan's products. A couple of those were tubeless specific things like the Universal Valve Stems, the Sealant Injector, and the sealant, of course. 

I had decided to set up some different tires on my Fargo Gen I. Since I was going to do that it provided the perfect opportunity to use a few of the new Stan's products I have in. The wheels needed to be prepped first, so I cleaned up the inner rim well and laid down some new tubeless tape. Then I used the new Stan's Universal Valves. 

It should be noted that these wheels are not tubeless rated wheels. This did not seem to complicate things, but it could in certain cases. Unless you have extensive tubeless set up experience, I would not recommend doing what I have done. Best to stick to known tubeless ready certified items.  And of course, if you are not well versed in tubeless set up there are a lot of online tutorials and your local bike shop mechanic where you could possibly gain some wisdom. 

These Universal Valves have a base which sits proud of the inner rim well a fair amount, but there is a good reason for this. Instead of a single, outward facing bore, the base of the valve stem has two holes facing horizontally in alignment with rim well and two which are 90° to the rim well and face the rim's side on each side. There is also a fifth hole facing outward as a traditional tubeless valve would have. Ostensibly this should provide more air flow and an easier tubeless set up. 

The base also has an oval, and conical shaped rubber piece which sits above the very base of the stem.  This should seal off the valve stem hole. It's supposedly a one-size fits all solution, and I guess it is okay. As long as it seals up, (right?), it can be whatever shape they want to make it. 

The rest looks like standard fare, but there is one hidden feature in the valve stem nut. It has a 'o' ring installed in it which provides a bit of friction you can feel when installing it. This is there to prevent unintentional loosening of the nut. I cannot say I've ever had a valve nut loosen, but perhaps I am a lucky guy in this respect.  

The valve installed. The arrows are indicating two of the four air outlet holes in the valve base. 

 Alright, now let's talk about the Stan's Sealant Injector. I've tried various hacks and purpose built sealant injectors over the course of my nearly 20 years of setting up tires tubeless. The Stan's injector follows the form of a few of the other older injectors I have used but with a couple of notable differences. 

Lube bottles for size context.
First off, everything about the Stan's injector is bigger. The body, the bore of the nozzle, and the capacity are all much larger than any other purpose built injector I have seen or have used. 

The Stan's Injector also has this funky rubber end which is angled and fits over a standard tubeless valve stem. This is handy for times when you are adding sealant through a valve bore with the core removed. I was going to add my sealant before I finished mounting the tire, so I didn't think I'd need the funky black rubber end. (Stay tuned on this point)

The injector can hold up to 150ml of sealant. This reflects the trend for bigger tires on almost every tubeless set up these days. I think it is smart. The gradations are very clear and easy to read. They also are a separate applied film/sticker which I also like. Gradations printed directly onto the body of most injectors tend to fade away over time leaving you guessing. 

We'll see how the Stan;'s gradations hold up over time, but this is a feature which has been missing from products like this for a long time. A small thing maybe, but a detail I appreciate.  

Okay, back to that black nipple thing-a-majig I decided not to use. Big mistake. Generally speaking one can draw up sealant into an injector and it stays inside the injector until one depresses the plunger. Not so with this Stan's injector! The sealant practically runs right out as if you were pouring it from a pitcher. 

You'll want to use this. Trust me....
Back on with the rubber nipple! Ha! Seriously though, it stopped the free-running of sealant from the injector and everything went a lot better afterward. 

One more thing about the injector. Clean-up is a breeze. You can pull everything apart easily. Since the bore of the nipple, injector body, and tubes is larger over all, it makes for easier clean up. This will make the injector last longer. I appreciated this as well. 

A Word About How Inflation Went: 

The tires aired up pretty easily with my SILCA pump. I have to believe the air flow from the valve stem was a high enough volume that it made this set up go a lot better than it would have with a standard tubeless valve stem. 

Of course, tire/rim interface has a lot to do with this, but I do really feel the valve stems were a difference maker here as the tires I used were a bit looser on these rims than I typically find these days while setting up stuff tubeless. 

Overall Impressions: 

The valve stems are good. Those extra ports are good for some more push outward on the tires from the inside, making a tubeless set up a bit easier. The valves have press-on aluminum caps which are fine. They are functionally unnecessary, but they complete the look here and that is worth something, I guess. 

I'm most impressed with the sealant injector. Overall it is an improvement even if the black nipple is a bit weird, at least it keeps sealant where it should be while you are setting up a set of tires. The ease of clean-up is perhaps my best liked part of using this tool though. It means it should last in great shape for a longer period of time then the other dead injectors I have in a drawer in the shop.  

I'd give the nod to all three products used in this test. The sealant, injector, and the valve stems. So far so good. I may come back with a longer term look at these items if I find anything else notable to share.  

Tuesday, November 11, 2025

Schwalbe G-One Overland Tires 700 x 50mm: Final Verdict

 Note: Guitar Ted was gifted these tires by a friend for his Singular Peregrine Mk4 bicycle build. Guitar Ted is not being paid, nor bribed for this review. Schwalbe is unaware of this review and have no input in the content here. All opinions are Guitar Ted's. The introductory post can be seen by clicking HERE. A follow-up to the introductory post can be read HERE


I've been riding these Schwalbe G-One Overland tires on tons of shorter rides on all sorts of surfaces. Most of my previous impressions still stand. I will take this final look at the G-One Overland as an opportunity to add just a couple of notes to my impressions previous to this post.

First. the G-One Overland tires have not stretched one little bit since I measured them after mounting. These tires stubbornly have stuck at just a hair under the claimed 50mm width. I'm not saying this is a negative, but I am saying this is surprising. Most tires stretch a bit for a week or two before settling into what they will be for width. Not so with the G-One Overlands.

 The noted stiff casings of the G-One Overland tires worked better at lowered air pressures for me, but they never "broke in". I was a bit disappointed in the ride quality toward the end of this review because of this. The Hutchinson Touaregs did break in after several rides, a tire very similar to the G-One Overland. 

This was most notable when sharper hits from chunkier gravel were encountered. Also when cracks or broken pavement was encountered. The damping just was too harsh. It hasn't improved, and lowering the air pressure didn't help with this either. So, I went back up a few psi for speed, so at least there was this benefit. 

The wet weather I was hoping to test in? It never materialized at an opportune time, and now this area where I live is headed back to a moderate drought status. So, it is dry. The G-One Overland really does well when it is dry, so this was good. 

Final Verdict: This is a "good" tire overall. It is a great tire if all you care about is going very fast in the dry. I'm not crazy about the ride quality overall, and having all this volume and weight seems a waste if the tire doesn't damp out everything well. The G-One damps out some of the higher frequency stuff, but those sharper hits? No. 

I do appreciate the ability the G-One Overland tires have for air retention, their toughness, and their grip on dry dirt and gravel. These tires are remarkable on pavement as well.  

In the end, I don't think the value is there in the G-One Overland. Sure, it's a fast tire, but in most every other sense it is merely average on gravel. The 50mm WTB Resolutes ride better than these tires do, and the WTB tires have SG2 puncture protection belts in there, so it is more apples to apples than not.  

I'll probably swap my SOMA Cazadero 700 x 50mm tires with TPU tubes into this bike and park the Schwalbe G-One tires for now. If this says anything to you, you might understand what my final verdict on the G-One Overlands means to me. 

Saturday, October 11, 2025

Two Things

Five years worth of sealant pulled from a 26" x 4" tire.
 Sprucing Up The Ti Mik 2:

This job I had to do had been hanging over my head now for a couple of years. I kept putting it off because it is not a fun job. Last year I just shrugged, put more sealant in, and said to myself, "I'll get around to it next year for sure.

Actually, I knew I was long overdue to peel off the tires, clean out the sealant, replace valve stems, re-tape the rims, and reinstall everything with new sealant.  

Like I said, it is a big job, and with my having to replace the oil in my Rohloff Speed Hub as well as doing the tires, this became a major deal. Fortunately pulling off the rear wheel was made easier since the cables to run the Rohloff are attached to a metal box which when the shifter is put on "7" allows me to unscrew a thumbscrew, remove the box where the cables enter, and keep the hub indexed. The front has its own difficulties because it is a dynamo hub and I have wires to disconnect via spade connectors. 

Well, as you can see here, the sealant was dried up and came out in almost one pull. I had the rear tire cleaned out in well under 15 minutes. Not as bad as I was expecting it to be! The tape job, installing a brand new valve  stem, and re-installation of the rear  tire went pretty smoothly. I was a bit surprised the Cake Eater tire went on so well after being on the bike for so long. 

Replacing the oil in a Rohloff hub is pretty easy if you've done it once, and by my count, this is the fifth time I've done it. Gotta keep this hub running smoothly and well for many more years! As for the connectors on my dynamo hub, I'd sure like to get some of those fancy co-axial connectors, but I haven't done this as of yet. It would be easier to get the front wheel off, but then again, I do not take this wheel off very often. So, maybe it is a "why bother" situation. 

Image seen on Facebook
In The "Nothing Is New" File:

I follow several bicycle related accounts on Facebook, (it isn't all garbage if you can stay disciplined), and once in a while you end up learning something. In this case, it is an adaptation for a specific niche in cycling which has found its way into gravel events over the years. 

As you can see, this Bianchi cross bike is fitted with a factory installed pair of bosses which were meant to have this sling attached to them. This allowed the rider to portage the bicycle through ravines, across streams, and up or down steeps, back when cyclo-cross was not run on manicured courses with artificial barriers. 

I also noted the geometry of this bike, which is quite a bit unlike today's cyclo cross bikes, is something which looks good for gravel. And why wouldn't it be? Early cross bikes essentially were converted road bikes. The geometry was still fairly slack in the times before the mid-20th Century, and was exactly what would work with a gravel rider.  

But what about "aero" and frame storage and wireless, blah, blah, blah? Well, maybe we don't really need all that stuff. 

Something to think about. 

Monday, April 28, 2025

Stan's Biobased Bike Care Products: Review Intro

NOTE: Stan's sent the Biobased Bike Care Products, Stan's Exo-Core valve stems, and Stans DART tool for review to Guitar Ted Productions at no charge. GTP is not being paid, nor bribed for this post and all opinions are Guitar Ted's.


 Stan's  recently introduced a new line of "biobased" products and sent a suite of these to me here to check out. The products are centered around lubricants, maintenance, and cleaning. I also received a set of Exo-Core valve stems and a Stan's Dart tool with the accessory handlebar mount. 

I will be breaking out separate reviews on several of these products and accessories over the next couple of months. This post will get you acquainted with what I have and I will let you know what my plans and expectations are for each product. 

Stan's had Whistler Performance Labs develop lubricants and oils by manipulating the biomaterials and their properties into products for your bicycle. They claim these products will not harm the environment if/when they get washed off your bicycle. All products are USDA Certified Biobased and come in bottles which are 100% recycled "sea plastic". The grease, lubricants, and oil are products of Canada.

Lubricants: Let's get into the lubricants first. While Stans may not be the first name you think of when it comes to grease and chain lube, they hope to make a mark with the following offerings.

First up we have Stan's Biobased Wet Chain Lube. ($13.00 USD) This is intended for mixed to wet conditions and has a unique "Emulsifite Technology". This is a feature which allows you to clean your chain after the lubricant gets dirty by spraying it with water. This allows you to re-lube the chain again.

 Next we have, (obviously) the Stan's Biobased Dry Lube. ($13.00 USD) This PTFE free lube is meant for your dry conditions and promises longer component life. 

Then we have the Stans Biobased Grease ($15.00 USD) A waterproof, safe for seals and elastomers grease for general maintenance purposes. 

Finally we have the Stans Biobased Forkboost ($13.00 USD) This oil helps to reduce "stiction" and lubricates seals on suspension forks. Safe to use on all fork seals and is PTFE free. 

Stan's Biobased Bike Wash ($15.00 USD) is a cleaner which promises to cut the gunk and grime off your bike to bring back that shiny thing lurking beneath all the gravel dust.

Non-corrosive and free of VOC's and phosphates, this cleaner is safe to use on any frame material. 

Comments: My intentions here are to run the dry lubricant in a Guitar Ted Lube-Off over the riding season. The Wet lube will be a little trickier since we would have to rely on wet/rainy weather, which may or may not happen here. I will try the Wet lube on my commuter bikes though, since those have the better chance of seeing rain or any sort of moisture.

The Forkboost oil will go to N.Y. Roll who will use it on his Santa Cruz Blur. I don't do suspension at this point, and honestly, I told Stan's not to send the Forkboost, but they did. (You can thank me later N.Y. Roll!) I will get him to chime in with a report on how this works for him later on into the Summer.

The Bike Wash will go to work at the Cedar Valley Bicycle Collective where it will see use on a myriad of dirty bicycles and when I get a few, or several, bikes cleaned with this product I should have a handle on how it works enough to come back with a final word on the product in a few weeks.  

But wait.....there is more.

Stan's also sent over their Exo-Core valve stems for tubeless usage. There also was a Dart tool and Dart Tool handle bar mount in the box. So, let's take a look at these tubeless accessories. 

The Exo-Core stems are a unique design with a promised higher flow rate, a resistance to clogging, and which come in various lengths to fit most rim depths. You can even get custom colors to match your bike's other components. The Exo-Core stems cost $55.00 USD.

Next up we have the Stans Incredible Dart Tubeless Repair Tool and Incredible Dart Handle Bar Mount.

This precision Swiss made tool will deploy three Stan's Dart plugs (included) to repair tubeless tire punctures. Stan's partnered with Daysaver to make this 27 gram tool which can be mounted in a handle bar with the separately sold Handle Bar Mount.

The Dart tool goes for $72.00 USD and the Handle Bar Mount is another $32.00 USD.

Comments: The Dart tool and handle bar mount will go in my kit and we will see if I have to use it or not as time goes by. Before this happens I will do a separate detailed look for both of these pieces.

The Exo-Core stems will also be detailed out, installed on a wheel set, and I will get some new tires to air up using them to see how the claimed higher air-flowing valve helps out or does not help.

In the meantime, please check out these Stan's products via any of the links in the post or go to www.stans.com for more on these products and all of Stan's offerings. 

I should be back with a look at some of these products in more detail very soon. Thanks for reading Guitar Ted Productions.

Thursday, September 29, 2022

Guitar Ted's How To: The Rim Taping Reference Post

Okay! You asked for it, now you got it! (Well, a couple of you asked for this) This stems from the comments from my last "How To" post. Anyway, this post will be a reference post more than anything since I have written a bunch already on tubeless tire taping procedures and how I do this.

As with anything, quality materials are everything when it comes to successful outcomes. So, make sure you use a tubeless rim and really high quality rim tape with great valves. Never assume that you can get away with using a not-for-tubeless rim, a duct tape variant, or old, used up valves. 

Want to save money? That's cool. We all do. Read THIS POST for great tips on how to get high-quality rim tape or sealant for your set up. Make sure you read the comments at the bottom for more great tips. 

Side Note: If you are re-using a tire with a lot of old sealant in it, READ THIS POST for tips on how to remove old sealant. 

For more on the preparation of you tire, rim tape installation, and valve core tips, read THIS POST. This is an over-all look at tubeless tire set-up, but the rim taping thing is in there.

More Tips:

Actually putting tape on a rim is an arduous task. My number one tip is to get prepped properly (cleaned rim, great tape, right tools) and use plenty of patience. Taping two rims is not a race. The ordinary rider should expect this to take up to and over a half an hour of your time. I know mechanics that will scoff at that, but they do things trying to be fast and efficient. People that are not mechanics don't have that constraint or need. Take your time taping and get it right.

Tools: I'll say it- a truing stand is your best friend here. You can tape a rim "free style", out of a bike, and you can tape a rim in a bike with it upside down on the floor. But a truing stand, properly affixed to a bench, makes taping a rim waaaaay easier. Obviously a truing stand is good for more than this, so seriously consider that as an upgrade to your shop. 

Technique: The next big thing to add here is technique, and what I do is almost impossible without a truing stand, that's why I recommend a truing stand for your personal shop. I pull the tape gently with my right hand and hold the starting end down with my left thumb in the inner rim well. I pull maybe three inches, carefully align it, and pull it down toward the rim well. At the same time I start sliding my left thumb downward, but this is tricky as you have to not let the wheel rotate. 

Once I lay the tape down on the rim then I use my left thumb or I'll use my right forefinger to press the tape down starting at the furthest point from the roll and working toward the roll. I only push it down in the center of the tape. I don't bother worrying about the edges until later. 

I always put two laps of tape down on a rim. This is to help the tape withstand air pressure at the spoke holes. You could also use something like these Velocity Rim Plugs which would do the same thing. Another product that aims to alleviate the same problem is the WTB Solid Strip. By using these you might get away with one run of rim strip. However; I'd still use two runs of tape, because saving whatever weight using one run would give you, it is not worth it. 

Rim tape should be wide enough that it covers up to where the bead of the tire will sit at a minimum and up to the rim's inner edge if at all possible. Never try overlapping tape to make it "wide enough". Get the right width rim tape instead. 

Other than that, I always start taping at the point 180° from the valve stem. I've seen tape jobs that start near the valve stem, but in my opinion this invites a possible failure. Tape ends are prone to lifting and letting sealant seep between layers of tape or the tape and the rim well. If this occurs near a valve stem, a perfect place for pressure to escape, then you have a big problem. So, why not avoid that possibility and start your tape end at a point the furthest away from that big hole in the rim for the valve? 

That's it. Did I miss anything you wanted to know? (Don't forget to check the links!) Hit me up in the comments.

Guitar Ted's How To: The Rim Taping Reference Post

Okay! You asked for it, now you got it! (Well, a couple of you asked for this) This stems from the comments from my last "How To" post. Anyway, this post will be a reference post more than anything since I have written a bunch already on tubeless tire taping procedures and how I do this.

As with anything, quality materials are everything when it comes to successful outcomes. So, make sure you use a tubeless rim and really high quality rim tape with great valves. Never assume that you can get away with using a not-for-tubeless rim, a duct tape variant, or old, used up valves. 

Want to save money? That's cool. We all do. Read THIS POST for great tips on how to get high-quality rim tape or sealant for your set up. Make sure you read the comments at the bottom for more great tips. 

Side Note: If you are re-using a tire with a lot of old sealant in it, READ THIS POST for tips on how to remove old sealant. 

For more on the preparation of you tire, rim tape installation, and valve core tips, read THIS POST. This is an over-all look at tubeless tire set-up, but the rim taping thing is in there.

More Tips:

Actually putting tape on a rim is an arduous task. My number one tip is to get prepped properly (cleaned rim, great tape, right tools) and use plenty of patience. Taping two rims is not a race. The ordinary rider should expect this to take up to and over a half an hour of your time. I know mechanics that will scoff at that, but they do things trying to be fast and efficient. People that are not mechanics don't have that constraint or need. Take your time taping and get it right.

Tools: I'll say it- a truing stand is your best friend here. You can tape a rim "free style", out of a bike, and you can tape a rim in a bike with it upside down on the floor. But a truing stand, properly affixed to a bench, makes taping a rim waaaaay easier. Obviously a truing stand is good for more than this, so seriously consider that as an upgrade to your shop. 

Technique: The next big thing to add here is technique, and what I do is almost impossible without a truing stand, that's why I recommend a truing stand for your personal shop. I pull the tape gently with my right hand and hold the starting end down with my left thumb in the inner rim well. I pull maybe three inches, carefully align it, and pull it down toward the rim well. At the same time I start sliding my left thumb downward, but this is tricky as you have to not let the wheel rotate. 

Once I lay the tape down on the rim then I use my left thumb or I'll use my right forefinger to press the tape down starting at the furthest point from the roll and working toward the roll. I only push it down in the center of the tape. I don't bother worrying about the edges until later. 

I always put two laps of tape down on a rim. This is to help the tape withstand air pressure at the spoke holes. You could also use something like these Velocity Rim Plugs which would do the same thing. Another product that aims to alleviate the same problem is the WTB Solid Strip. By using these you might get away with one run of rim strip. However; I'd still use two runs of tape, because saving whatever weight using one run would give you, it is not worth it. 

Rim tape should be wide enough that it covers up to where the bead of the tire will sit at a minimum and up to the rim's inner edge if at all possible. Never try overlapping tape to make it "wide enough". Get the right width rim tape instead. 

Other than that, I always start taping at the point 180° from the valve stem. I've seen tape jobs that start near the valve stem, but in my opinion this invites a possible failure. Tape ends are prone to lifting and letting sealant seep between layers of tape or the tape and the rim well. If this occurs near a valve stem, a perfect place for pressure to escape, then you have a big problem. So, why not avoid that possibility and start your tape end at a point the furthest away from that big hole in the rim for the valve? 

That's it. Did I miss anything you wanted to know? (Don't forget to check the links!) Hit me up in the comments.

Tuesday, November 09, 2021

Review: Tubolito Tubes: Final Word

The Tubolito Tubes were run on my Tamland Two.
 (Note- The Standard Disclaimer applies here. Please familiarize yourself with that disclaimer if you have not already so you understand the situation with this product review. Thank you!) 

 This review of the Tubolito Tubes will be my final take on these orange hoops of wonder for the time being. I will have an update here first, then I will close out this series of posts. If you missed my last update, you can reference that here. I'm going to start things off with an update to what I stated in that earlier linked post, so it may be a good idea to check that out first. 

The Update: After I posted and related my experience with the S-CX Tubolito, the marketing rep reached out and discussed my problem with me. I ended up getting a replacement Tubolito S-CX because it was thought that I may have received a defective Tubolito. So, I waited until I received that, installed it in the front wheel of the Raleigh Tamland Two, and re-tested that. 

Initially I had gone with 40psi, so that's where I started again and the test ride went well. 24 hours later and the tire was not flat! This was definitely better! Now, all along the rear Tubolito has done very well in regard to air retention. Now I would be able to compare the two types of Tubolito tubes without dealing with the defective front that I started out with, which led me to a false conclusion on that Tubolito. 

So, it has been a solid week since I have had the new front Tubolito installed and I have ridden the bike a few times. Air retention on the front is as good, if not perhaps a little better than, the rear Tubolito which is the 'heavier-duty' one of the pair. Okay, so I think I've put that issue, and any questions about air retention, to bed now. 

Final Words: I think these Tubolito tubes are a definite option for anyone that isn't going to go tubeless for whatever reasons, or that maybe has a bike that isn't going to get used enough to make tubeless worthwhile. This might be a bike you only ride occasionally, or for a short season. Tubes make a lot more sense in these situations. Just air up and go when you want to ride. A tubeless set up will cause issues eventually with dried up sealant, coagulated sealant puddled in one spot of a stationary tire, and cause more headaches with maintaining/correcting issues that arise due to sporadic bike riding and tubeless usage. 

Obviously, if you live in an area where punctures are commonplace these might not be the best option. However; if you have a tubeless set up and want a back-up option in case of catastrophic tubeless failure or for a puncture/tear that won't seal? Tubolito tubes could be a very compact, lightweight, reliable option there.

I liked the way that they rode. The interesting thing about this review for me was that I had ridden the front wheel with a typical tube and then with the new Tubolito. I could notice a difference if I focused on it. The Tubolito allowed the front tire to act better over bumpy ground, like a grassy dike I rode during the test. I've no doubt that the rolling resistance is better with Tubolito tubes vs regular butyl tubes. Better than tubeless? Meh..... I'm not willing to go that far, but these Tubolito tubes feel pretty nice. 

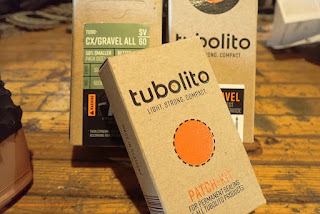
If you puncture a Tubolito, there is a specific patch kit for that.

Would I run Tubolito tubes exclusively? No. I'm a tubeless guy for sure, but with that said, I am keeping the Tubolito tubes in the Tamland Two indefinitely. This is a bike that I have an attachment to, but a bike that I don't get to ride a whole lot anymore. So, tubeless tires don't make any sense for this bike since it sits long periods of time between uses. 

That the Tubolito tubes have air retention equal to, or better than regular butyl tubes, in my experience, that makes sense then to leave the Tubolito tubes in there. That way whenever I can ride this bike I only have to air up the tires and go. I lose little to nothing compared to a tubeless set up, at least on the gravel roads around here. 

I would also strongly consider a Tubolito spare for longer gravel events, bikepacking, or touring where space and weight concerns make carrying regular tubes a nuisance. You can easily pack two Tubolito tubes in the same space it takes for one butyl tube, and the weight is astronomically lighter. 

Downsides? Yes, they are expensive. They don't come in every size out there. Yes, they could be punctured or pinched. (There is a patch kit especially for Tubolito tubes, so that might assuage the puncture fears a bit) But Tubolito tubes, in their standard weight, are more puncture resistant than standard tubes are, so..... It's a gamble, but perhaps one worth taking.

I wasn't 100% convinced these were a good idea when I heard about them. Now that I have seen these and dug in a bit deeper, I can see what they do that tubes and tubeless do not do well. So, there is a place for a Tubolito in my kit from now on. You? Perhaps the price and the fact that you may never use tubes again would make this a not-so-great idea. I get that. These are not for everyone, but they are an interesting and viable option for many.

Review: Tubolito Tubes: Final Word

The Tubolito Tubes were run on my Tamland Two.
 (Note- The Standard Disclaimer applies here. Please familiarize yourself with that disclaimer if you have not already so you understand the situation with this product review. Thank you!) 

 This review of the Tubolito Tubes will be my final take on these orange hoops of wonder for the time being. I will have an update here first, then I will close out this series of posts. If you missed my last update, you can reference that here. I'm going to start things off with an update to what I stated in that earlier linked post, so it may be a good idea to check that out first. 

The Update: After I posted and related my experience with the S-CX Tubolito, the marketing rep reached out and discussed my problem with me. I ended up getting a replacement Tubolito S-CX because it was thought that I may have received a defective Tubolito. So, I waited until I received that, installed it in the front wheel of the Raleigh Tamland Two, and re-tested that. 

Initially I had gone with 40psi, so that's where I started again and the test ride went well. 24 hours later and the tire was not flat! This was definitely better! Now, all along the rear Tubolito has done very well in regard to air retention. Now I would be able to compare the two types of Tubolito tubes without dealing with the defective front that I started out with, which led me to a false conclusion on that Tubolito. 

So, it has been a solid week since I have had the new front Tubolito installed and I have ridden the bike a few times. Air retention on the front is as good, if not perhaps a little better than, the rear Tubolito which is the 'heavier-duty' one of the pair. Okay, so I think I've put that issue, and any questions about air retention, to bed now. 

Final Words: I think these Tubolito tubes are a definite option for anyone that isn't going to go tubeless for whatever reasons, or that maybe has a bike that isn't going to get used enough to make tubeless worthwhile. This might be a bike you only ride occasionally, or for a short season. Tubes make a lot more sense in these situations. Just air up and go when you want to ride. A tubeless set up will cause issues eventually with dried up sealant, coagulated sealant puddled in one spot of a stationary tire, and cause more headaches with maintaining/correcting issues that arise due to sporadic bike riding and tubeless usage. 

Obviously, if you live in an area where punctures are commonplace these might not be the best option. However; if you have a tubeless set up and want a back-up option in case of catastrophic tubeless failure or for a puncture/tear that won't seal? Tubolito tubes could be a very compact, lightweight, reliable option there.

I liked the way that they rode. The interesting thing about this review for me was that I had ridden the front wheel with a typical tube and then with the new Tubolito. I could notice a difference if I focused on it. The Tubolito allowed the front tire to act better over bumpy ground, like a grassy dike I rode during the test. I've no doubt that the rolling resistance is better with Tubolito tubes vs regular butyl tubes. Better than tubeless? Meh..... I'm not willing to go that far, but these Tubolito tubes feel pretty nice. 

If you puncture a Tubolito, there is a specific patch kit for that.

Would I run Tubolito tubes exclusively? No. I'm a tubeless guy for sure, but with that said, I am keeping the Tubolito tubes in the Tamland Two indefinitely. This is a bike that I have an attachment to, but a bike that I don't get to ride a whole lot anymore. So, tubeless tires don't make any sense for this bike since it sits long periods of time between uses. 

That the Tubolito tubes have air retention equal to, or better than regular butyl tubes, in my experience, that makes sense then to leave the Tubolito tubes in there. That way whenever I can ride this bike I only have to air up the tires and go. I lose little to nothing compared to a tubeless set up, at least on the gravel roads around here. 

I would also strongly consider a Tubolito spare for longer gravel events, bikepacking, or touring where space and weight concerns make carrying regular tubes a nuisance. You can easily pack two Tubolito tubes in the same space it takes for one butyl tube, and the weight is astronomically lighter. 

Downsides? Yes, they are expensive. They don't come in every size out there. Yes, they could be punctured or pinched. (There is a patch kit especially for Tubolito tubes, so that might assuage the puncture fears a bit) But Tubolito tubes, in their standard weight, are more puncture resistant than standard tubes are, so..... It's a gamble, but perhaps one worth taking.

I wasn't 100% convinced these were a good idea when I heard about them. Now that I have seen these and dug in a bit deeper, I can see what they do that tubes and tubeless do not do well. So, there is a place for a Tubolito in my kit from now on. You? Perhaps the price and the fact that you may never use tubes again would make this a not-so-great idea. I get that. These are not for everyone, but they are an interesting and viable option for many.

Saturday, November 06, 2021

Probably Not For Me

The Fillmore valve. (Image courtesy of ReserveWheels.com)
 The interweb-o-sphere was a buzzin' last Thursday concerning a new tubeless valve stem called the "Fillmore". (Clever marketing right there!) I saw these things and began to think about what issues these new valves were solving and if I might need this answer to a question I was unaware of until now. 

First of all, while this is not a Presta Valve, it is highly derivative of that design. In essence, it is just a rearranging of a Presta Valve to put the sealing end at the base of the valve so it can be larger and therefore "flow more air" when one tries to seat a tubeless tire. 

So, I looked at this thing and researched the site with a particular eye toward the FAQ section. Here's my take- and let it be known- this is only my take. Others may have a completely different view on this deal.

First off, the shaft of the Fillmore valve and a typical tubeless Presta Valve are basically the same. They have to be to fit the standard rim holes we have. So, the entire shaft of the Fillmore is basically exactly the same as an ordinary Presta Valve. Where it differs is at the base, and it has a bigger seat for the valve. You can think of this in Internal Combustion Engine terms- A bigger valve lets in more air/fuel mixture than a smaller one. (If the intake pressure and cam timing are the same in both examples- that is)

Okay. Gotcha. How about that "O" ring valve seal? What can I do when that gets deformed and breaks down due to exposure to chemicals in the sealant? Well, bad news here. From the FAQ: "No, Fillmore valves are not rebuildable." Okay, so what about checking for sealant levels where I used to be able to remove a Presta Valve core? Well, since a Fillmore Valve does not have a removable core, you cannot do this if you use them. What about deeper rims as we see some in gravel wheel sets? Too bad- Fillmore valves only fit 18mm - 25mm rim depths. What about pumps? Up front, the FAQ says, "No, no special pump is needed", and then further down in the FAQ it says, "Unfortunately, there are pumps and gauges that do not function well with Fillmore valves.

Hmm....

I have noted that there are higher flow valve stems for tubeless applications available from CushCore and Muc-Off which do not have the limitations of the Fillmore system. Also, these Fillmore valves cost fifty bucks. 

Ouch! 

I have determined that no- these are not for me. 

Probably Not For Me

The Fillmore valve. (Image courtesy of ReserveWheels.com)
 The interweb-o-sphere was a buzzin' last Thursday concerning a new tubeless valve stem called the "Fillmore". (Clever marketing right there!) I saw these things and began to think about what issues these new valves were solving and if I might need this answer to a question I was unaware of until now. 

First of all, while this is not a Presta Valve, it is highly derivative of that design. In essence, it is just a rearranging of a Presta Valve to put the sealing end at the base of the valve so it can be larger and therefore "flow more air" when one tries to seat a tubeless tire. 

So, I looked at this thing and researched the site with a particular eye toward the FAQ section. Here's my take- and let it be known- this is only my take. Others may have a completely different view on this deal.

First off, the shaft of the Fillmore valve and a typical tubeless Presta Valve are basically the same. They have to be to fit the standard rim holes we have. So, the entire shaft of the Fillmore is basically exactly the same as an ordinary Presta Valve. Where it differs is at the base, and it has a bigger seat for the valve. You can think of this in Internal Combustion Engine terms- A bigger valve lets in more air/fuel mixture than a smaller one. (If the intake pressure and cam timing are the same in both examples- that is)

Okay. Gotcha. How about that "O" ring valve seal? What can I do when that gets deformed and breaks down due to exposure to chemicals in the sealant? Well, bad news here. From the FAQ: "No, Fillmore valves are not rebuildable." Okay, so what about checking for sealant levels where I used to be able to remove a Presta Valve core? Well, since a Fillmore Valve does not have a removable core, you cannot do this if you use them. What about deeper rims as we see some in gravel wheel sets? Too bad- Fillmore valves only fit 18mm - 25mm rim depths. What about pumps? Up front, the FAQ says, "No, no special pump is needed", and then further down in the FAQ it says, "Unfortunately, there are pumps and gauges that do not function well with Fillmore valves.

Hmm....

I have noted that there are higher flow valve stems for tubeless applications available from CushCore and Muc-Off which do not have the limitations of the Fillmore system. Also, these Fillmore valves cost fifty bucks. 

Ouch! 

I have determined that no- these are not for me. 

Wednesday, September 29, 2021

Modern Day Tube

Tubolito products received for test and review.
 Tubes in bicycle tires. Anyone who has ridden a bicycle knows about those rubber hoops inside the tires. It is one of those things only bicyclists really know about, and then not all bicyclists know about them. (I am consistently amazed by riders who do not know they have tubes in their tires.) 

I remember when I was between bicycle mechanic jobs. I worked on cars at an auto repair shop for five and a half years. When I first started the job, my boss was amazed when I mentioned something about tubes in bicycle tires. He said, "You guys still use tubes?", in an incredulous tone of voice. 

Yeah.....we still use those things! And they can be the downfall of a good ride, a race, or your commute to work. Even if you run tubeless, you probably have a spare tube tucked away, you know, just in case. I doubt bicycle tubes will ever go the way of the dinosaur, but one thing is for sure- they have changed.

I think it was the late 90's when I first saw a butyl rubber alternative for a bicycle tube. It was touted as more puncture resistant, lighter than butyl rubber tubes, and that it would be longer lasting. One caveat- You had to buy the exact size to fit your tire. Apparently these were not very stretchable tubes. Subsequently the idea did not go over well, although I had a 16" one around for years as a spare for my Burley Flat Bed trailer. 

That was that. It looked like butyl rubber was going to be the king forever. Then a few years ago I heard about these Tubolito things. I checked them out in a news story I saw, probably on "Bicycle Retailer and Industry News". Hmm.... Little orange rolls with an erotic looking nipple capped in black. Weird. They reminded me of those failed plasticky clear-ish tubes from the 90's. I saw the price and gulped. What! Over 30 bucks for a tube! To pack as a spare? Ah........hard pass. 

But then the marketing dude for American Classic tires sent out a few samples of the new models that are hitting the roads now and with them he stuffed in a few Tubolito products. (See Standard Disclaimer page) So, since I try to be open-minded, (but I don't always succeed in that), I figured I better check this deal out again. I went to their site and poked around a bit. there is some compelling evidence there as to why anyone might want to use one of these, not just as a spare, but to actually ride with. Okay....I'll check it out then.

They are still pretty spendy though. 

More soon.....

Modern Day Tube

Tubolito products received for test and review.
 Tubes in bicycle tires. Anyone who has ridden a bicycle knows about those rubber hoops inside the tires. It is one of those things only bicyclists really know about, and then not all bicyclists know about them. (I am consistently amazed by riders who do not know they have tubes in their tires.) 

I remember when I was between bicycle mechanic jobs. I worked on cars at an auto repair shop for five and a half years. When I first started the job, my boss was amazed when I mentioned something about tubes in bicycle tires. He said, "You guys still use tubes?", in an incredulous tone of voice. 

Yeah.....we still use those things! And they can be the downfall of a good ride, a race, or your commute to work. Even if you run tubeless, you probably have a spare tube tucked away, you know, just in case. I doubt bicycle tubes will ever go the way of the dinosaur, but one thing is for sure- they have changed.

I think it was the late 90's when I first saw a butyl rubber alternative for a bicycle tube. It was touted as more puncture resistant, lighter than butyl rubber tubes, and that it would be longer lasting. One caveat- You had to buy the exact size to fit your tire. Apparently these were not very stretchable tubes. Subsequently the idea did not go over well, although I had a 16" one around for years as a spare for my Burley Flat Bed trailer. 

That was that. It looked like butyl rubber was going to be the king forever. Then a few years ago I heard about these Tubolito things. I checked them out in a news story I saw, probably on "Bicycle Retailer and Industry News". Hmm.... Little orange rolls with an erotic looking nipple capped in black. Weird. They reminded me of those failed plasticky clear-ish tubes from the 90's. I saw the price and gulped. What! Over 30 bucks for a tube! To pack as a spare? Ah........hard pass. 

But then the marketing dude for American Classic tires sent out a few samples of the new models that are hitting the roads now and with them he stuffed in a few Tubolito products. (See Standard Disclaimer page) So, since I try to be open-minded, (but I don't always succeed in that), I figured I better check this deal out again. I went to their site and poked around a bit. there is some compelling evidence there as to why anyone might want to use one of these, not just as a spare, but to actually ride with. Okay....I'll check it out then.

They are still pretty spendy though. 

More soon.....

Friday, May 22, 2020

Friday News And Views

Surly ECR in "Blacktacular"
Okay, So I Have This Idea....

The Problem: Old MTB I hardly ride anymore, put up for sale, no interest seen. Solution: Re-purpose most of the parts into a new bike. Side Effect: New bike takes place of another in the stable and I have a prospective owner for that bike already. Result: One new bike I'll use and two bikes eliminated from taking up valuable space in The Lab.

Are you with me so far? Now for the details.

The old Singular Buzzard is sitting in the Lab unloved and unridden. It's been this way for several years. Last year I put it on my Garage Sale Page, with zero interest. So, I had a 'light bulb' moment Wednesday. How about a 29+ bike? See, the idea came up when I was speaking with the Teravail guy about possibly reviewing some of their tires. He suggested the Coronado. and when I checked on sizes, well, the only tire in that range I could have possibly tried was a fat bike version of the Coronado, but I noticed that they had "plus bike" versions as well. Trouble is, I don't have a good plus bike to try a Coronado on. (Note- More about Teravail Tires coming later in the post)

Then Wednesday I saw a review of the Coronado with those tires mounted to a Krampus. I liked what I saw, but a Krampus? Nah! I pretty much have that bike now and never use it. But what about a Surly ECR? Those are plus bike tire compatible! Off to the Surly Bikes site to investigate. I look at the current ECR offerings, and I see the "Blacktacular" frame set. I could go with one of those, and my current Velocity Dually rimmed wheel set with the big Coronado tires. Hmm...... Maybe single speed too. Hmm...... Then I see the ECR takes an 1 1/8th head set. I have one of those. Hmm....... The head set in the Buzzard could be the same one I need for the T-6 Standard Rando build..... This is getting interesting. 

So, what bike does an ECR replace? Well, it would essentially be a better, more versatile replacement for my ill-fitting and limited 1X1. AND- I have a person to pass that bike on to that has already indicated interest. I then only have to sell a Buzzard frame and the fork with it, and hopefully that would be enticing enough to someone to get it out of my Lab. See? New bike, minus two bikes = a happier Guitar Ted.

I'm liking this plan.

Hutchinson Touareg tires.
New Shoes In For Testing: 

 The Hutchinson Touareg tires showed up earlier this week and I have mounted one set so far and tried them out. Here's a very, very initial impression on the 700c X 45 tires.

Initially I didn't think these were going to be 45mm wide, but right after mounting them, they were very nearly 45mm wide on Shimano GRX wheels, (not the widest internal measurement wheels by any stretch), and so I am comfortable in saying they are probably going to stretch out to be what they say. That's important to note, because many bikes will not be a good fit for these tires since they are that wide in reality. Note- There is a 40mm version of this tire as well.

The profile is very rounded- a definite "C" shape. The tread reminds me of a cross between a Donnelly MSO and a Michelin Power Gravel tread pattern. Lots of tightly packed, arrow-ish shaped, low center blocks (MSO) and then stepped rows of higher, tiny , tightly packed side tread (Power Gravel). Yes- they fling small stones a bit.

Feels fast on my super deteriorated gravel, smooth dirt, asphalt test track. Gotta get out on gravel on these soon, but I don't know for sure with this being a holiday weekend when that might be. AND it is supposed to be rainy most of the weekend. Ya know......Memorial Day Weekend? (I think that means "Rainy Weekend" in some foreign language)

More soon.........

 More New Shoes For Testing:

Yep! I'm going to be pretty busy in the coming weeks. Teravail, who saw my recent Rutland review on Riding Gravel, contacted me and asked me why I had issues with their original models. Thus started a conversation and that resulted in their informing me that they changed their tires since I had last tried them, (previous to the Rutland review).

We decided that I should give the fully armored versions of the Cannonball a whirl again. And I am also taking a look at the Rutland in the "Light and Supple" casing for contrast. Then I am going to get on their Ehline tire and put those to test on the Fargo as a gravel/bike packing option.

The 700 X 47mm size is intriguing. Of course, there are a few 700 X 45mm options out there. The WTB Riddler and the above mentioned Hutchinson Touaregs are examples that come to mind. But a 700 X 47mm tire is odd. I haven't heard of that size until I ran across this with Teravail. I find it interesting because, as of now, there are not many gravel bikes that can handle a tire that wide and voluminous. But it also tells me there will be more. Tire manufacturers don't make a tire size on spec that someone might like it. No, they make tires for perceived needs now and in the near future, or even better- for production bikes, otherwise known as "OE spec". (Original Equipment spec)

A company that scores an OE contract to make components for a bicycle has guaranteed sales. Making tires for the aftermarket means what? Maybe. You might sell a bunch, or you might not. This is why when you see an online forum ranting for, say, White side wall 650B X 55mm studded tires that weigh 700 grams each, well you probably will never see them getting made. No matter how much sense that might make to you, or 100 people online.

This is why when I see something out of the ordinary getting made, my ears prick up. There is something going on I need to pay attention to. And 700 X 47mm is one of those things.

That's it for this week. I hope all you US readers have a safe, happy, and adventurous Memorial Day Weekend.

Friday News And Views

Surly ECR in "Blacktacular"
Okay, So I Have This Idea....

The Problem: Old MTB I hardly ride anymore, put up for sale, no interest seen. Solution: Re-purpose most of the parts into a new bike. Side Effect: New bike takes place of another in the stable and I have a prospective owner for that bike already. Result: One new bike I'll use and two bikes eliminated from taking up valuable space in The Lab.

Are you with me so far? Now for the details.

The old Singular Buzzard is sitting in the Lab unloved and unridden. It's been this way for several years. Last year I put it on my Garage Sale Page, with zero interest. So, I had a 'light bulb' moment Wednesday. How about a 29+ bike? See, the idea came up when I was speaking with the Teravail guy about possibly reviewing some of their tires. He suggested the Coronado. and when I checked on sizes, well, the only tire in that range I could have possibly tried was a fat bike version of the Coronado, but I noticed that they had "plus bike" versions as well. Trouble is, I don't have a good plus bike to try a Coronado on. (Note- More about Teravail Tires coming later in the post)

Then Wednesday I saw a review of the Coronado with those tires mounted to a Krampus. I liked what I saw, but a Krampus? Nah! I pretty much have that bike now and never use it. But what about a Surly ECR? Those are plus bike tire compatible! Off to the Surly Bikes site to investigate. I look at the current ECR offerings, and I see the "Blacktacular" frame set. I could go with one of those, and my current Velocity Dually rimmed wheel set with the big Coronado tires. Hmm...... Maybe single speed too. Hmm...... Then I see the ECR takes an 1 1/8th head set. I have one of those. Hmm....... The head set in the Buzzard could be the same one I need for the T-6 Standard Rando build..... This is getting interesting. 

So, what bike does an ECR replace? Well, it would essentially be a better, more versatile replacement for my ill-fitting and limited 1X1. AND- I have a person to pass that bike on to that has already indicated interest. I then only have to sell a Buzzard frame and the fork with it, and hopefully that would be enticing enough to someone to get it out of my Lab. See? New bike, minus two bikes = a happier Guitar Ted.

I'm liking this plan.

Hutchinson Touareg tires.
New Shoes In For Testing: 

 The Hutchinson Touareg tires showed up earlier this week and I have mounted one set so far and tried them out. Here's a very, very initial impression on the 700c X 45 tires.

Initially I didn't think these were going to be 45mm wide, but right after mounting them, they were very nearly 45mm wide on Shimano GRX wheels, (not the widest internal measurement wheels by any stretch), and so I am comfortable in saying they are probably going to stretch out to be what they say. That's important to note, because many bikes will not be a good fit for these tires since they are that wide in reality. Note- There is a 40mm version of this tire as well.

The profile is very rounded- a definite "C" shape. The tread reminds me of a cross between a Donnelly MSO and a Michelin Power Gravel tread pattern. Lots of tightly packed, arrow-ish shaped, low center blocks (MSO) and then stepped rows of higher, tiny , tightly packed side tread (Power Gravel). Yes- they fling small stones a bit.

Feels fast on my super deteriorated gravel, smooth dirt, asphalt test track. Gotta get out on gravel on these soon, but I don't know for sure with this being a holiday weekend when that might be. AND it is supposed to be rainy most of the weekend. Ya know......Memorial Day Weekend? (I think that means "Rainy Weekend" in some foreign language)

More soon.........

 More New Shoes For Testing:

Yep! I'm going to be pretty busy in the coming weeks. Teravail, who saw my recent Rutland review on Riding Gravel, contacted me and asked me why I had issues with their original models. Thus started a conversation and that resulted in their informing me that they changed their tires since I had last tried them, (previous to the Rutland review).

We decided that I should give the fully armored versions of the Cannonball a whirl again. And I am also taking a look at the Rutland in the "Light and Supple" casing for contrast. Then I am going to get on their Ehline tire and put those to test on the Fargo as a gravel/bike packing option.

The 700 X 47mm size is intriguing. Of course, there are a few 700 X 45mm options out there. The WTB Riddler and the above mentioned Hutchinson Touaregs are examples that come to mind. But a 700 X 47mm tire is odd. I haven't heard of that size until I ran across this with Teravail. I find it interesting because, as of now, there are not many gravel bikes that can handle a tire that wide and voluminous. But it also tells me there will be more. Tire manufacturers don't make a tire size on spec that someone might like it. No, they make tires for perceived needs now and in the near future, or even better- for production bikes, otherwise known as "OE spec". (Original Equipment spec)

A company that scores an OE contract to make components for a bicycle has guaranteed sales. Making tires for the aftermarket means what? Maybe. You might sell a bunch, or you might not. This is why when you see an online forum ranting for, say, White side wall 650B X 55mm studded tires that weigh 700 grams each, well you probably will never see them getting made. No matter how much sense that might make to you, or 100 people online.

This is why when I see something out of the ordinary getting made, my ears prick up. There is something going on I need to pay attention to. And 700 X 47mm is one of those things.

That's it for this week. I hope all you US readers have a safe, happy, and adventurous Memorial Day Weekend.

Thursday, April 16, 2020

Tubeless 101 Part 2

Tubeless 101 Part 2:

Last time I posted on this subject I mentioned that tubeless set ups may not be for you and that they are more technical and require more maintenance than tubed set ups. This time I am going to get into more of the techniques and tips which can help you if you should decide to actually pursue this tubeless madness.

First of all, you'll need a good supply of sealant, tubeless valve stems, valve cores, a way to introduce sealant into your tires, and it wouldn't hurt to have some tubeless tape around. Basic tools like tire levers, a pair of needle nosed pliers, a valve core remover, and a really good pump are also requisite items. It also wouldn't hurt to have a small air compressor handy as well.

By now you should be getting the idea that tubeless tire set ups are not only more technical and maintenance intensive, but more expensive as well. By the way, I highly recommend getting legit items and do not try to cut corners, like getting Gorilla Tape instead of real tubeless tape, as an example. While many will say this is just fine, it doesn't make sense that it is "better" than the real deal, or why would there be tubeless tape at all? Besides, Gorilla Tape can soak up sealant and fail, which will happen faster than with using real tubeless tape. Besides the mess you have cutting it to size, and getting it on right, Gorilla Tape doesn't save you anything in the long run. And yes, I've used it before. 

So, in that vein, it also needs to be said that in 2020 fudging tubeless set ups is not only unnecessary, but it is very unwise. Systems exist, so use them. If you don't have tubeless rims, tires, or the proper tools and equipment, it just doesn't make sense to reinvent the wheel, so to speak, and garage-tech your way along until you get a successful set up. Unless you are just curious, have a ton of time to waste, and think you are "saving money/beating The Man" by doing it your way. Your time is valuable. You just need to buck-up and do it right, save time, and get to riding. Or.....use tubed set ups. Again- tubeless tires are not for everyone

That said, I will now recommend what I've found to work well over my 14 years or so of messing around with tubeless set ups.

Sealant: Muc-Off No Puncture Hassle Tubeless Sealant, Orange Seal, Caffe Latex. In that order, and all of those are better than Stan's, which isn't bad, but Stan's is my last choice.

Tubeless Tape: Stan's, Muc-Off, Velocity Blue. In that order. WTB is actually Stan's tape, so that is on the list too. DO NOT USE DUCT TAPE or GORILLA TAPE. Oh, and by the way, I've heard good things about Whiskey tape, but I have yet to use it. (Note- Muc-Off tubeless tape is so new it isn't online yet. You can get it at Andy's Bike Shop)

Injector: Get a sealant injector. You'll thank me later. The best is KOM Cycling's unit. Caffe Latex also makes a decent one.

Valve Core Remover: Park Tools or KOM Cycling's which comes with some killer tire levers.

Valves: Mavic used to make the best ones. But anything that is not aluminum is best. Pay attention to the bases. Some are meant to fit certain inner rim wells and others won't so well. Velocity makes good valves. WTB has decent ones. Bontrager's are specific to their plastic rim strips, but are sturdy and work great.

Pedros lever, WTB tire.
How To Remove A Tubeless Tire And Recover Sealant:

First step: Remove air. Open the valve and release as much as you can, then remove the valve core to get it all out. Next: Press the bead of the tire off the rim bead shelf of the rim toward the center of the rim. Do this ALL THE WAY AROUND and on BOTH SIDES of the tire. 

NEXT: Lift the tire upward away from the rim by pinching the beads together at one point on the tire and pulling away from the rim. Stick a tire lever under one side of the tire's bead, pry over the rim, (see image) and push the lever away from you, peeling the tire bead over the rim as you go. Now you should have one side of the tire off. STOP here and do not spill any sealant that remains inside the tire.

Hang the wheel off a hook or something similar and wait for 15-30 minutes. This will allow any sealant in the tire to settle into a pool at the bottom of the wheel. You can do this previous to working on the wheel by setting the wheel in a static position for a time, but you'll have to be careful not to rotate it as you work the tire off the rim bead shelf and peel off one side of the tire. The idea here is to recover any wet sealant in the tire. If there is none, I'll cover the next steps in my next post.

After setting for a while your tire should look like this with a pool of sealant at the bottom.
You then suck up the sealant with a sealant injector, and push what you recover into a container.
Put your recovered sealant back into the bottle, (if you purchased commercially available sealant) or in a separate container that is opaque and sealable. Once you have hoovered out as much sealant as you can, you can wipe out the remaining bit with a wet rag. Then your tire should be easily removed by hand, most likely. You might need a lever, but if so, only one should do the trick.

The last bead should come over the rim fairly easily.
Inspect the inner casing of the tire for any casing degradation. Sealants can degrade tire casings over time. Also, just the fact that the casing has to do the job of holding the air and handling all sorts of abuse can damage casings. If you see any deformation, it is time for a new tire. Now- maybe the tire isn't quite right, but usable. In that case, keep it for a tubed set up. But don't risk it as a tubeless tire again. Ditto if the tire casing stretched a lot and fits too loosely after dismounting. Double that ditto if the tire ever blew off the rim, even once. Yes- this can be an expensive lesson. Did I mention tubeless set ups are more expensive than tubed? I'm pretty sure I did....... Anyway-

If the tire checks out, I usually hang it up to allow it to air dry. If you are going to re-use it, then there are a few things you'll need to do, which I will cover in my next post. I will also cover how to mount a tire.

Notes On Storing Sealant: Keep your recovered sealant in a cool, dry, dark place. It will last longer this way. I have stored sealant for well over six months and have seen no issues with use afterward, but some sealants do better than others. Also- clean your sealant injector by sucking up warm water and pushing it out again several times. Sealant will muck up an injector causing blockage if you do not clean up the innards of the injector immediately after using it.

Okay, next time I will have the tire clean up and mounting procedure I use to share with you in Part 3.