Showing posts with label water bottles. Show all posts

Friday, February 18, 2022

Friday News And Views

From Peter Stetina's Twitter feed: A bull knocks down a rider at the Rock Cobbler event.
 That Was Bull!:

Last weekend on social media you may have noted a few images of people getting knocked down by a young bull during the Rock Cobbler event in California. Apparently there were no severe injuries and I did not see anything related to what the event director(s) may have stated afterward.

Comments: While every event is an expression of what the organizer(s) think is appropriate for a challenge, one has to wonder how this event will deal with the fall-out from the incidents of the past weekend during their event. My opinion is my own, but if I had to make a call here I would have possibly diverted the course around such a danger. 

I have, a few different times, been exposed to "open range" conditions at the event formerly known as The Dirty Kanza 200. I am not aware that any bulls were around, but I have seen cows right on the course we were directed to ride on. That's dangerous enough, as a cow can easily cause serious injury to a cyclist that is unaware of the dangers of cattle. 

And as a former director of events which were similar to the Rock Cobbler, I can tell you that some form of education prior to the event is necessary and must be repeated multiple times. Even then, you are not guaranteed the people in your audience are taking you seriously. That's why, (again- risk assessment comes into play), you as a Race Director are tasked with judging your course and the risks it may present with an ultra-critical eye. Getting outside advice is often wise as well, because no matter how 'cool' you may think a certain experience may be for your riders, you may be blinded to possibilities for things to get ugly. 

In the case of open range riding and bulls, I would submit that it is not a prudent idea to submit your riders to such possibilities for injury and harm. But that's just me......

Fork Update:

Thank you for all of the excellent comments about my recently discovered Colnago Super Fork from Monday's post this week. I really appreciated every one of the responses and considered each one. 

A few good points were made. Like how often this bike would see roads? And that is really a good way to look at this. Also, some suggested just trying to polish it out to get a better read on where I am at with it. Perhaps do that and seal it with a clear coat? 

And to be honest, those were the comments that resonated the most with me. Getting it painted, or re-chromed makes sense if I am creating a garage queen, or restoration of some sort, well then yeah. However; I am not at a point where I have the free cash or inclination to do a full-on early 80's restoration so I think that just getting it going with the least fuss possible is what makes sense here. 

Next I will do the clean up, polish, and inspect it from there. I think clear coating the lower fork legs is a good idea to arrest the rust pitting that will be there. I probably will touch up the yellow painted bits as well. Of course, I'll need that threaded Athena head set, but I almost forgot that I'll also need a quill stem now. Hmm..... I may have to do some more digging around in the shop!

Guitar Ted 'Lube-Off' Update:

Thanks to all those readers who commented on the post from Wednesday concerning lubes to test for the next Lube-Off. I got some solid votes on one brand and some advice on using the wax I mentioned I have.

So, it was crystal-clear that SILCA's "Super-Secret" lube should be in the next Lube-Off. So, I will get a bottle of that coming and I will likely install that with a new Shimano 11 speed chain I just received for my Raleigh Tamland Two. (Most likely anyway.) 

The wax is NOT going to make the cut in this round. One commenter saying, "Super secret is supposed to have most of the wax benefit without the hassle of actual waxing". Another commenter chimed in saying, "I also think sticking with a drip lube for your round up is the best option as most people have no desire to go through the tedious processes of maintaining a hot dip waxed chain every 200 or so miles."

That's enough reason there to convince me that using the Molten Speed Chain Wax is not really all that interesting to you- the readers- and it definitely is okay with me if I do not have to hassle with that stuff. That said, someday I'll try it. 

I will work on the compiling of all the "Lube-Off" results and post that soon. Stay tuned for that and the next round of the Lube-Off soon. 

New Polar water bottles from their Breakaway series.
Polar Bottle Debuts New Big Bottle:

On Tuesday of this past week, Polar Bottle introduced the new Breakaway series of bottles which includes a new 30 ounce size. 

Last year I did a bit of a series on water bottles and using larger sized ones. I found that by doing some careful tweaking utilizing some bottle mount expanders like the Wolf Tooth B-Rad, I could carry as much water on the bike as I could have with a hydration pack on my body. 

While not everyone can use bigger capacity bottles, perhaps due to shorter frames or specific frame limitations, those who can may want to look into that. It works out well in practice on longer rides and I have seen the benefits of not having a heavy hydration pack on my body. 

I get that hydration packs have their fans and reasons for being a great choice. One, and maybe the biggest reason of all to use a hydration vest or pack, is that you can drink 'on-the-fly' easily and that this promotes better hydration. That's an excellent case for using a hydration bladder somewhere on your body or bicycle. However; those systems have some pretty significant drawbacks as well. 

Keeping the hoses clean, the bladders clean, having weight on your back, (if it is traditional system) and having more of a hassle in filling a bladder in the field are but a few of the concerns.  "End-of-service" life of hydration packs is also a bit more difficult than with bottles, and is a subject not many consider when thinking about bladders and packs. 

At any rate, it is nice to see options in bottles now.

The new Surly Bikes Ghost Grappler
Surly Bikes Debuts The Ghost Grappler Drop Bar Trail Bike:

A bit of a surprise here from Surly. A drop bar trail bike that has a very familiar look to it if you are a Fargo aficionado. It is a bike designed around a drop bar for bike packing, trail riding, and gravel with a focus on versatility and 27.5" wheels. Steel, of course, and it has several interesting features.

Besides looking like a Gen I Fargo, the Ghost Grappler has through axle capabilities with Surly's "GnotBoost" rear spacing, a Boost spaced fork which is not suspension corrected, and new bottle mounts on the seat stays near the drop outs. Stealth dropper post routing is also offered along with rack, fender, and Three-Pack mounting options on the top and bottom of the down tube. 

Tire clearance is 27.5 X 3.0" or 29" X 2.5". The frame has a straight, 1 1/8th head tube and the fork, called the Surly "Dinner Fork", is available separately. 

Comments: Yeah, if Salsa Cycles had ever done a Fargo Gen I reissue, this Ghost Grappler would be pretty much what I would have expected from them. It's very close, in my opinion, to what a Fargo should be now days. 

But hold on- That name! Yes, this is Surly Bikes, after all, but still. Weird. I guess that's the whole point? Anyway...... GnotBoost rear spacing? Rear facing, track fork style drop outs? Uggh! In some ways Surly's bent to be the most versatile bike choice is also its undoing. If you've ever dealt with their various versions of multiple-standard rear drop out designs, you'll understand. A Salsa version would have been elegantly executed with their Alternator Drop Out. But this is Surly's way.... 

After checking out the geometry, this really isn't all that far off from the Gen I Fargo. Tweaked for the modern day trail rider, yes. And I like what Surly has done with the geometry. Tire sizes that can be used here are also very appropriate, in my view. 

Some will grouse and say that the Gen I Fargo had a better drive train compatibility, but with Boost spacing? You are not going to get old, triple crank drive trains, or even a double with a big drive ring, on a bike like that. Boost pretty much kicked all that to the curb and so 1X is pretty much going to be the jam here, unfortunately. 

Finally- A straight steer tube MTB in 2022? I did not see that coming. I think that's a big mistake, but whatever. It should ride better, and maybe that's one reason Surly did that. It also pretty much takes the whole, "Can I put a suspension fork on this?" question off the table. Regarding the fork: It is soooo short, axle to crown, that anyone thinking it might work for their Gen I Fargo, or an older 29"er should reconsider that. Axle to crown is a short 420mm, which was the old sus corrected length for 26" wheeled rigid forks. It'll clear a 29"er wheel/tire, but juuust barely. Plus, because it is a short fork it would really steepen most 29"er bike's head angles to the point that you would negatively affect handling. (I know- I've tried it before.)
  

That's a wrap for this week! Thank you for reading Guitar Ted Productions and I hope that you get out for some riding this weekend!

Friday News And Views

From Peter Stetina's Twitter feed: A bull knocks down a rider at the Rock Cobbler event.
 That Was Bull!:

Last weekend on social media you may have noted a few images of people getting knocked down by a young bull during the Rock Cobbler event in California. Apparently there were no severe injuries and I did not see anything related to what the event director(s) may have stated afterward.

Comments: While every event is an expression of what the organizer(s) think is appropriate for a challenge, one has to wonder how this event will deal with the fall-out from the incidents of the past weekend during their event. My opinion is my own, but if I had to make a call here I would have possibly diverted the course around such a danger. 

I have, a few different times, been exposed to "open range" conditions at the event formerly known as The Dirty Kanza 200. I am not aware that any bulls were around, but I have seen cows right on the course we were directed to ride on. That's dangerous enough, as a cow can easily cause serious injury to a cyclist that is unaware of the dangers of cattle. 

And as a former director of events which were similar to the Rock Cobbler, I can tell you that some form of education prior to the event is necessary and must be repeated multiple times. Even then, you are not guaranteed the people in your audience are taking you seriously. That's why, (again- risk assessment comes into play), you as a Race Director are tasked with judging your course and the risks it may present with an ultra-critical eye. Getting outside advice is often wise as well, because no matter how 'cool' you may think a certain experience may be for your riders, you may be blinded to possibilities for things to get ugly. 

In the case of open range riding and bulls, I would submit that it is not a prudent idea to submit your riders to such possibilities for injury and harm. But that's just me......

Fork Update:

Thank you for all of the excellent comments about my recently discovered Colnago Super Fork from Monday's post this week. I really appreciated every one of the responses and considered each one. 

A few good points were made. Like how often this bike would see roads? And that is really a good way to look at this. Also, some suggested just trying to polish it out to get a better read on where I am at with it. Perhaps do that and seal it with a clear coat? 

And to be honest, those were the comments that resonated the most with me. Getting it painted, or re-chromed makes sense if I am creating a garage queen, or restoration of some sort, well then yeah. However; I am not at a point where I have the free cash or inclination to do a full-on early 80's restoration so I think that just getting it going with the least fuss possible is what makes sense here. 

Next I will do the clean up, polish, and inspect it from there. I think clear coating the lower fork legs is a good idea to arrest the rust pitting that will be there. I probably will touch up the yellow painted bits as well. Of course, I'll need that threaded Athena head set, but I almost forgot that I'll also need a quill stem now. Hmm..... I may have to do some more digging around in the shop!

Guitar Ted 'Lube-Off' Update:

Thanks to all those readers who commented on the post from Wednesday concerning lubes to test for the next Lube-Off. I got some solid votes on one brand and some advice on using the wax I mentioned I have.

So, it was crystal-clear that SILCA's "Super-Secret" lube should be in the next Lube-Off. So, I will get a bottle of that coming and I will likely install that with a new Shimano 11 speed chain I just received for my Raleigh Tamland Two. (Most likely anyway.) 

The wax is NOT going to make the cut in this round. One commenter saying, "Super secret is supposed to have most of the wax benefit without the hassle of actual waxing". Another commenter chimed in saying, "I also think sticking with a drip lube for your round up is the best option as most people have no desire to go through the tedious processes of maintaining a hot dip waxed chain every 200 or so miles."

That's enough reason there to convince me that using the Molten Speed Chain Wax is not really all that interesting to you- the readers- and it definitely is okay with me if I do not have to hassle with that stuff. That said, someday I'll try it. 

I will work on the compiling of all the "Lube-Off" results and post that soon. Stay tuned for that and the next round of the Lube-Off soon. 

New Polar water bottles from their Breakaway series.
Polar Bottle Debuts New Big Bottle:

On Tuesday of this past week, Polar Bottle introduced the new Breakaway series of bottles which includes a new 30 ounce size. 

Last year I did a bit of a series on water bottles and using larger sized ones. I found that by doing some careful tweaking utilizing some bottle mount expanders like the Wolf Tooth B-Rad, I could carry as much water on the bike as I could have with a hydration pack on my body. 

While not everyone can use bigger capacity bottles, perhaps due to shorter frames or specific frame limitations, those who can may want to look into that. It works out well in practice on longer rides and I have seen the benefits of not having a heavy hydration pack on my body. 

I get that hydration packs have their fans and reasons for being a great choice. One, and maybe the biggest reason of all to use a hydration vest or pack, is that you can drink 'on-the-fly' easily and that this promotes better hydration. That's an excellent case for using a hydration bladder somewhere on your body or bicycle. However; those systems have some pretty significant drawbacks as well. 

Keeping the hoses clean, the bladders clean, having weight on your back, (if it is traditional system) and having more of a hassle in filling a bladder in the field are but a few of the concerns.  "End-of-service" life of hydration packs is also a bit more difficult than with bottles, and is a subject not many consider when thinking about bladders and packs. 

At any rate, it is nice to see options in bottles now.

The new Surly Bikes Ghost Grappler
Surly Bikes Debuts The Ghost Grappler Drop Bar Trail Bike:

A bit of a surprise here from Surly. A drop bar trail bike that has a very familiar look to it if you are a Fargo aficionado. It is a bike designed around a drop bar for bike packing, trail riding, and gravel with a focus on versatility and 27.5" wheels. Steel, of course, and it has several interesting features.

Besides looking like a Gen I Fargo, the Ghost Grappler has through axle capabilities with Surly's "GnotBoost" rear spacing, a Boost spaced fork which is not suspension corrected, and new bottle mounts on the seat stays near the drop outs. Stealth dropper post routing is also offered along with rack, fender, and Three-Pack mounting options on the top and bottom of the down tube. 

Tire clearance is 27.5 X 3.0" or 29" X 2.5". The frame has a straight, 1 1/8th head tube and the fork, called the Surly "Dinner Fork", is available separately. 

Comments: Yeah, if Salsa Cycles had ever done a Fargo Gen I reissue, this Ghost Grappler would be pretty much what I would have expected from them. It's very close, in my opinion, to what a Fargo should be now days. 

But hold on- That name! Yes, this is Surly Bikes, after all, but still. Weird. I guess that's the whole point? Anyway...... GnotBoost rear spacing? Rear facing, track fork style drop outs? Uggh! In some ways Surly's bent to be the most versatile bike choice is also its undoing. If you've ever dealt with their various versions of multiple-standard rear drop out designs, you'll understand. A Salsa version would have been elegantly executed with their Alternator Drop Out. But this is Surly's way.... 

After checking out the geometry, this really isn't all that far off from the Gen I Fargo. Tweaked for the modern day trail rider, yes. And I like what Surly has done with the geometry. Tire sizes that can be used here are also very appropriate, in my view. 

Some will grouse and say that the Gen I Fargo had a better drive train compatibility, but with Boost spacing? You are not going to get old, triple crank drive trains, or even a double with a big drive ring, on a bike like that. Boost pretty much kicked all that to the curb and so 1X is pretty much going to be the jam here, unfortunately. 

Finally- A straight steer tube MTB in 2022? I did not see that coming. I think that's a big mistake, but whatever. It should ride better, and maybe that's one reason Surly did that. It also pretty much takes the whole, "Can I put a suspension fork on this?" question off the table. Regarding the fork: It is soooo short, axle to crown, that anyone thinking it might work for their Gen I Fargo, or an older 29"er should reconsider that. Axle to crown is a short 420mm, which was the old sus corrected length for 26" wheeled rigid forks. It'll clear a 29"er wheel/tire, but juuust barely. Plus, because it is a short fork it would really steepen most 29"er bike's head angles to the point that you would negatively affect handling. (I know- I've tried it before.)
  

That's a wrap for this week! Thank you for reading Guitar Ted Productions and I hope that you get out for some riding this weekend!
Wednesday, July 28, 2021

Water Carriers: Update #5

What it looks like post last weekend's 60 miler.
 So the big test of my water carrying system was last weekend when I rode with N.Y. Roll. My biggest concern was how the three bottles I would need to be able to access while riding would work out. 

The upper one on the down tube had been moved upward a bit, perhaps making that one harder to grab and reinstall. The Chaff Bag bottle may be tough to use as it was up against the make-shift cue sheet holder. The only way you really can find out if these sorts of things will work is to actually go on a ride and see. So, of course, that's what happened over the weekend. 

I have to say that most of my fears were unfounded. Yeah....that top bottle took a bit of a different move to get in and out, but it wasn't what I would call 'difficult'. I moved the strap on the Chaff Bag a bit which canted out the bag's top a bit to make the bottle clear the cue sheet holder. So, that worked. All in all, everything did what it was supposed to do. 

The big Jett Green bottle stayed put. The Wolf Tooth strap and B-Rad held it like a champ, and it was super easy and quick to get the bottle out and replace it again when stopped for refilling. The bottom bottle, the Jet+, was rock solid and I never noticed it while riding. I believe I have everything I need locked in with a few changes elsewhere to the set up.

One will be that I may end up using this Topeak Burrito Pack for my flat repair kit and that would go under the saddle. I have nothing there now and adding that pack would open up a bit more space in the Top Tube Garage Bag for nutritional stuff and whatnot. I'm still debating on whether or not to run two lights. I don't think I will, mainly because Gravel Worlds is only dark for about 30 minutes after the start and then whenever you roll in after - oh, say 8:00pm or so, depending on cloud cover. I might have maybe four hours max in darkness. If it is longer than that, well..... I probably am a DNF. 

Finally, the wheels and tires here are training wheels and tires. I have a lighter set up that I will race/ride on when the time comes. Stay tuned for that coming soon.....

Water Carriers: Update #5

What it looks like post last weekend's 60 miler.
 So the big test of my water carrying system was last weekend when I rode with N.Y. Roll. My biggest concern was how the three bottles I would need to be able to access while riding would work out. 

The upper one on the down tube had been moved upward a bit, perhaps making that one harder to grab and reinstall. The Chaff Bag bottle may be tough to use as it was up against the make-shift cue sheet holder. The only way you really can find out if these sorts of things will work is to actually go on a ride and see. So, of course, that's what happened over the weekend. 

I have to say that most of my fears were unfounded. Yeah....that top bottle took a bit of a different move to get in and out, but it wasn't what I would call 'difficult'. I moved the strap on the Chaff Bag a bit which canted out the bag's top a bit to make the bottle clear the cue sheet holder. So, that worked. All in all, everything did what it was supposed to do. 

The big Jett Green bottle stayed put. The Wolf Tooth strap and B-Rad held it like a champ, and it was super easy and quick to get the bottle out and replace it again when stopped for refilling. The bottom bottle, the Jet+, was rock solid and I never noticed it while riding. I believe I have everything I need locked in with a few changes elsewhere to the set up.

One will be that I may end up using this Topeak Burrito Pack for my flat repair kit and that would go under the saddle. I have nothing there now and adding that pack would open up a bit more space in the Top Tube Garage Bag for nutritional stuff and whatnot. I'm still debating on whether or not to run two lights. I don't think I will, mainly because Gravel Worlds is only dark for about 30 minutes after the start and then whenever you roll in after - oh, say 8:00pm or so, depending on cloud cover. I might have maybe four hours max in darkness. If it is longer than that, well..... I probably am a DNF. 

Finally, the wheels and tires here are training wheels and tires. I have a lighter set up that I will race/ride on when the time comes. Stay tuned for that coming soon.....

Tuesday, July 20, 2021

Water Carriers: Update #4

Note the position of this seat tube mounted water bottle cage.
 In my last update (seen here) I mentioned these custom made 'Popsicle Sticks' that DG machined for MJ years ago so MJ could move his water bottle cages in positions that better suited his needs. These are a precursor to the Wolf Tooth B-Rad System rails. I mentioned that I had plans for these machined bits of alloy. 

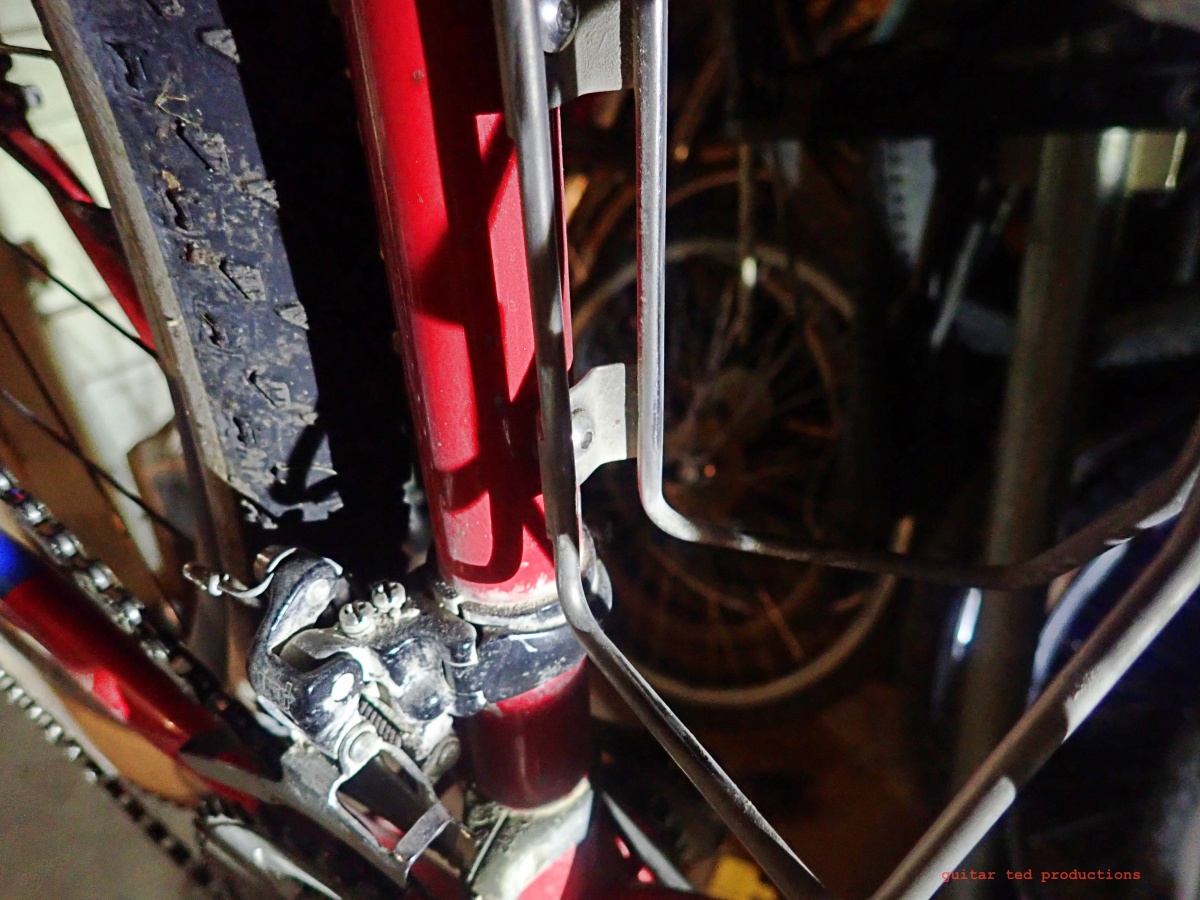
So, to the left here, you see a grainy image of a seat tube from my Raleigh Tamland Two and the water bottle cage on that tube. Notice how the bottom is higher than the front derailleur clamp? That means that any size bottle I put in that cage interferes with a top tube mounted bag like a Tangle Bag, for instance. 

I wanted to use one of the Popsicle Sticks to move the position of this seat tube mounted cage as low as possible. There are a couple of things to note here. One- I had to allow for clearance of the front derailleur clamp. Two- I had to find shorter water bottle bolts to bolt the cage to the Popsicle Stick at the bottom so the bolt would not interfere with the derailleur clamp. Fortunately, DG machined some spacers and gave them to MJ, who in turn passed them on to me, so that the spacing away of the Popsicle Stick to the seat tube was not an issue. Finding really short water bottle bolts? Could be a problem, that is unless you've been wrenching on bicycles for 20+ years and have been hoarding bits and baubles. 

You can see the special spacers that DG machined to go with the Popsicle Sticks here.
I also had to find longer bolts for the Popsicle Sticks that would find enough purchase after going through the base and spacer. The original bottle boss bolts only stuck out maybe a couple of millimeters after adding spacers. No good for holding a full 24 ounce bottle on rough gravel! So, once again thanks to my hoarding of fasteners, I had no trouble at all finding brand new stainless bolts to mount the Popsicle Stick with. 

Another nice touch here was the counter-sunk pocket DG machined into the stick to allow the mounting bolt's heads to not interfere with the water bottle cage. You can see the bolt heads peeking out in the image above, but I can assure you that they were buried into that aluminum bar once I fastened the stick on the seat tube of my Raleigh.

Here you can see the completed project. Note how the really short lower bottle cage bolt misses the front derailleur clamp.

Fortunately I found a short bolt for the lower mounting hole of the water bottle cage which barely passes through the Popsicle Stick but avoids contact with the front derailleur clamp. Good thing I decided that short bolt was worth hanging on to! 

As you might imagine, that beefy aluminum bar is not flexing at all and the cage, and therefore the water bottle, is secure for any long haul in rougher terrain. Everything clears, and all the bolts are just the right length to do their jobs. I test rode the set up and there are no issues other than that this bottle is a little harder to reach now. Hey! I have long arms! I can stretch yet......

The full view showing that now I have plenty of room for a Tangle Bag, or the equivalent.

So now instead of my cage and bottle sitting above the front derailleur clamp, the cage is lowered so that the bottom of the cage is a good two inches below the top of that clamp. This easily opens up the entire area under the top tube for a 'half-frame' bag, like a Revelate Tangle Bag or customized equivalent. That and a top tube 'tank' bag, like my Bike Bag Dude Garage Bag, and a couple of Chaff Bags and I will be set up for any super-long ride with the Tamland. 

Using one of the Chaff Bags as a water bottle holder, I now can get five bottles onboard the Tamland when originally this bike could only do two bottles. It was an oversight of mine to not advise Raleigh to put on under-the-down-tube water bottle mounts. I also am fortunate that Fyxation made this fork for quick release wheels and added bosses so that I could expand the versatility of this bike even more. In fact, I'm pretty sure that with another B-Rad 4 I could get another water bottle cage up on the down tube above the one already there. Maybe I'll do that as well someday.

So, that leaves one more Popsicle Stick. I have a plan for that one as well which I will show you all soon. Stay tuned for that...... Oh! And by the way, someone asked in the comments about my cue sheet holder and light mount for the pink BMC. I've not forgotten about that. That will get shown soon as well....

Water Carriers: Update #4

Note the position of this seat tube mounted water bottle cage.
 In my last update (seen here) I mentioned these custom made 'Popsicle Sticks' that DG machined for MJ years ago so MJ could move his water bottle cages in positions that better suited his needs. These are a precursor to the Wolf Tooth B-Rad System rails. I mentioned that I had plans for these machined bits of alloy. 

So, to the left here, you see a grainy image of a seat tube from my Raleigh Tamland Two and the water bottle cage on that tube. Notice how the bottom is higher than the front derailleur clamp? That means that any size bottle I put in that cage interferes with a top tube mounted bag like a Tangle Bag, for instance. 

I wanted to use one of the Popsicle Sticks to move the position of this seat tube mounted cage as low as possible. There are a couple of things to note here. One- I had to allow for clearance of the front derailleur clamp. Two- I had to find shorter water bottle bolts to bolt the cage to the Popsicle Stick at the bottom so the bolt would not interfere with the derailleur clamp. Fortunately, DG machined some spacers and gave them to MJ, who in turn passed them on to me, so that the spacing away of the Popsicle Stick to the seat tube was not an issue. Finding really short water bottle bolts? Could be a problem, that is unless you've been wrenching on bicycles for 20+ years and have been hoarding bits and baubles. 

You can see the special spacers that DG machined to go with the Popsicle Sticks here.
I also had to find longer bolts for the Popsicle Sticks that would find enough purchase after going through the base and spacer. The original bottle boss bolts only stuck out maybe a couple of millimeters after adding spacers. No good for holding a full 24 ounce bottle on rough gravel! So, once again thanks to my hoarding of fasteners, I had no trouble at all finding brand new stainless bolts to mount the Popsicle Stick with. 

Another nice touch here was the counter-sunk pocket DG machined into the stick to allow the mounting bolt's heads to not interfere with the water bottle cage. You can see the bolt heads peeking out in the image above, but I can assure you that they were buried into that aluminum bar once I fastened the stick on the seat tube of my Raleigh.

Here you can see the completed project. Note how the really short lower bottle cage bolt misses the front derailleur clamp.

Fortunately I found a short bolt for the lower mounting hole of the water bottle cage which barely passes through the Popsicle Stick but avoids contact with the front derailleur clamp. Good thing I decided that short bolt was worth hanging on to! 

As you might imagine, that beefy aluminum bar is not flexing at all and the cage, and therefore the water bottle, is secure for any long haul in rougher terrain. Everything clears, and all the bolts are just the right length to do their jobs. I test rode the set up and there are no issues other than that this bottle is a little harder to reach now. Hey! I have long arms! I can stretch yet......

The full view showing that now I have plenty of room for a Tangle Bag, or the equivalent.

So now instead of my cage and bottle sitting above the front derailleur clamp, the cage is lowered so that the bottom of the cage is a good two inches below the top of that clamp. This easily opens up the entire area under the top tube for a 'half-frame' bag, like a Revelate Tangle Bag or customized equivalent. That and a top tube 'tank' bag, like my Bike Bag Dude Garage Bag, and a couple of Chaff Bags and I will be set up for any super-long ride with the Tamland. 

Using one of the Chaff Bags as a water bottle holder, I now can get five bottles onboard the Tamland when originally this bike could only do two bottles. It was an oversight of mine to not advise Raleigh to put on under-the-down-tube water bottle mounts. I also am fortunate that Fyxation made this fork for quick release wheels and added bosses so that I could expand the versatility of this bike even more. In fact, I'm pretty sure that with another B-Rad 4 I could get another water bottle cage up on the down tube above the one already there. Maybe I'll do that as well someday.

So, that leaves one more Popsicle Stick. I have a plan for that one as well which I will show you all soon. Stay tuned for that...... Oh! And by the way, someone asked in the comments about my cue sheet holder and light mount for the pink BMC. I've not forgotten about that. That will get shown soon as well....

Tuesday, July 13, 2021

Water Carriers: Update #3

Thanks to a very kind friend, I have these mounting rails for bottle cages.
 Well, who knew so many of you were into water bottles and bottle mounting? Gosh! These posts have been big number generators for the blog and, frankly, I am a bit surprised by that. But, I suppose a guy or gal has gotta drink or ya know.....you might die! That's not on the agenda for a good ride, so let's keep those bodies hydrated out there!

And I think I have my situation figured out, finally. But first, I have to thank a very good friend to me and Trans Iowa, Mike, who had another former winner and volunteer of Trans Iowa, DG, machine these awesome bottle mount spacers. They are precursors to the Wolf Tooth B-Rad modular system, and they were made with a similar thought- To be able to move water bottle cages to fit in places more advantageous for bike packers and long distance riders in events or otherwise. By the way, I am not 100% sure, but these were likely made around the time of T.Iv8, so probably 2012-ish? Definitely before the B-Rad stuff was around.

So, what you are looking at here are two 'bars' of machined aluminum with two countersunk, ovalized holes in each. Those are the points where the bars get attached to whatever bottle bosses are on your bike where you want to modify the bottle's position. The holes are threaded for accepting standard water bottle bolts. So, as you can see, you have several possibilities for moving cages slightly this way or that using these. The spacers are for raising the bar a bit in case of interference with cables, front derailleur clamps, and the like. You'd use these spacers underneath the bar bit and mount the cage on top in your preferred position. Stay tuned- I have plans for these.....

So, here is how I used the B-Rad to work out my water bottle situation.

 
In the meantime, here is how I solved my dilemma with the BMC MCD and the Elite Jet bottles. I had a B-Rad 4, which is the longest B-Rad accessory mount available. On one end I have the B-Rad Accessory Plate and Strap which is doing the job of holding that ginormous Jet Green bottle in place. Up top I have moved my bottle cage, which is the new Lezyne Side Mount Cage, to the furthest 'up' position. This allows for easy access to the upper bottle on the fly while leaving plenty of space between the base of that bottle and the top of the Jet Green bottle. The wide Wolf Tooth accessory strap locks down that bottle so there is absolutely no movement while riding. Meanwhile, I replaced the weak Velocity Cage with my old Lezyne Side Mount Cage which is far more robust and with that side entry/exit, it makes for a much easier time of getting at that big Jet Green bottle when I need to. 

The two remaining bottles are the Velocity Bottle Traps and they are perfect for where they are at on the bike. I just added that orange ByeKyle Velcro strap to stabilize that Jet + bottle. Basically a peace of mind thing. I'm about 99.9% that this will be it for Gravel Worlds and as far as water goes, I should have enough to get through the entire event, given that there are usually plenty of opportunities to get water on their routes. 

The way I figure it, with the one extra bottle onboard in the Chaff Bag, I have three and one-third quarts of water with this set up, and that should be plenty. Probably overkill, but that's what I am taking. I don't want to have any excuses when it comes to water/hydration/nutrition. I plan on using that GU Energy Roctane stuff too, which seems to be setting well with me. I feel stronger when using it and it doesn't seem to get my gut into a shutdown situation. But that said, I plan on mixing in some regular ol' hydration via Elite and other food as well. 

Anyway, I digress.... This is pretty much the set up unless I can think of something better.

Water Carriers: Update #3

Thanks to a very kind friend, I have these mounting rails for bottle cages.
 Well, who knew so many of you were into water bottles and bottle mounting? Gosh! These posts have been big number generators for the blog and, frankly, I am a bit surprised by that. But, I suppose a guy or gal has gotta drink or ya know.....you might die! That's not on the agenda for a good ride, so let's keep those bodies hydrated out there!

And I think I have my situation figured out, finally. But first, I have to thank a very good friend to me and Trans Iowa, Mike, who had another former winner and volunteer of Trans Iowa, DG, machine these awesome bottle mount spacers. They are precursors to the Wolf Tooth B-Rad modular system, and they were made with a similar thought- To be able to move water bottle cages to fit in places more advantageous for bike packers and long distance riders in events or otherwise. By the way, I am not 100% sure, but these were likely made around the time of T.Iv8, so probably 2012-ish? Definitely before the B-Rad stuff was around.

So, what you are looking at here are two 'bars' of machined aluminum with two countersunk, ovalized holes in each. Those are the points where the bars get attached to whatever bottle bosses are on your bike where you want to modify the bottle's position. The holes are threaded for accepting standard water bottle bolts. So, as you can see, you have several possibilities for moving cages slightly this way or that using these. The spacers are for raising the bar a bit in case of interference with cables, front derailleur clamps, and the like. You'd use these spacers underneath the bar bit and mount the cage on top in your preferred position. Stay tuned- I have plans for these.....

So, here is how I used the B-Rad to work out my water bottle situation.

 
In the meantime, here is how I solved my dilemma with the BMC MCD and the Elite Jet bottles. I had a B-Rad 4, which is the longest B-Rad accessory mount available. On one end I have the B-Rad Accessory Plate and Strap which is doing the job of holding that ginormous Jet Green bottle in place. Up top I have moved my bottle cage, which is the new Lezyne Side Mount Cage, to the furthest 'up' position. This allows for easy access to the upper bottle on the fly while leaving plenty of space between the base of that bottle and the top of the Jet Green bottle. The wide Wolf Tooth accessory strap locks down that bottle so there is absolutely no movement while riding. Meanwhile, I replaced the weak Velocity Cage with my old Lezyne Side Mount Cage which is far more robust and with that side entry/exit, it makes for a much easier time of getting at that big Jet Green bottle when I need to. 

The two remaining bottles are the Velocity Bottle Traps and they are perfect for where they are at on the bike. I just added that orange ByeKyle Velcro strap to stabilize that Jet + bottle. Basically a peace of mind thing. I'm about 99.9% that this will be it for Gravel Worlds and as far as water goes, I should have enough to get through the entire event, given that there are usually plenty of opportunities to get water on their routes. 

The way I figure it, with the one extra bottle onboard in the Chaff Bag, I have three and one-third quarts of water with this set up, and that should be plenty. Probably overkill, but that's what I am taking. I don't want to have any excuses when it comes to water/hydration/nutrition. I plan on using that GU Energy Roctane stuff too, which seems to be setting well with me. I feel stronger when using it and it doesn't seem to get my gut into a shutdown situation. But that said, I plan on mixing in some regular ol' hydration via Elite and other food as well. 

Anyway, I digress.... This is pretty much the set up unless I can think of something better.

Tuesday, June 29, 2021

Water Carriers

The Elite Jet Green (L), the Jet Plus,(M), and a standard bottle (R)
 I got a nice gift in the mail yesterday from a marketing company I work with for review items for RidingGravel.com. It was two bottles from the "Elite" company.

I wouldn't normally say anything about 'water bottles', but I thought that these two bottles were unusual enough that they warranted mentioning. By the way, I wasn't asked to review these at all, nor does the marketing company or Elite know I am posting this. I just thought maybe some of you folks could use something like these bottles. 

First up, the enormous 'Jet Green' bottle I got here, which is on the left in the image. The impressive thing about it is that it is made from a 'bio-plastic' using sugar cane plants. There is no petroleum based products in its manufacture at all. The other thing is its size. Now, any of these two bottles are available in 550ml and 750ml, which are normal bottle sizes, but this example is 950ml! That's about a quart, in case you were wondering. 

The nozzle at the top has a bigger diameter than many bottles have, so it flows a bunch of water. The bottle is reasonably soft, easy to squeeze, and not weird feeling. I'm not sure about the 950ml size. There is more volume over the top bit where a water cage grabs this bottle than there is under that area. It makes me wonder how this would stay in a water bottle cage or not. It is so tall that it probably will not work in several cases. So, it has its limitations, but in cases where you need to pack a lot of water and you have the available cage space, well..... This might work for you. https://www.elite-it.com/en/products/water-bottles/sport/jet-green

The Jet Plus has a cover which would make it ideal for under the down tube.
The 'Jet Plus' is Elite's bottle with a cap cover which protects the nozzle from dirt and debris making this bottle a great choice for under the down tube situations where the front tire can sling all sorts of crud at a bottle. 

The other feature of the cap is that with its design, you can 'one-hand' the opening and closing of the top with ease, allowing the rider to keep one hand on the handle bars at all times. One slight flick of the wrist, and the protective cap snaps back into place and you can stow the bottle away again.  

This bottle comes in all three sizes that the Jet Green bottle comes in as well, so you can get something with the protective cap that fits your situation. The 750ml size I received might be a bit much for some bikes under the down tube position, but I'll give it a whirl here and see what bike it works on for me. 

The other thing with this bottle, and the Jet Green, is that they are biodegradable once you are done with them. The plastic is infused with certain elements that allow micro-organisms to attack it and break it down more quickly which allows the bottles to be assimilated into the earth again. You can check out the Jet Plus here:  https://www.elite-it.com/en/products/water-bottles/sport/jet-plus

So, there you have it. As always, I am not being paid, nor bribed for this post, I honestly just thought these two bottles were cool and unusual enough that they deserved to get a mention. I'll be using them soon and I will have a thing or two to say about them down the road, but Elite s a well known and respected company from Italy that manufactures these bottles there. I have little doubt that they are at the very least, 'good' products. But, we shall see.......

Water Carriers

The Elite Jet Green (L), the Jet Plus,(M), and a standard bottle (R)
 I got a nice gift in the mail yesterday from a marketing company I work with for review items for RidingGravel.com. It was two bottles from the "Elite" company.

I wouldn't normally say anything about 'water bottles', but I thought that these two bottles were unusual enough that they warranted mentioning. By the way, I wasn't asked to review these at all, nor does the marketing company or Elite know I am posting this. I just thought maybe some of you folks could use something like these bottles. 

First up, the enormous 'Jet Green' bottle I got here, which is on the left in the image. The impressive thing about it is that it is made from a 'bio-plastic' using sugar cane plants. There is no petroleum based products in its manufacture at all. The other thing is its size. Now, any of these two bottles are available in 550ml and 750ml, which are normal bottle sizes, but this example is 950ml! That's about a quart, in case you were wondering. 

The nozzle at the top has a bigger diameter than many bottles have, so it flows a bunch of water. The bottle is reasonably soft, easy to squeeze, and not weird feeling. I'm not sure about the 950ml size. There is more volume over the top bit where a water cage grabs this bottle than there is under that area. It makes me wonder how this would stay in a water bottle cage or not. It is so tall that it probably will not work in several cases. So, it has its limitations, but in cases where you need to pack a lot of water and you have the available cage space, well..... This might work for you. https://www.elite-it.com/en/products/water-bottles/sport/jet-green

The Jet Plus has a cover which would make it ideal for under the down tube.
The 'Jet Plus' is Elite's bottle with a cap cover which protects the nozzle from dirt and debris making this bottle a great choice for under the down tube situations where the front tire can sling all sorts of crud at a bottle. 

The other feature of the cap is that with its design, you can 'one-hand' the opening and closing of the top with ease, allowing the rider to keep one hand on the handle bars at all times. One slight flick of the wrist, and the protective cap snaps back into place and you can stow the bottle away again.  

This bottle comes in all three sizes that the Jet Green bottle comes in as well, so you can get something with the protective cap that fits your situation. The 750ml size I received might be a bit much for some bikes under the down tube position, but I'll give it a whirl here and see what bike it works on for me. 

The other thing with this bottle, and the Jet Green, is that they are biodegradable once you are done with them. The plastic is infused with certain elements that allow micro-organisms to attack it and break it down more quickly which allows the bottles to be assimilated into the earth again. You can check out the Jet Plus here:  https://www.elite-it.com/en/products/water-bottles/sport/jet-plus

So, there you have it. As always, I am not being paid, nor bribed for this post, I honestly just thought these two bottles were cool and unusual enough that they deserved to get a mention. I'll be using them soon and I will have a thing or two to say about them down the road, but Elite s a well known and respected company from Italy that manufactures these bottles there. I have little doubt that they are at the very least, 'good' products. But, we shall see.......